
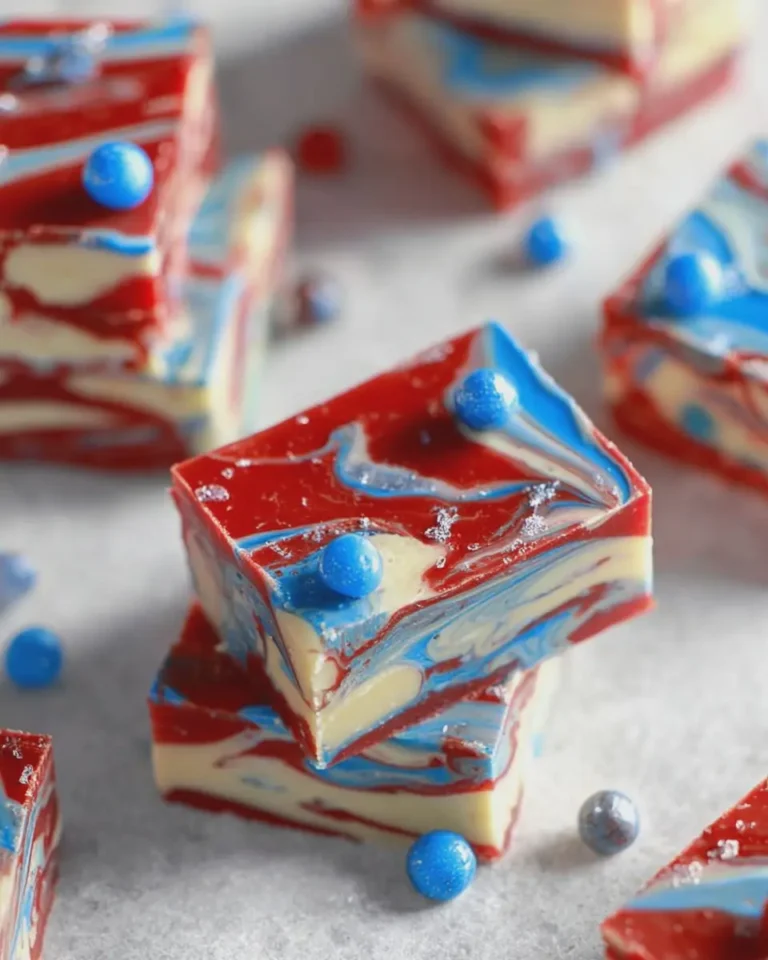
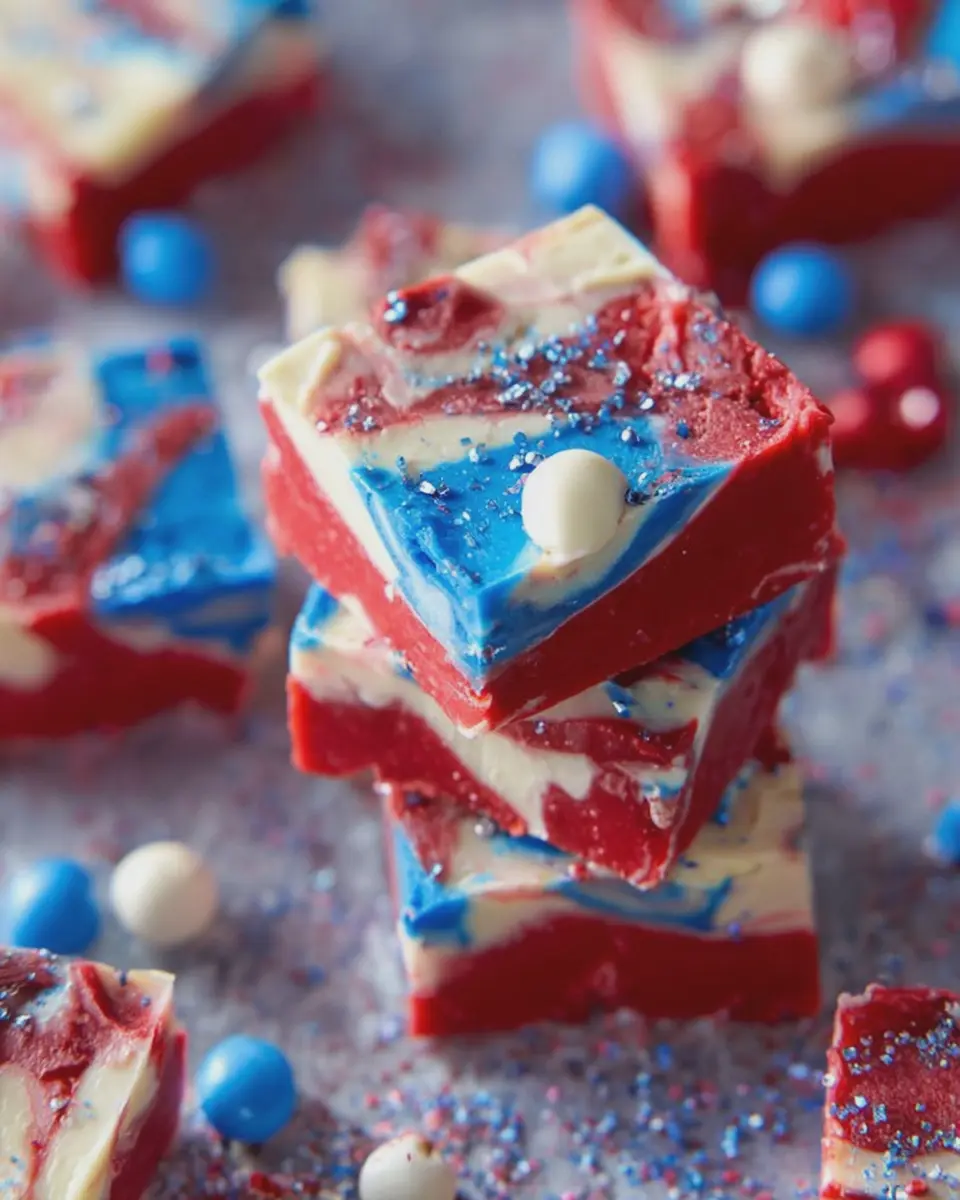
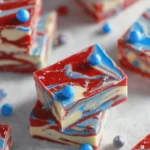
Introduction to Red White and Blue Fudge
If you’re looking for a delightful, festive treat that embodies the spirit of summer gatherings, barbecues, and even a casual night in, Red White and Blue Fudge is your go-to dessert. This treat not only pleases the palate but also offers the visual appeal that’s perfect for any celebration—think Fourth of July parties, Memorial Day events, or any occasion that calls for a little patriotic flair.
Why Red White and Blue Fudge is the Perfect Treat for Young Professionals
As a young professional navigating a busy life, you might find yourself juggling work commitments, social outings, and meal prep. You deserve something simple yet impressive. That’s where Red White and Blue Fudge shines.
This easy-to-make dessert provides a delightful combination of flavors while also being a feast for the eyes. The soft, creamy texture melts in your mouth, and the sweetness makes it a perfect companion for a coffee break or an evening gathering. Here are a few reasons why this fudge is ideal for you:
- Quick Preparation: In just a few simple steps, you can whip up this delicious treat without spending hours in the kitchen.
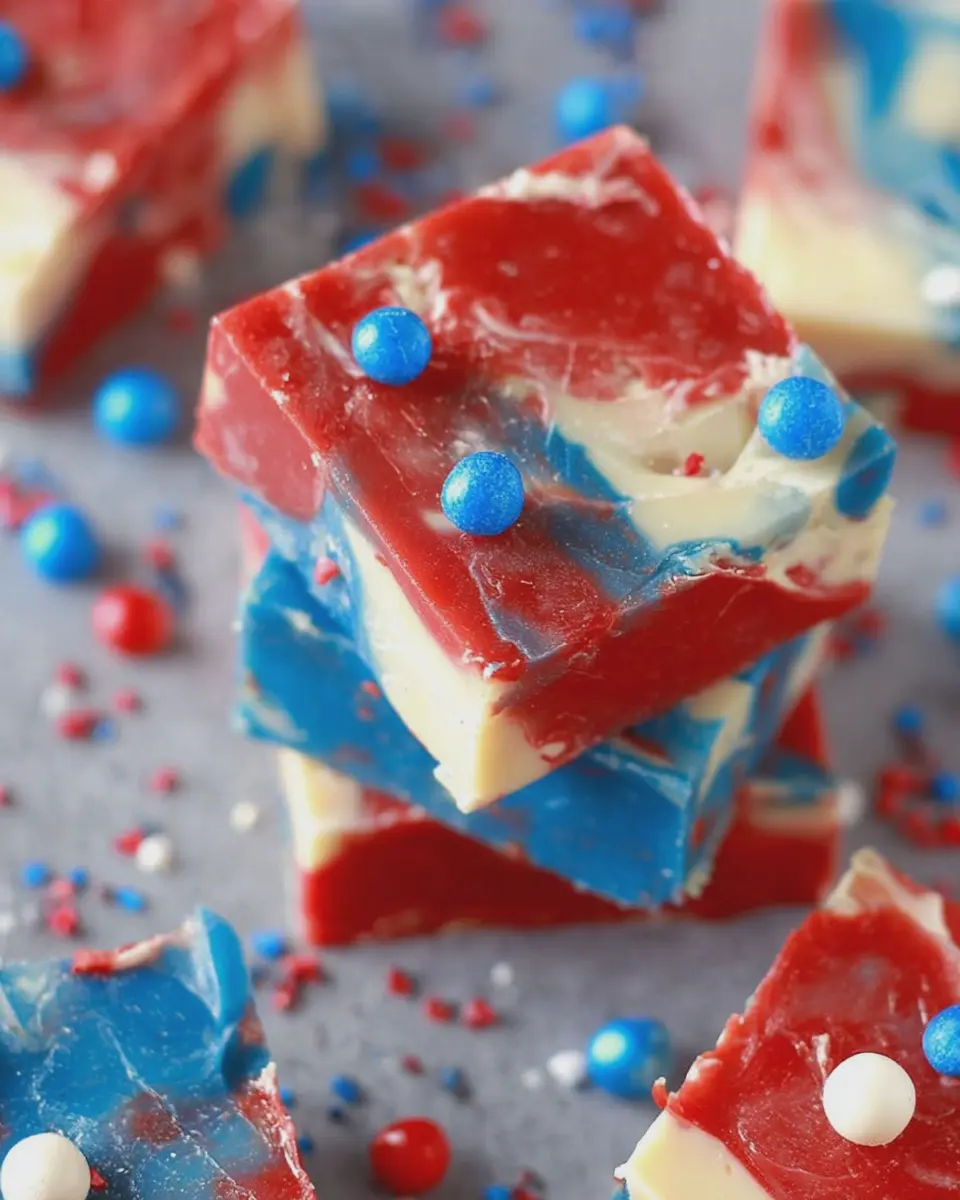
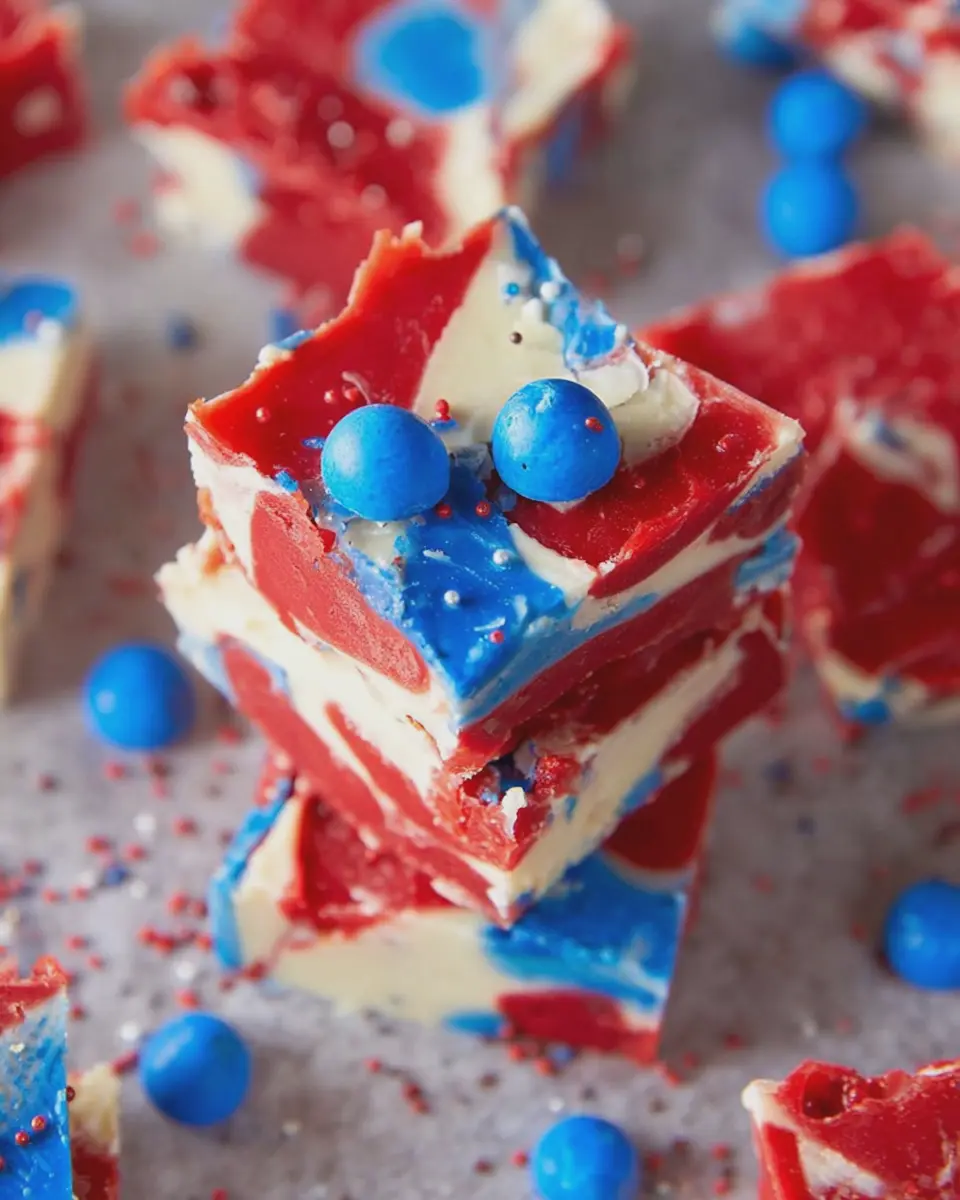
- Impressive Presentation: The vibrant colors look stunning on any dessert table. Your friends and colleagues will surely be impressed!
- Versatile Flavor Profiles: You can tweak the flavor by adding your favorite ingredients like nuts or vanilla to keep things interesting while still maintaining the theme.
Besides being a deliciously patriotic option, the fudge allows you to enjoy a taste of nostalgia while connecting with others over shared experiences. Imagine bringing a batch to your next potluck, sitting back, and watching smiles spread as people dive into this treat.
If you’d like to dig deeper into fudge-making techniques or explore more creative variations, check out articles on Food Network or Serious Eats. These sites provide a wealth of information that can help elevate your dessert game.
In the world of desserts, Red White and Blue Fudge is an easy winner that ticks all the boxes—delicious, visually stunning, and straightforward to prepare. So, why not give it a try? You won’t regret it!
Ingredients for Red White and Blue Fudge
Creating a delicious batch of Red White and Blue Fudge is easier than you might think! Gather these key ingredients, and you’ll be ready to impress your friends and family with a festive treat.
- White Chocolate Chips: The creamy base of your fudge will come from 2 cups of white chocolate chips. Go for good quality; you’ll taste the difference!
- Sweetened Condensed Milk: One 14-ounce can adds a luscious sweetness and smooth texture to the mix.
- Blue Food Coloring: A few drops will tint your fudge beautifully. Look for gel-based varieties for a more vibrant color.
- Red Food Coloring: Similar to the blue, just a few drops will create that striking contrast we all love.
- Salt: A pinch will enhance the flavors, balancing the sweetness.
- Optional Sprinkles: Consider using festive sprinkles for that extra flair when serving.
These simple yet effective ingredients will help you whip up a delightful batch of Red White and Blue Fudge. Check out places like Taste of Home for inspiration on variations and ways to make this treat your own. Ready to start? Let’s go!
Step-by-step Preparation of Red White and Blue Fudge
Creating delightful treats like Red White and Blue Fudge can transform your celebrations into something truly special. Whether you’re hosting a Fourth of July barbecue or a birthday party, this vibrant dessert is not only a feast for the eyes but also incredibly easy to make. Let’s get right into the steps!
Gather and Prep Your Tools
Before diving into the kitchen, it’s essential to gather all the tools and ingredients you’ll need. Here’s what you will require:
-
Ingredients:
-
2 cups of white chocolate chips
-
1 can (14 oz) sweetened condensed milk
-
1 tsp vanilla extract
-
1 cup red and blue M&M’s
-
Optional: food coloring for a bolder red and blue.
-
Tools:
-
Saucepan
-
Mixing bowl
-
Rubber spatula or wooden spoon
-
8×8 inch baking dish
-
Parchment paper (for easy removal and clean-up)
Having everything ready will smoothen out the process, allowing you to focus on making your delicious Red White and Blue Fudge.
Melting the White Chocolate
The first step to achieving that creamy fudge texture is melting the white chocolate. Place your saucepan over low heat, and add the white chocolate chips. Stir constantly to prevent burning—the chocolate should melt evenly and become smooth. If you’re feeling adventurous, you can toss in a couple of drops of red or blue food coloring to create a vibrant base.
Mixing in the Condensed Milk and Vanilla
Once your chocolate is melted, it’s time to add the sweetened condensed milk and vanilla extract. This step is crucial as it introduces creaminess to your fudge. Mix until fully combined; the consistency should be thick and luscious. It’s the perfect moment to taste the delightful mixture—just a tiny spoonful!
Adding the M&M’s
Now comes the fun part! Gently fold in the M&M’s, ensuring they are evenly distributed throughout the fudge. You want to see pockets of color when you cut into the finished product. If you’re looking for a little crunch, you could also consider adding crushed nuts or sprinkles during this step.
Pouring and Spreading the Mixture
With everything mixed, it’s time to transfer your fudge mixture into the lined baking dish. Use your rubber spatula to pour, then spread it evenly. This helps ensure that every piece is as tasty and beautiful as the last. If you want to get really creative, you can create swirls with additional colors or layers.
Finishing Touches with M&M’s
Before your fudge sets, sprinkle additional M&M’s on top. They not only add extra flavor but also enhance the visual appeal of your Red White and Blue Fudge. Gently press them into the fudge to ensure they adhere well when chilled.
Chilling Until Firm
Now, it’s time to let your creation firm up. Place the baking dish in the refrigerator for about 2-4 hours. This is a great time to clean up your workspace or prepare for the big reveal. Just think—your friends and family are going to love this beautiful piece of fudge!
Cutting and Serving
Once the fudge is set, remove it from the baking dish by lifting the edges of the parchment paper. Transfer it to a cutting board and slice it into squares. Serve on a colorful platter for a stunning presentation, or even wrap them individually for party favors. These are sure to be the hit of your next gathering!
Not only is this Red White and Blue Fudge recipe a delicious treat, but it’s also highly customizable. Do you have a favorite candy? Toss it in! With a little creativity, you can make this treat your own.
For more dessert ideas, check out some of my other favorite recipes! Happy cooking!
Variations of Red White and Blue Fudge
When it comes to Red White and Blue Fudge, creativity is the name of the game! Here, we’ll explore some delightful variations that will keep your taste buds tantalized and your celebrations vibrant.
Red White and Blue Oreo Fudge
If you’re a fan of cookies, this variation is sure to delight. By adding crushed Oreos into the classic fudge mixture, you introduce that beloved chocolatey crunch. Here’s how you can whip it up:
- Ingredients: Make the standard Red White and Blue Fudge, but incorporate roughly 1 cup of crushed Oreos while mixing in the white chocolate.
- Presentation: Top with additional Oreo crumbles and a drizzle of white chocolate for a decadent finish.
Not only does this twist offer an exciting texture, but it also enhances the flavor profile beautifully. Plus, who doesn’t love Oreos? If you want some inspiration for other cookie-based treats, check out The Cookie Dough Diaries.
Nut-Free Red White and Blue Fudge
For those watching out for nut allergies, we’ve got you covered! Creating a Nut-Free Red White and Blue Fudge is both simple and satisfying. Here’s what you can do:
- Substitutions: Instead of using any nut-based toppings or flavors, incorporate more fruit flavors, like dried cherries or blueberries, to keep that festive feel without the nutty components.
- Optional Flavoring: Consider using coconut butter for a creamy texture without any nuts.
Sharing sweet treats shouldn’t come with worries about allergies, and this nut-free option ensures everyone can join in on the fun. For more allergy-friendly recipes, check out Epicurious.
With these variations, you can mix and match to impress your friends and family at your next gathering. So, which one will you try first?
Cooking Tips and Notes for Red White and Blue Fudge
When making Red White and Blue Fudge, the key is to enjoy each step of the process! Here are some tips to ensure your fudge turns out perfectly every time.
Use Quality Ingredients
The taste of your fudge relies heavily on the ingredients. Opt for high-quality chocolate and pure vanilla extract to enhance the flavor. These simple swaps can elevate your fudge from good to unforgettable. Did you know that using white chocolate with at least 30% cocoa can make a difference?
Achieving the Perfect Texture
To get that creamy, smooth consistency in your Red White and Blue Fudge, make sure to melt your chocolate slowly over low heat. Stirring continuously helps avoid any unwanted lumps. If you’re short on time, using a microwave in short bursts can also work—just monitor closely!
Layering Tips
When pouring your colored layers, do it gently to avoid blending. You might find that a spatula helps in spreading the fudge evenly, particularly when you’re layering the red, white, and blue. To keep your fudge fresh, store it in an airtight container in a cool place, or check out this guide for more storage tips.
Happy cooking!
Serving Suggestions for Red White and Blue Fudge
When it comes to enjoying your Red White and Blue Fudge, it’s all about presentation and pairing. This delightful treat is not just for snacking; it can elevate any gathering or celebration. Here are some creative ideas to showcase your fudge beautifully:
Create a Festive Platter
Consider serving your Red White and Blue Fudge on a decorative platter. Arrange the fudge pieces alongside fresh strawberries and blueberries for a vibrant presentation. Add some whipped cream or dollops of Greek yogurt for that extra creamy touch—trust me, flavors mesh beautifully!
Perfect Pairings
Pair your fudge with a refreshing drink! Think about a chilled lemonade or a sparkling fruit-infused water. These beverages not only complement the sweetness but provide a refreshing balance. You could even consider a creamy vanilla ice cream on the side!
Fun Themes
This fudge is perfect for celebrations like the Fourth of July or Memorial Day. Consider using themed decorations like mini flags or red, white, and blue tableware to enhance the festive vibe. If you’re feeling crafty, try to turn your fudge into fun shapes using cookie cutters!
Store and Serve
If you have leftovers (which is rare!), store your Red White and Blue Fudge in an airtight container. It can last for up to two weeks—just make sure to keep it cool. When serving later, consider adding a sprinkle of sea salt to enhance the flavors.
For more presentation tips, check out sources like Taste of Home’s entertaining ideas or even look into fun serving styles on Martha Stewart’s website.
These suggestions will make your Red White and Blue Fudge not only a tasty treat but also a show-stopping centerpiece!
Time Breakdown for Making Red White and Blue Fudge
When it comes to preparing your delightful Red White and Blue Fudge, knowing how much time to set aside is key to a smooth cooking experience. Here’s a simple breakdown to help you plan your next kitchen adventure.
Preparation Time
Start with around 15 minutes for preparation. This includes gathering your ingredients and equipment, as well as prepping any items you’ll need for your fudge layers. Need a hand with ingredient selection? Check out this guide on fudge-making essentials.
Cooking Time
Once you’re prepped, expect your fudge to take about 20 minutes to cook. Melting the chocolate and mixing in the layers is quick, but make sure to keep an eye on the temperatures!
Total Time
In total, you’ll want to set aside roughly 35 minutes for your Red White and Blue Fudge. This includes both the preparation and cooking phases, giving you just enough time to clean up while your layers set.
With this time guide, you’re well on your way to creating a delicious treat that’s perfect for any patriotic celebration! Happy fudging!
Nutritional Facts for Red White and Blue Fudge
When you’re whipping up a stunning batch of Red White and Blue Fudge, it’s essential to know what you’re indulging in. Here’s a quick breakdown of the nutritional facts to keep in mind:
Calories
Each piece of Red White and Blue Fudge boasts approximately 100 calories. That makes it a delightful treat for special occasions without completely derailing your diet.
Fat
You can expect about 5 grams of fat per serving. While fats are often demonized, remember that some fats are essential for a balanced diet!
Sugar
This fudge is sweet! With around 11 grams of sugar per piece, it’s a treat that satisfies your sweet tooth. Moderation is key, of course.
For more detailed insights on managing sugar intake, you might find this Harvard article helpful. Enjoy your delicious creation!
FAQs about Red White and Blue Fudge
When it comes to making Red White and Blue Fudge, you might have a few questions before diving into this vibrant treat. Let’s address some of the most common ones.
Can I use different types of chocolate?
Absolutely! The beauty of our Red White and Blue Fudge recipe is its versatility. While white chocolate, milk chocolate, and dark chocolate all bring different flavors to the table, feel free to mix and match according to your taste preferences. Just keep in mind that each type of chocolate has unique melting properties, so adjust your heat accordingly to get that perfect creamy texture.
How should I store my fudge?
To keep your Red White and Blue Fudge fresh, store it in an airtight container. Place parchment paper between layers if you’re stacking pieces to prevent sticking. The fridge is a great choice for storage, keeping your fudge firm while maintaining its flavor. If you’re feeling adventurous, you can also try freezing it—just remember to thaw it in the fridge for optimal texture later on.
How long does fudge last?
If stored properly, your Red White and Blue Fudge can last up to two weeks in the refrigerator and about three months in the freezer. Feel free to share this delightful treat at your next gathering, knowing it will hold its tasty charm.
For more information on storing sweets, check out articles from reputable sources like The Spruce Eats or Food Network. Now you’re all set to whip up your very own festive fudge!
Conclusion on Red White and Blue Fudge
In summary, Red White and Blue Fudge is not just a delicious treat; it’s a delightful way to celebrate any occasion. With its layered colors and rich flavors, this fudge is perfect for summer barbecues, patriotic holidays, or simply as a sweet indulgence to share with friends. The process is simple yet rewarding, allowing you to customize it however you wish—perhaps by adding in some nuts or experimenting with flavors.
When you serve this fudge, you’re not just offering a snack; you’re creating an experience. So grab your ingredients, evoke your inner chef, and let the sugary bliss unfold. Check out more creative dessert ideas or enhance your next gathering with fun recipes here.
PrintRed White and Blue Fudge: Easy Summer Treat for Everyone
Indulge in a festive and delicious treat this summer with Red White and Blue Fudge, perfect for all occasions.
- Prep Time: 10 minutes
- Cook Time: 0 minutes
- Total Time: 2 hours 10 minutes
- Yield: 16 servings 1x
- Category: Dessert
- Method: No-bake
- Cuisine: American
- Diet: Vegetarian
Ingredients
- 2 cups white chocolate chips
- 1 can (14 oz) sweetened condensed milk
- 1 cup strawberries, chopped
- 1 cup blueberries
- 1 tablespoon butter
- 1/2 teaspoon vanilla extract
Instructions
- Line an 8×8 inch baking dish with parchment paper.
- In a saucepan over low heat, combine white chocolate chips, sweetened condensed milk, and butter. Stir until melted and smooth.
- Divide the mixture into three bowls.
- In one bowl, add strawberries and mix well; in the second bowl, add blueberries; leave the third bowl plain.
- Pour the strawberry mixture into the baking dish, spreading it evenly.
- Next, pour in the plain mixture and spread evenly on top of the strawberry layer.
- Finally, pour the blueberry mixture on top and spread it evenly.
- Refrigerate for at least 2 hours or until firm.
- Cut into squares and serve.
Notes
- This fudge can be stored in an airtight container in the refrigerator for up to a week.
- Feel free to substitute with other fruits if you desire.
Nutrition
- Serving Size: 1 square
- Calories: 150
- Sugar: 25g
- Sodium: 30mg
- Fat: 7g
- Saturated Fat: 4g
- Unsaturated Fat: 2g
- Trans Fat: 0g
- Carbohydrates: 20g
- Fiber: 1g
- Protein: 2g
- Cholesterol: 10mg
Keywords: Red White and Blue Fudge, summer treat, easy dessert