

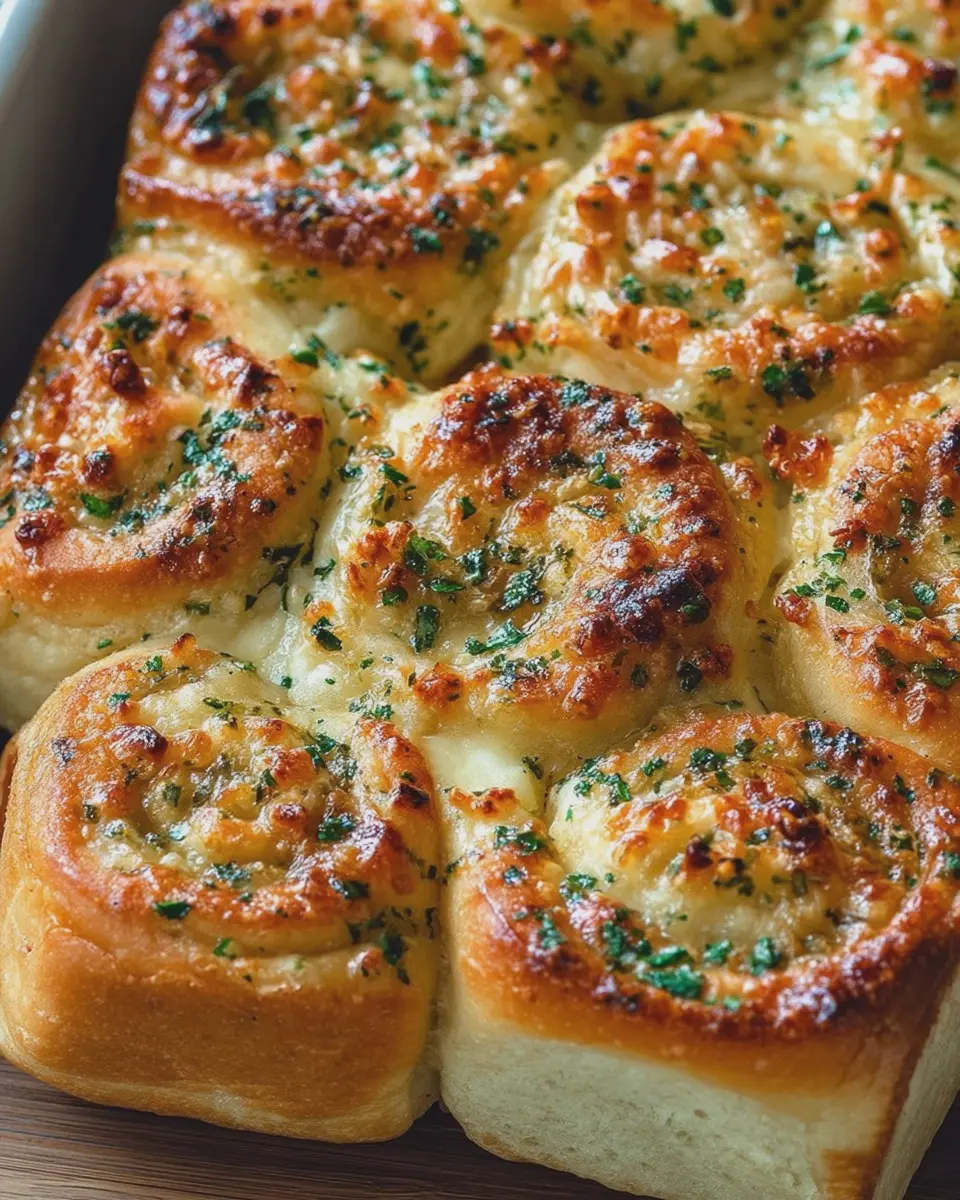
Introduction to Cheesy Garlic Bread Rolls
If you’ve ever had the pleasure of biting into a warm, cheesy garlic bread roll, you already know that this delightful combination is a heavenly addition to any meal. Imagine pulling apart a soft, buttery roll, revealing an ooey-gooey center speckled with fresh garlic and melted cheese—pure bliss! Making cheesy garlic bread rolls at home is not just fun; it’s a total game-changer for your cooking repertoire.
Why Homemade Cheesy Garlic Bread Rolls Are a Game-Changer
Let’s be honest: store-bought options don’t stand a chance against homemade. When you whip up your own cheesy garlic bread rolls, you have the flexibility to customize every bite. Want extra garlic? Go for it! Prefer a blend of gooey cheeses like mozzarella and cheddar? You’ve got it! The possibilities are endless, and so is the flavor.
Here’s why you should give this recipe a try:
-
Quality Control: When you make these rolls yourself, you control the ingredients, ensuring freshness and flavor. Plus, you can make them without preservatives—just good, wholesome goodness.
-
Versatility: These rolls aren’t just side dishes; they can accompany almost any meal. Cooked up with your favorite soup or pasta, they can even be an elegant appetizer for gatherings. Pair them with rich alternatives like chicken broth or a vibrant marinara sauce for dipping!
-
Impress Your Guests: Picture your friends and family gathered around the dinner table, the aroma of baked cheesy garlic bread rolls wafting through the air. Trust me, they’ll be asking for your secret recipe (which, of course, you can keep to yourself).
Perhaps you’re wondering how difficult these rolls are to make? Truthfully, they’re easier than you think! Even novice cooks can master this simple craft and dazzle their dinner guests.
Mentioning some resources can help, like checking out the kitchn.com for more insights on garlic bread variations or foodnetwork.com for tips on perfecting your baking skills.
So grab your apron and let’s get rolling! You’ll soon discover that once you’ve tasted homemade cheesy garlic bread rolls, there’s no going back to anything store-bought.
Ingredients for Cheesy Garlic Bread Rolls
Creating perfect cheesy garlic bread rolls starts with gathering the right ingredients. Let’s break it down into three main components: the dough, garlic butter, and the filling. Each part plays a crucial role in delivering that gooey, flavorful goodness we all love!
For the Dough
- All-purpose flour: 3 cups
- Warm water: 1 cup (about 110°F)
- Active dry yeast: 2¼ teaspoons
- Sugar: 1 tablespoon
- Salt: 1 teaspoon
- Olive oil: 2 tablespoons
The dough is the foundation of these rolls, providing the perfect chewy texture. You can learn more about yeast and baking on King Arthur Baking to really master your bread-making skills!
For Garlic Butter
- Unsalted butter: ½ cup (softened)
- Garlic cloves: 4 (minced)
- Chopped parsley: 2 tablespoons
- Salt: ½ teaspoon
This rich mixture brings out the garlic flavor we crave!
For the Filling
- Mozzarella cheese: 1 cup (shredded)
- Parmesan cheese: ½ cup (grated)
- Turkey bacon or chicken ham: 1 cup (diced)
The blend of cheeses and your choice of meat really elevates these rolls to the next level.
With these ingredients ready, you’re just a few steps away from indulging in homemade cheesy garlic bread rolls!
Preparing Cheesy Garlic Bread Rolls
Making cheesy garlic bread rolls is not just about satisfying your cravings; it’s an experience to relish! Each step brings you closer to creating these delightful, warm rolls that practically melt in your mouth. Let’s dive into the process together and see how you can create these cheesy delights from scratch.
Mixing the Dough
Start by gathering your ingredients. You’ll need all-purpose flour, yeast, sugar, salt, warm water, and some olive oil. In a large bowl, mix:
- 4 cups of all-purpose flour
- 2 teaspoons of instant yeast
- 1 tablespoon of sugar
- 1 teaspoon of salt
Combine these dry ingredients before gradually adding in:
- 1.5 cups of warm water (not boiling, just warm enough to touch)
Add about 3 tablespoons of olive oil for flavor and moisture. Stir with a wooden spoon or spatula until it forms a shaggy dough. If you want a faster alternative, consider checking out machines that can mix dough to save your arms!
Kneading to Perfection
Once your dough comes together, it’s time to knead. Forget about fancy equipment; your hands are your best tools! Sprinkle some flour on a clean surface, and turn out the dough. Knead for about 8-10 minutes until the dough is smooth and elastic. You know it’s ready when it springs back when you press it. Want to learn more about this technique? Many professional chefs swear by the magic of kneading—check out this article on the science behind it.
Allowing the Dough to Rise
After kneading, place your dough in a lightly oiled bowl and cover it with a damp cloth or plastic wrap. This helps keep moisture in. Let it rise in a warm spot for an hour, or until it’s doubled in size. This is the perfect time to clean your kitchen or sip on a refreshing beverage.
Preparing the Garlic Butter
While the dough rises, whip up a batch of garlic butter. Melt:
- ½ cup of unsalted butter
- 4-5 cloves of minced garlic
Combine until the garlic is fragrant but not browned. Mix in a handful of chopped fresh parsley and a pinch of salt for that extra flavor kick. Trust me; your rolls will thank you!
Rolling and Cutting the Dough
Once your dough has risen wonderfully, punch it down to release the air. Turn it out onto a floured surface and roll it into a large rectangle—about 12 by 18 inches should do the trick. Brush a generous layer of the garlic butter over the dough, leaving a small border around the edges.
Then, sprinkle your choice of shredded cheese—mozzarella works wonders here! Roll the dough tightly into a log and cut it into 12 equal pieces. You can use kitchen scissors or a sharp knife for this.
The Second Rise
Place the rolls cut-side up in a greased 9×13 inch baking dish. Cover them again and let them rise for about 30 more minutes. This step is crucial, as it gives the rolls that pillowy texture.
Baking the Rolls to Golden Perfection
Preheat your oven to 375°F (190°C). Once the rolls have risen beautifully, pop them into the oven for about 20-25 minutes. Bake until they are golden brown and emit that irresistible garlic aroma. To make them even tastier, brush them with any remaining garlic butter when they come out of the oven.
And there you have it—your delicious, gooey cheesy garlic bread rolls are ready to be devoured! Pair them with a fresh salad or enjoy them on their own for a savory treat. Happy baking!
Variations on Cheesy Garlic Bread Rolls
Looking to spice up your cheesy garlic bread rolls? Let’s dive into some delightful variations that will have your taste buds dancing!
Cheesy Herb Twists
One way to elevate your rolls is by incorporating a blend of fresh herbs. Imagine pulling apart those warm, melty rolls and discovering a medley of flavors! Mix finely chopped rosemary, thyme, and parsley into your cheesy filling, and you’ll instantly add a burst of freshness. These rolls pair beautifully with a light salad for a quick lunch or can be served as a shareable appetizer.
For even more inspiration, check out this guide on herb combinations that can transform your culinary experience!
Spicy Stuffed Cheesy Rolls
For the spicy food lovers out there, why not take your cheesy garlic bread rolls up a notch? Try adding diced jalapeños or even a sprinkle of crushed red pepper flakes to the cheese mixture. If you’re feeling adventurous, a bit of turkey bacon or chicken ham could provide that savory kick that makes your rolls truly unforgettable. Your dinner guests will be buzzing about this twist long after the meal is over!
Sweet Twists with a Hint of Garlic
Think sweet can’t go with garlic? Think again! Create sweet cheesy rolls by adding a dash of cinnamon and a drizzle of honey to the cheese filling. The unexpected combination will tantalize your taste buds and leave you craving more. You can serve these sweet twists as a dessert or snack, proving that cheesy garlic bread rolls can wear many hats!
Feeling inspired? Grab your ingredients and get rolling!
Cooking tips and notes for Cheesy Garlic Bread Rolls
Best practices for kneading dough
When preparing cheesy garlic bread rolls, mastering the art of kneading is essential. Start with a clean, lightly floured surface. Knead your dough for about 8-10 minutes until it feels smooth and elastic. Think of it as a workout for your dough; you want it to have some strength! For a handy guide, you can check out resources like King Arthur Baking. If it’s sticky, just sprinkle in a little more flour, but avoid overdoing it—too much flour can make your rolls tough.
How to achieve the perfect rise
A great rise is the hallmark of a splendid roll! After kneading, let your dough rest in a warm, draft-free place. Aim for a cozy temperature between 75°F and 80°F. Cover it with a damp cloth, so it doesn’t dry out; think of it as tucking your dough in for a cozy nap. Let it rise until it doubles in size—typically about an hour. Did you know that yeast loves warmth? If your kitchen is cool, you might consider using your oven’s proofing setting.
Enjoy your baking adventure, and don’t forget to share your cheesy garlic bread rolls with friends and family! They won’t believe you made them from scratch! For more tips, check out this useful article on The Kitchn.
Serving suggestions for Cheesy Garlic Bread Rolls
Paired with Soups and Salads
Enhance your meals with cheesy garlic bread rolls next to your favorite soups and salads. Picture this: a warm, comforting bowl of tomato basil soup paired with a gooey garlic roll. The combo is timeless and sure to bring smiles. Consider a refreshing Caesar salad as well; the creamy dressing and crisp romaine perfectly balance the rich, cheesy flavors of the rolls. If you’re looking for more variety, check out this guide on perfect soup pairings on Food Network.
As a Snack or Appetizer
Whether hosting a gathering or simply enjoying a cozy night in, cheesy garlic bread rolls make an irresistible snack or appetizer. Serve them with a zesty marinara sauce for dipping or a flavorful herb-infused olive oil. They’re also fantastic alongside a cheese platter featuring creamy Brie or tangy goat cheese, offering deliciously melty bites that are hard to resist.
Remember, these rolls are not just an addition—they’re the star of the show! What are your favorite pairings? Let us know in the comments!
Time breakdown for Cheesy Garlic Bread Rolls
When it comes to making cheesy garlic bread rolls, getting the timing just right can be the key to perfecting this delicious treat. Here’s how to break it down:
Preparation time
Expect to spend about 20 minutes preparing the dough and filling. Gather your ingredients like fresh garlic, herbs, and, of course, your favorite cheeses. A little prep hustle sets the stage for a delightful bake!
Rising time
Let the dough rise for about 1 hour. This step is crucial for achieving that fluffy texture. During this time, you might catch up on a quick episode of your favorite show or tackle some chores. Just be sure to poke your head in to check on the dough’s progress!
Baking time
Baking the cheesy garlic bread rolls will take about 15-20 minutes. Keep an eye on them towards the end; you want that golden-brown finish without overcooking. Nothing feels quite as satisfying as watching your delicious creation come to life in the oven!
Total time
In total, you’re looking at about 1 hour and 40 minutes from start to finish. This includes all the fun of prepping, rising, and baking. So, grab a friend and turn this into a fun cooking session! If you enjoy your time in the kitchen, check out this guide for more bread-making tips and tricks.
Nutritional Facts for Cheesy Garlic Bread Rolls
When you’re indulging in cheesy garlic bread rolls, it’s always good to know what you’re putting into your body. Here’s a quick breakdown of the nutritional content that can help you stay informed while you enjoy this delicious treat.
Calories
A serving of cheesy garlic bread rolls typically contains around 180-200 calories. This rich flavor can be a delightful addition to any meal, but it’s wise to enjoy them in moderation, especially if you’re watching your calorie intake.
Protein
One of the perks of these rolls is their protein content, which usually hovers around 6-8 grams per serving. This can be especially beneficial if you’re following a more active lifestyle and looking to maintain muscle mass.
Carbohydrates
With about 25-30 grams of carbohydrates per serving, cheesy garlic bread rolls provide a solid energy source. The combination of carbohydrates and fats from the cheese ensures you feel satisfied and energized, making it a great accompaniment to salads or hearty soups.
Curious about more nutritional facts? Check out Nutrition.gov for reliable information on various ingredients and healthier alternatives! Remember, being aware of nutritional values can help you make better choices and enjoy your favorites even more.
FAQs about Cheesy Garlic Bread Rolls
Can I make the dough in advance?
Absolutely! Preparing the dough for your cheesy garlic bread rolls in advance is a great time-saver. Simply mix and knead your dough, then let it rise until doubled in size. After the first rise, punch it down, cover it tightly with plastic wrap, and refrigerate. You can keep it in the fridge for up to 24 hours. When you’re ready to bake, bring the dough back to room temperature before shaping and baking. This method can actually enhance the flavor and texture, making your rolls even more delightful!
What can I use instead of mozzarella cheese?
If mozzarella isn’t your thing or you want to experiment, there are several tasty alternatives! Cheddar cheese brings a sharpness that balances beautifully with garlic, while pepper jack can add a spicy kick if you’re feeling adventurous. Other excellent options include:
- Provolone for a smokier flavor
- Gouda, which melts wonderfully
- Parmesan, for a robust, savory touch
Feel free to mix different cheeses for a unique flavor twist in your cheesy garlic bread rolls.
How do I store leftover rolls?
Let’s be real: leftovers are fantastic, but only if they’re stored properly! To keep your cheesy garlic bread rolls fresh, place them in an airtight container at room temperature for up to two days. If you want to store them for longer, you can freeze the rolls. Just make sure they’re completely cool, then wrap them individually in plastic wrap and store them in a freezer-safe bag. When you’re ready to enjoy them again, simply reheat them in the oven for that fresh-baked taste. For more on leftover storage, check out this detailed guide.
These tips will ensure your cheesy garlic bread rolls stay delicious, adding warmth and comfort to any meal!
Conclusion on Cheesy Garlic Bread Rolls
Your new go-to comfort food
When you think of cozy evenings or gatherings with friends, cheesy garlic bread rolls will quickly become your new favorite dish. These rolls pair perfectly with soups, salads, or as a snack by themselves. Not only are they satisfyingly cheesy and infused with garlic goodness, but they’re also surprisingly easy to make.
Imagine pulling a batch fresh from the oven, the aroma filling your kitchen, and the gooey cheese beckoning you for that first bite. If you’re looking for a quick crowd-pleaser, look no further! Plus, they can be customized with your favorite ingredients, such as turkey bacon or chicken ham, giving you endless delicious possibilities. For more ideas on enhancing your meals, check out Epicurious.
So why not give these rolls a try? Your taste buds will thank you, and you’ll quickly find a delightful addition to your recipe repertoire.
PrintCheesy Garlic Bread Rolls: The Best Homemade Indulgence

Indulge in the soft and gooey texture of these Cheesy Garlic Bread Rolls, perfect for any occasion.
- Prep Time: 15 minutes
- Cook Time: 25 minutes
- Total Time: 1 hour 40 minutes
- Yield: 12 rolls 1x
- Category: Appetizer
- Method: Baking
- Cuisine: American
- Diet: Vegetarian
Ingredients
- 2 cups all-purpose flour
- 1 cup shredded mozzarella cheese
- 4 cloves garlic, minced
- 1/2 cup unsalted butter, melted
- 1 teaspoon garlic powder
- 1/2 teaspoon salt
- 1 tablespoon fresh parsley, chopped
- 1 packet active dry yeast (2 1/4 teaspoons)
- 1 tablespoon sugar
- 3/4 cup warm water
Instructions
- In a small bowl, dissolve yeast and sugar in warm water. Let it sit for 5 minutes until frothy.
- In a large bowl, combine flour, garlic powder, and salt.
- Add the yeast mixture and melted butter to the dry ingredients and mix until a dough forms.
- Knead the dough on a floured surface for about 5 minutes until smooth.
- Place the dough in a greased bowl and cover. Let it rise for 1 hour or until doubled in size.
- Preheat oven to 375°F (190°C).
- Punch down the dough and divide it into small balls.
- Stuff each ball with mozzarella cheese and seal.
- Place the rolls on a baking sheet, brush with remaining melted butter, and sprinkle with garlic and parsley.
- Bake for 20-25 minutes until golden brown.
Notes
- For a richer flavor, you can add more garlic.
- Experiment with different types of cheese for variation.
Nutrition
- Serving Size: 1 roll
- Calories: 200
- Sugar: 1g
- Sodium: 200mg
- Fat: 10g
- Saturated Fat: 6g
- Unsaturated Fat: 3g
- Trans Fat: 0g
- Carbohydrates: 24g
- Fiber: 1g
- Protein: 5g
- Cholesterol: 20mg
Keywords: Cheesy Garlic Bread Rolls