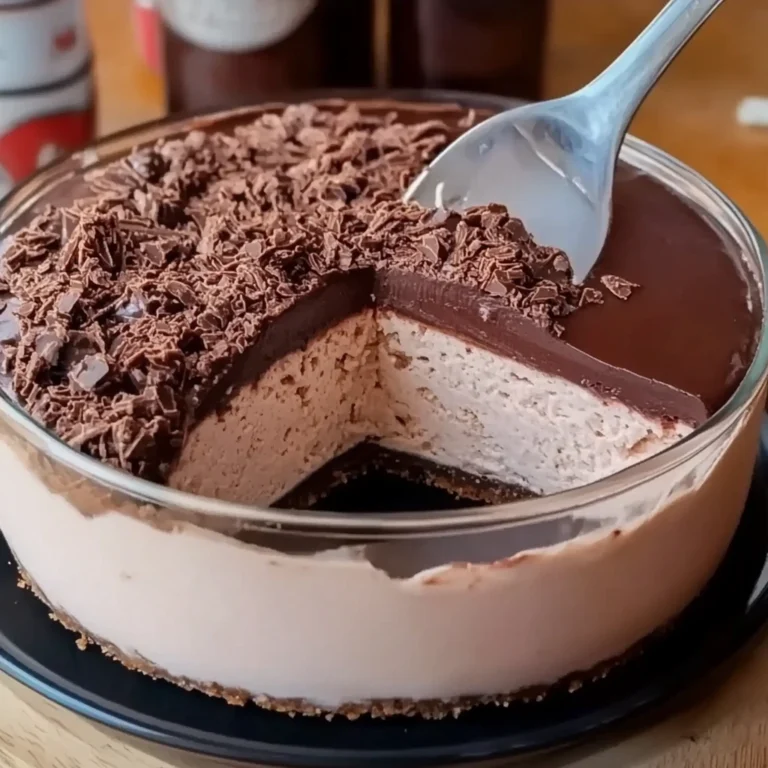
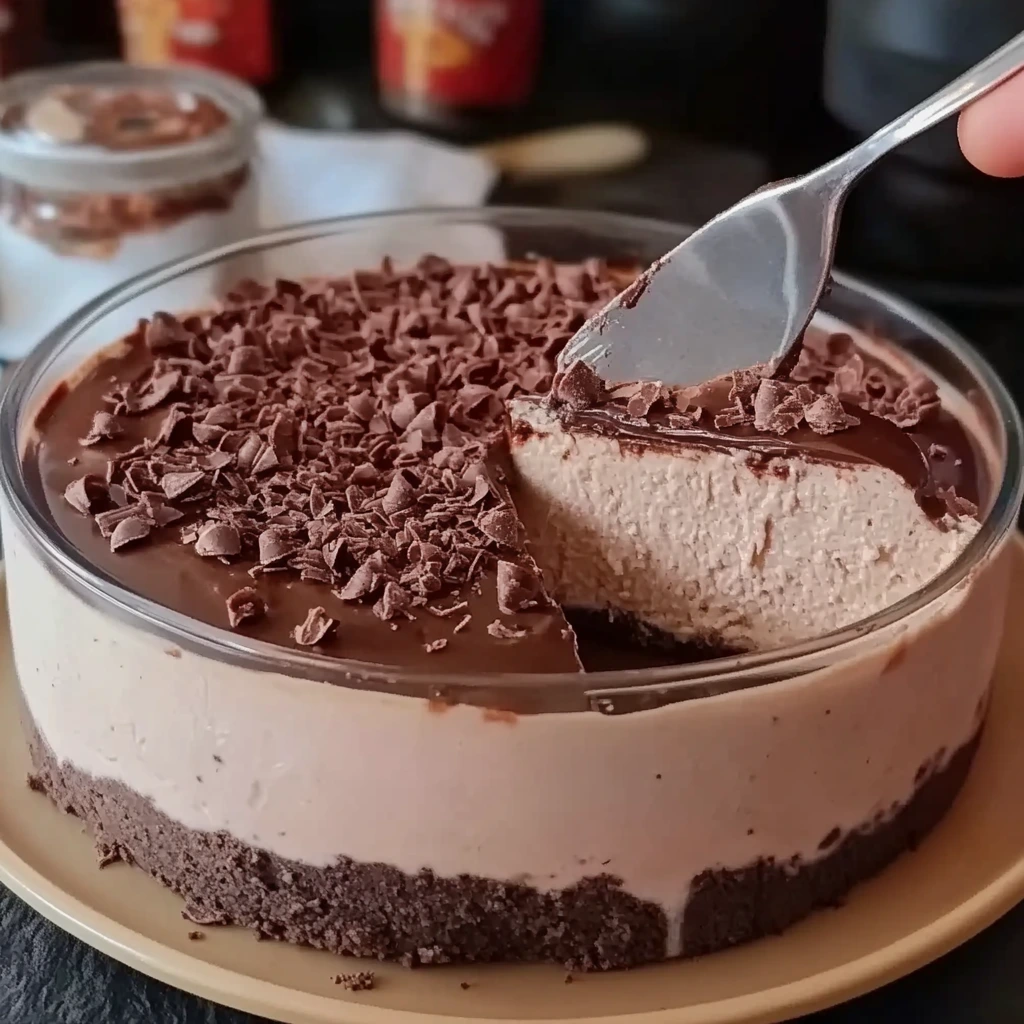
Introduction to No-Bake Nutella Cheesecake
When it comes to indulgent desserts, few things captivate our taste buds quite like a No-Bake Nutella Cheesecake. This creamy and decadent treat brings together the irresistible flavors of Nutella, silky cream cheese, and a crunchy Oreo crust, making it a dessert that’s hard to resist. The best part? You don’t even need an oven to create this masterpiece!
Why Choose a No-Bake Cheesecake?
The no-bake cheesecake stands out as a perfect option for those who love easy-to-make yet impressive desserts. Unlike traditional baked cheesecakes, no-bake versions:
- Save time and energy by skipping the baking step.
- Offer a foolproof solution for beginners.
- Retain a light, mousse-like texture that melts in your mouth.
For tips on achieving the perfect no-bake consistency, check out this guide on no-bake cheesecakes.
The Magic of Nutella in Desserts
Nutella’s rich hazelnut and cocoa flavor has earned it a special place in the world of desserts. From cookies to cakes, this beloved spread transforms simple recipes into extraordinary delights. Combining it with a no-bake cheesecake elevates its appeal, offering a luscious dessert perfect for any occasion. Wondering how to toast hazelnuts for that extra crunch? Explore this helpful tutorial to add even more flavor to your creation.
Dive into this recipe to experience a dessert that’s as easy to make as it is delicious, delivering a slice of heaven in every bite.
Ingredients Overview
Crafting a delicious No-Bake Nutella Cheesecake begins with the perfect combination of simple yet essential ingredients. Here’s what you’ll need:
For the Base:
- 25 Oreo biscuits (with cream)
- 5 tbsp melted butter (71g)
For the Filling:
- 1 ½ cups softened cream cheese (338g)
- ½ cup Nutella
- ¾ cup whipping cream
For the Ganache:
- ¾ cup (100g) fresh cream
- ½ cup (100g) dark chocolate, chopped
- ½ cup roasted and chopped hazelnuts
Why Quality Ingredients Matter
Using fresh and high-quality ingredients ensures the best taste and texture. For instance, premium dark chocolate creates a richer ganache, while high-fat cream cheese provides a smooth filling.
Substitutions and Dietary Options
- Replace Oreos with gluten-free cookies for a gluten-free crust.
- Swap heavy cream with a dairy-free alternative like coconut cream for lactose-free options.
- Prefer a different nut spread? Substitute Nutella with almond or peanut butter for a unique twist.
Learn more about selecting and handling hazelnuts for your dessert by exploring this toasting guide. Adjusting ingredients to suit your dietary preferences ensures everyone can savor this creamy masterpiece.
Required Equipment
To make a No-Bake Nutella Cheesecake, you’ll need a few essential kitchen tools for smooth preparation and assembly:
Kitchen Tools:
- Food processor or rolling pin (to crush the Oreos)
- Mixing bowls (various sizes)
- Electric mixer or whisk (for whipping cream and mixing the filling)
- Spatula (for folding and spreading the mixture)
- Measuring cups and spoons (for accuracy)
- 1500ml dish or springform pan (for assembling the cheesecake)
Tips for Choosing Equipment
- Opt for a high-speed electric mixer to achieve perfectly whipped cream.
- Use a sturdy springform pan for easy removal and a professional presentation.
- For best results, ensure your tools are clean and dry to avoid altering the texture of ingredients.
For insights on making the perfect whipped cream, refer to this helpful guide. The right tools make preparation easier and ensure your dessert looks and tastes flawless.
Preparing the Oreo Crust
The Oreo crust forms the foundation of this decadent No-Bake Nutella Cheesecake, providing a perfect balance of crunch and sweetness. Follow these steps to achieve the ideal base:
Step-by-Step Instructions:
- Grind the Oreos: Place 25 Oreo biscuits (with cream) in a food processor and blend until they become fine crumbs. If you don’t have a processor, place them in a zip-lock bag and crush with a rolling pin.
- Combine with Butter: In a mixing bowl, combine the crushed Oreos with 5 tablespoons of melted butter (71g). Mix thoroughly until the texture resembles wet sand.
- Press into Dish: Transfer the mixture to a 1500ml dish or springform pan. Use the back of a spoon or flat-bottomed glass to press it into an even layer.
Tips for Success:
- Ensure the crumbs are finely ground for a cohesive crust.
- Use unsalted butter for better control over the flavor balance.
Why Chilling is Essential
Refrigerate the crust for at least 30 minutes before adding the filling. This step solidifies the butter, preventing the crust from becoming soggy and ensuring it holds together.
For additional crust-making tips, refer to this comprehensive guide. A well-prepared crust sets the stage for a cheesecake that’s not only delicious but structurally sound.
Making the Nutella Cheesecake Filling
The Nutella cheesecake filling is the heart of this dessert, combining creamy, airy, and chocolatey textures for a luxurious bite. Follow these steps to create the perfect filling:
Step-by-Step Instructions:
- Prepare the Cream Cheese: In a large mixing bowl, place 1 ½ cups of softened cream cheese (338g). Beat it using an electric mixer until smooth and lump-free.
- Incorporate Nutella: Add ½ cup of Nutella to the bowl and mix until fully combined, creating a rich, silky mixture.
- Whip the Cream: In a separate chilled bowl, whip ¾ cup of heavy whipping cream on high speed until it forms stiff peaks. This step ensures the filling will have a light, airy texture.
- Combine Cream and Mixture: Gently fold the whipped cream into the Nutella-cream cheese mixture using a spatula. Avoid overmixing to maintain the airiness of the whipped cream.
Techniques for a Smooth, Airy Texture:
- Ensure the cream cheese is at room temperature to avoid lumps.
- Use high-fat whipping cream for better stability and volume.
- When folding, use a slow, circular motion to preserve the whipped cream’s structure.
Expert Tip:
If you’re new to folding whipped cream, check out this guide on no-bake techniques. Properly incorporating whipped cream is key to achieving the luscious texture that makes this cheesecake irresistible.
This light yet decadent filling perfectly complements the Oreo crust, creating a dessert that’s both visually stunning and delightfully satisfying.
Assembling the Cheesecake
Once your crust and filling are prepared, it’s time to bring the No-Bake Nutella Cheesecake together. Proper assembly ensures a visually stunning and structurally sound dessert.
Step-by-Step Instructions:
- Pour the Filling: Take the chilled Oreo crust out of the refrigerator. Spoon the prepared Nutella cheesecake filling over the crust.
- Level the Surface: Use a spatula or the back of a spoon to spread the filling evenly. Smooth out the top for a polished look.
Tips for Proper Setting:
- Refrigerate the assembled cheesecake for at least 7–8 hours or overnight. This allows the filling to firm up and develop its creamy consistency.
- Cover the dish with plastic wrap or a lid to prevent moisture loss and absorb surrounding odors.
Why Proper Chilling Matters:
Adequate refrigeration is essential for the cheesecake to achieve its signature smooth and stable texture. If the filling is too soft after chilling, consider exploring tips on stabilizing no-bake cheesecakes in this guide.
With patience and attention to detail, you’ll have a perfectly set cheesecake ready for its final touch: the decadent ganache topping.
Adding the Ganache and Final Chill
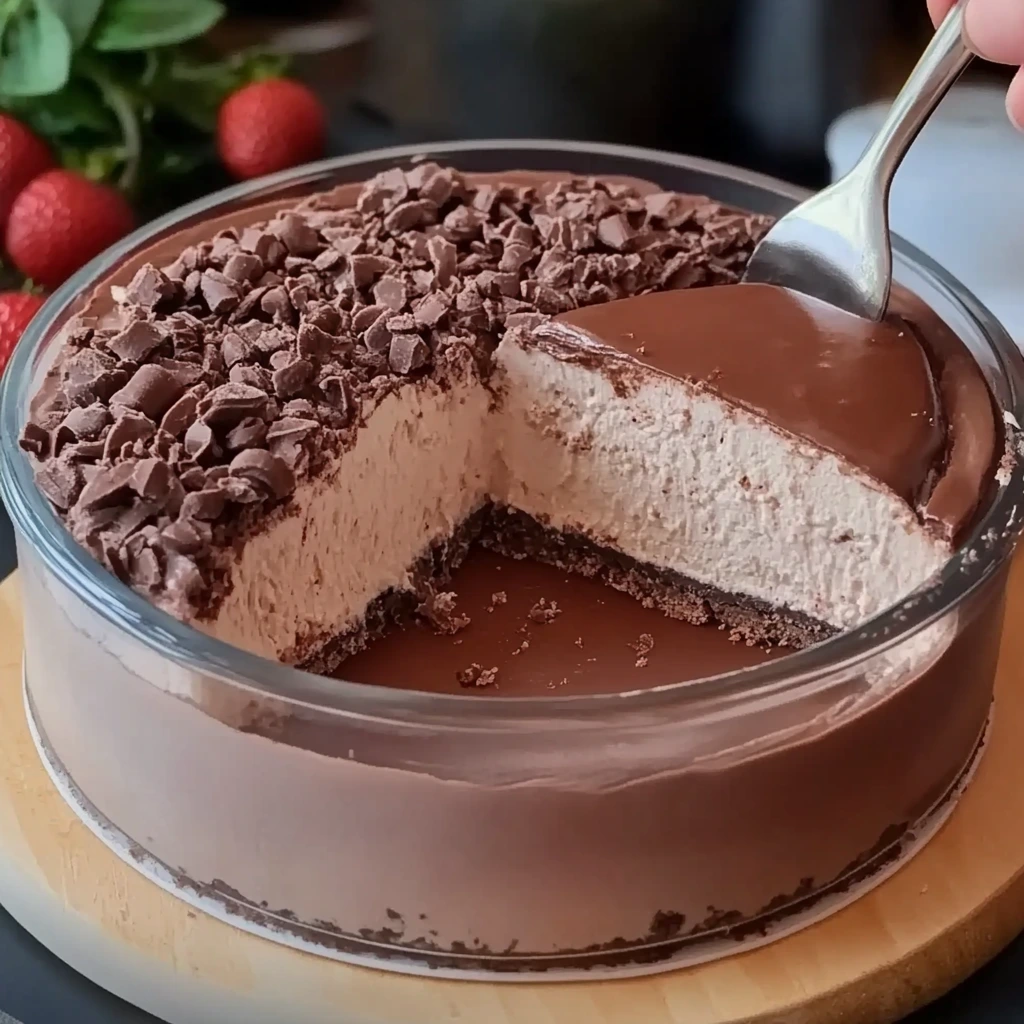
Once your Nutella cheesecake has set, the final step is to add the luxurious chocolate ganache topping. This finishing layer not only enhances the flavor but also adds an elegant, glossy look.
Step-by-Step Instructions:
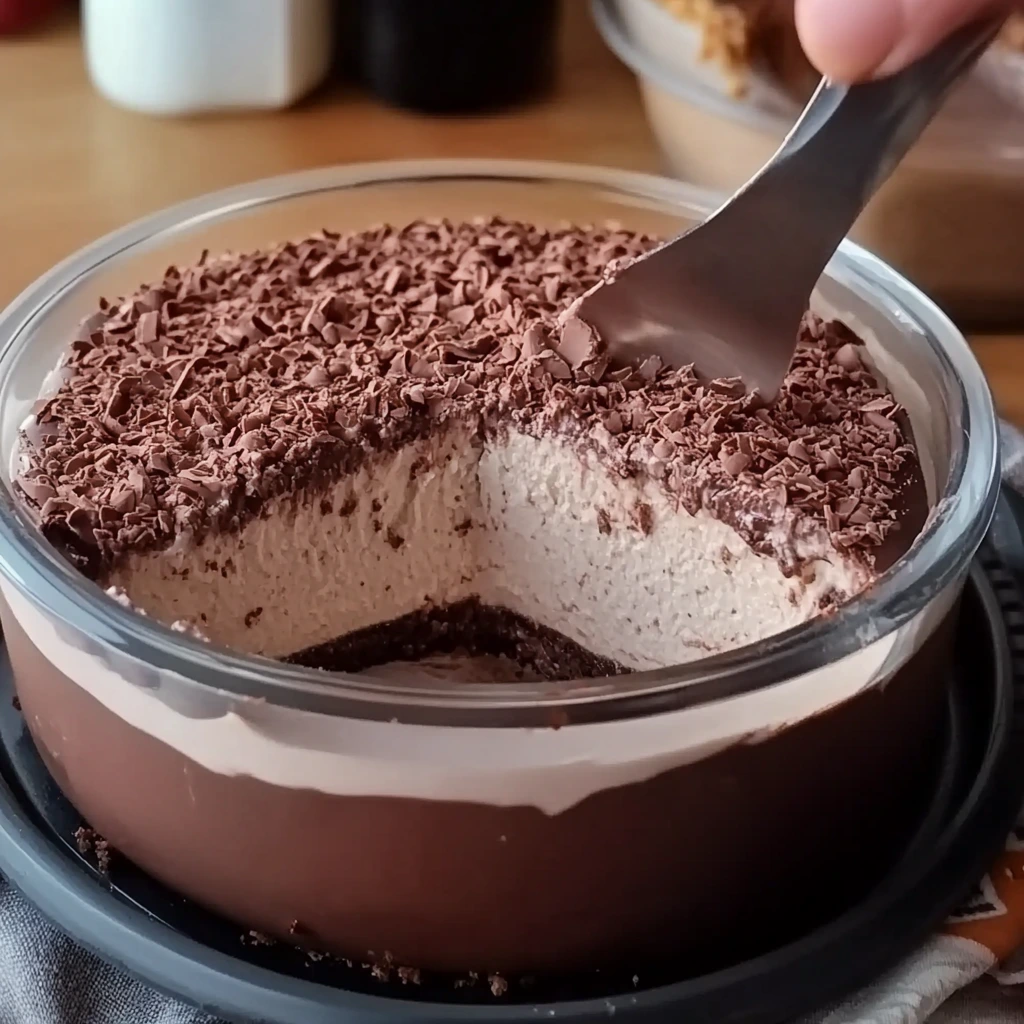
- Pour the Ganache: Remove the set cheesecake from the refrigerator. Slowly pour the cooled chocolate ganache over the top, ensuring it spreads evenly to cover the filling completely.
- Ensure Even Coverage: Use a spatula or tilt the dish gently to spread the ganache across the surface. Be careful not to disturb the filling underneath.
Final Chill:
- Return the cheesecake to the refrigerator and chill for an additional 20–30 minutes. This ensures the ganache firms up slightly for a smooth, sliceable texture.
- Cover loosely with plastic wrap to maintain its glossy finish without condensation forming on the surface.
For tips on achieving the perfect ganache consistency, check out this detailed guide. With this final step, your No-Bake Nutella Cheesecake is ready to impress, offering a perfect balance of creamy filling, crunchy crust, and rich ganache.
Adding the Ganache and Final Chill
The final step in creating your No-Bake Nutella Cheesecake is the decadent chocolate ganache topping. This glossy layer elevates both the flavor and presentation.
Step-by-Step Instructions:
- Pour the Ganache: Remove the cheesecake from the refrigerator. Slowly pour the cooled chocolate ganache over the top, starting from the center and working outward.
- Spread Evenly: Use an offset spatula or tilt the dish gently to ensure even coverage across the entire surface. Be careful not to let the ganache run over the sides unless that’s the desired effect.
Final Chill:
- Place the cheesecake back into the refrigerator for an additional 20–30 minutes. This allows the ganache to firm up, creating a smooth and sliceable finish.
- Cover loosely with plastic wrap to avoid moisture condensation while maintaining the glossy texture.
For tips on achieving a silky ganache, explore this guide. The chilled ganache sets beautifully, providing a rich, chocolatey topping that complements the creamy filling and crunchy crust. Your cheesecake is now ready to impress!
Serving Suggestions
The No-Bake Nutella Cheesecake is a showstopper dessert, perfect for any occasion. With its creamy texture and rich flavors, it’s best enjoyed with thoughtful presentation and pairings.
Ideal Serving Sizes:
- Slice the cheesecake into portions approximately 2 inches wide for a satisfying yet manageable serving size.
- A 1500ml dish typically serves 8–10 people, making it ideal for gatherings.
Complementary Garnishes:
- Add a dollop of whipped cream on each slice for extra indulgence.
- Garnish with fresh berries, such as strawberries or raspberries, to add a pop of color and a tart contrast to the sweetness.
- Sprinkle chopped hazelnuts or chocolate shavings on top for a decorative touch.
Beverage Pairings:
- Pair with a rich cup of coffee or espresso to complement the Nutella’s nutty notes.
- For a lighter option, serve with a glass of chilled milk or an iced latte.
For additional tips on dessert plating, check out this guide on creative garnishing. A well-presented cheesecake not only tastes amazing but also makes a lasting impression on your guests.
Storage and Shelf Life
To keep your No-Bake Nutella Cheesecake fresh and delicious, follow these storage tips:
Proper Storage:
- Cover the cheesecake tightly with plastic wrap or place it in an airtight container to prevent it from drying out or absorbing fridge odors.
Shelf Life:
- The cheesecake stays fresh for up to 4–5 days when stored in the refrigerator. Always keep it chilled to maintain its creamy texture.
Freezing Tips:
- To freeze leftovers, slice the cheesecake into individual portions and wrap each piece in plastic wrap, followed by aluminum foil. Place them in a freezer-safe container.
- Freeze for up to 2 months. Thaw in the refrigerator overnight before serving.
For more on proper dessert storage, refer to this helpful guide. With proper care, your cheesecake can be enjoyed long after it’s made, making it perfect for meal prep or future cravings!
Frequently Asked Questions (FAQs)
Can I use a different type of cookie for the crust?
Absolutely! Swap Oreo cookies with graham crackers, digestive biscuits, or any other cookie of your choice. Adjust the butter quantity slightly if the cookie is less moist than Oreos.
How can I make this cheesecake gluten-free?
Replace the Oreos with gluten-free cookies. Ensure the other ingredients, like Nutella and chocolate, are certified gluten-free.
Is it possible to substitute Nutella with another hazelnut spread?
Yes, you can use any hazelnut spread or even try almond or peanut butter for a different flavor profile. Ensure the consistency is similar to Nutella for best results.
What should I do if my cheesecake doesn’t set properly?
If your cheesecake is too soft, refrigerate it for a few more hours. For additional stabilization, consider adding gelatin. Check out this guide on gelatin use.
Can I add gelatin to stabilize the filling?
Yes, dissolve 1–2 teaspoons of gelatin in warm water and fold it into the filling before pouring it onto the crust. This step is optional but ensures a firmer texture.
How do I toast and chop hazelnuts for the topping?
Toast hazelnuts in an oven at 350°F for 8–10 minutes, then rub off the skins with a clean towel. Chop finely for the perfect garnish. Learn more here.
Can I make mini versions of this cheesecake?
Yes! Use muffin tins or small jars as containers. Follow the same layering process and reduce chilling time.
What variations can I try for different flavors?
Experiment with flavors like peanut butter, white chocolate, or fruit purees mixed into the filling for a creative twist.
Conclusion
The No-Bake Nutella Cheesecake is a masterpiece that combines creamy textures, rich flavors, and effortless preparation. Its Oreo crust, velvety Nutella filling, and glossy ganache make it a dessert that’s sure to impress. Whether you’re making it for a special occasion or a weeknight treat, this recipe delivers indulgence in every bite.
We encourage you to try this recipe, experiment with variations, and share your results. What toppings or twists will you add to make it your own? Let us know your experiences and tips—we’d love to hear how you’ve personalized this dessert!
PrintNo-Bake Nutella Cheesecake
A rich and creamy Nutella cheesecake made with an Oreo crust, velvety filling, and a decadent chocolate ganache topping. No baking required!
Ingredients
Base:
- 25 Oreo cookies (with cream)
- 5 tbsp butter, melted
Filling:
- 1 ½ cups cream cheese, softened
- ½ cup Nutella
- ¾ cup heavy whipping cream
Ganache:
- ¾ cup fresh cream
- ½ cup dark chocolate, chopped
- ½ cup roasted hazelnuts, chopped
Instructions
Instructions:
- Prepare the Base: Grind Oreos, mix with melted butter, and press into a dish. Chill.
- Make the Filling: Beat cream cheese and Nutella, fold in whipped cream, and spread over crust. Refrigerate for 8 hours.
- Prepare Ganache: Heat cream, mix with chocolate, and stir in hazelnuts. Pour over cheesecake. Chill 20 minutes.
- Serve and Enjoy: Slice and garnish as desired.
Notes
- Substitute Nutella with any hazelnut spread.
- Make gluten-free by using gluten-free cookies.
- Refrigerate overnight for the best texture.

