
Introduction to Banana Pudding Dessert Bars
When it comes to indulgent homemade treats, banana pudding dessert bars are definitely a standout choice. Imagine the sweet, creamy goodness of traditional banana pudding—layered with luscious vanilla custard and ripe bananas—but in a compact, easy-to-handle bar form. These delightful squares bring that nostalgic flavor right into your hands, making them perfect for both casual snacking and special occasions.
Why Banana Pudding Dessert Bars Are a Great Homemade Treat
There are several reasons why banana pudding dessert bars deserve a spot in your recipe rotation:
-
Simplicity: These bars are easy to make, even for kitchen novices. With just a few basic ingredients like bananas, vanilla pudding, and graham crackers, you’ll have a delightful dessert that doesn’t require advanced baking skills. You can find a great step-by-step guide on how to perfect the pudding technique at resources like Food Network or Bon Appétit.
-
Versatility: You can easily customize your banana pudding dessert bars. Want to add a layer of peanut butter? Go for it! Want to sprinkle some chocolate chips on top? Why not! The only limit is your imagination. This flexibility makes them suitable for various occasions—from casual get-togethers to birthday parties.
-
Perfect for Sharing: These bars are sliceable, making them easy to portion out and share with friends, family, or coworkers. Whether you're packing them for a picnic or hosting a get-together, they are always a hit.
-
Kid-Friendly: With their sweet, mild flavor and familiar ingredients, banana pudding dessert bars are sure to satisfy the taste buds of both kids and adults. They're a great way to introduce flavors to children without overwhelming them.
-
Make-Ahead Option: Another perk? They can be made a day ahead, allowing the flavors to meld together beautifully overnight. This makes them an ideal choice for busy hosts looking to impress without spending all day in the kitchen.
So, if you’re searching for a treat that’s sure to impress, give these banana pudding dessert bars a try! Your taste buds will thank you. Plus, you might just find a new favorite dessert to whip up for any occasion.
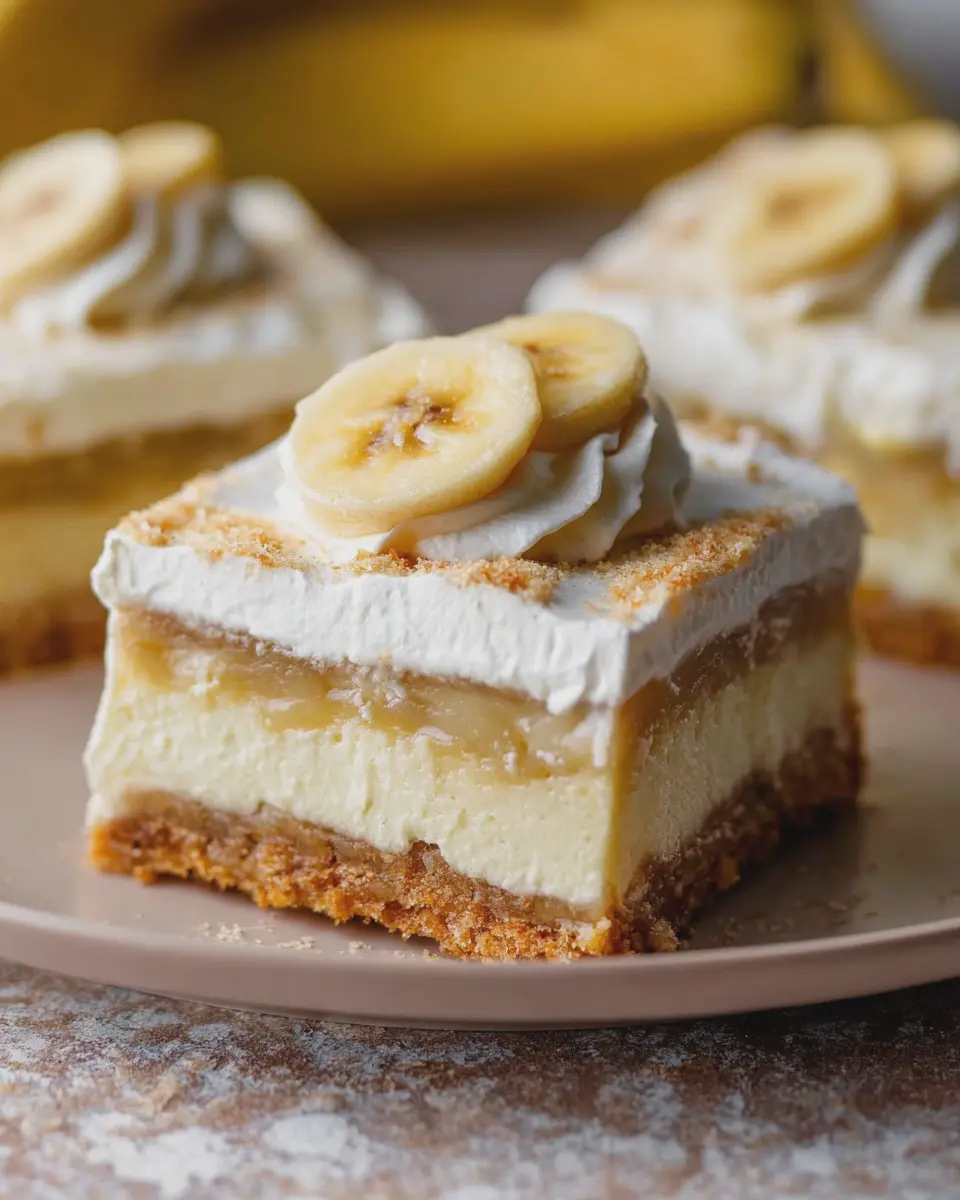
Ingredients for Banana Pudding Dessert Bars
Creating the perfect banana pudding dessert bars is all about the ingredients you choose. Let’s dive into what you’ll need to whip up this delectable treat!
Essential Ingredients
- Bananas: Use ripe but firm bananas for sweetness and texture—ideally around 3-4 medium ones.
- Vanilla Pudding Mix: A classic choice for that creamy flavor and smooth consistency—opt for instant mix for simplicity!
- Milk: Whole milk works wonders, adding richness to your pudding. Almond or oat milk can be great dairy-free alternatives.
- Graham Cracker Crumbs: These serve as the crust, bringing a delightful crunch. You can even use gluten-free varieties if needed.
- Heavy Cream: For that extra creaminess and to help your dessert bars hold together beautifully.
- Sugar: Regular granulated sugar sweetens your bars just right.
- Butter: A bit of melted butter adds richness to the crust.
Optional Add-ins
- Nuts: Chopped walnuts or pecans can add a fantastic crunch.
- Whipped Topping: For serving, some light whipped topping can elevate the flavor.
By combining these quality ingredients, you’ll set the stage for banana pudding dessert bars that your friends and family will rave about! Looking for more inspiration? Check out Bon Appétit for variations on classic desserts or ideas for mixing flavors.
Step-by-step Preparation of Banana Pudding Dessert Bars
Banana pudding dessert bars are a delightful twist on a classic dessert that’s simple to make and incredibly satisfying. Let's dive right into the preparation process, step by step, to ensure that you achieve dessert perfection!
Gather and Prepare the Ingredients
Before we start baking, it’s crucial to gather all your ingredients so that you have everything at your fingertips. Here’s what you will need:
-
For the crust:
-
2 cups of Nilla Wafers or a similar vanilla wafer cookie
-
½ cup of unsalted butter, melted
-
2 tablespoons of granulated sugar
-
For the filling:
-
2 ripe bananas, sliced
-
2 cups of whole milk
-
3.5 oz box of instant vanilla pudding mix
-
1 cup of whipped topping (or you can make your own!)
Ensure that your bananas are nicely ripe—this will enhance the flavor of your banana pudding dessert bars. Preparing your ingredients in advance simplifies the process and makes it more enjoyable!
Create the Nilla Wafer Crust
Now, let’s craft that delicious crust that will serve as the foundation for your bars:
- Preheat your oven to 350°F (175°C).
- In a food processor, pulse the Nilla Wafers until they become fine crumbs. If you don’t have a processor, you can place the cookies in a ziplock bag and crush them with a rolling pin.
- In a mixing bowl, combine the cookie crumbs, melted butter, and sugar. Stir until everything is well combined.
- Press the mixture evenly into the bottom of a greased 9x9-inch baking dish. Make sure to pack it tightly for a sturdy crust.
- Bake the crust for about 10 minutes, then let it cool while you prepare the filling.
Your crust should have that lovely golden hue! Did you know that using crushed Nilla Wafers not only provides an excellent flavor but also a unique texture that will elevate your dessert to the next level?
Layer the Banana Slices
Next, we’re going to add layers of banana goodness:
- Once your crust has cooled, evenly distribute the sliced bananas over the crust. Feel free to adjust the amount of banana to fit your taste; they’re the star of the show!
- You can even drizzle a bit of lemon juice over the bananas to prevent them from browning, but this is optional.
Take a moment to appreciate how beautiful those banana slices look against the crust—all those yellow tones are inviting and delicious!
Make the Creamy Pudding Filling
Here’s where the magic happens! It’s time to whip up that luscious pudding filling:
- In a large mixing bowl, whisk together the milk and instant vanilla pudding mix.
- Mix until it thickens, typically about 2-3 minutes.
- Gently fold in the whipped topping until everything is well-combined and smooth. This step adds a fluffiness to the pudding that’s simply irresistible.
The smooth, creamy filling will blend beautifully with the layers beneath it. You might even want to take a little taste test—totally justifiable for all your hard work!
Assemble the Bars and Chill
Now, it’s time to put everything together:
- Pour the creamy pudding filling over the banana slices, spreading it evenly to cover the entire surface.
- For a little extra flair, consider topping it with additional banana slices or crushed Nilla Wafers.
- Cover the baking dish with plastic wrap and refrigerate for at least 4 hours or, even better, overnight. This chilling time allows the flavors to meld beautifully.
The result? An irresistible treat that is sure to impress your friends and family. When it’s finally time to serve, cut into squares, and enjoy your homemade banana pudding dessert bars.
These bars are truly a delightful way to celebrate a sweet craving. Share the love—or not—because once you taste these, you might find it hard to share at all!
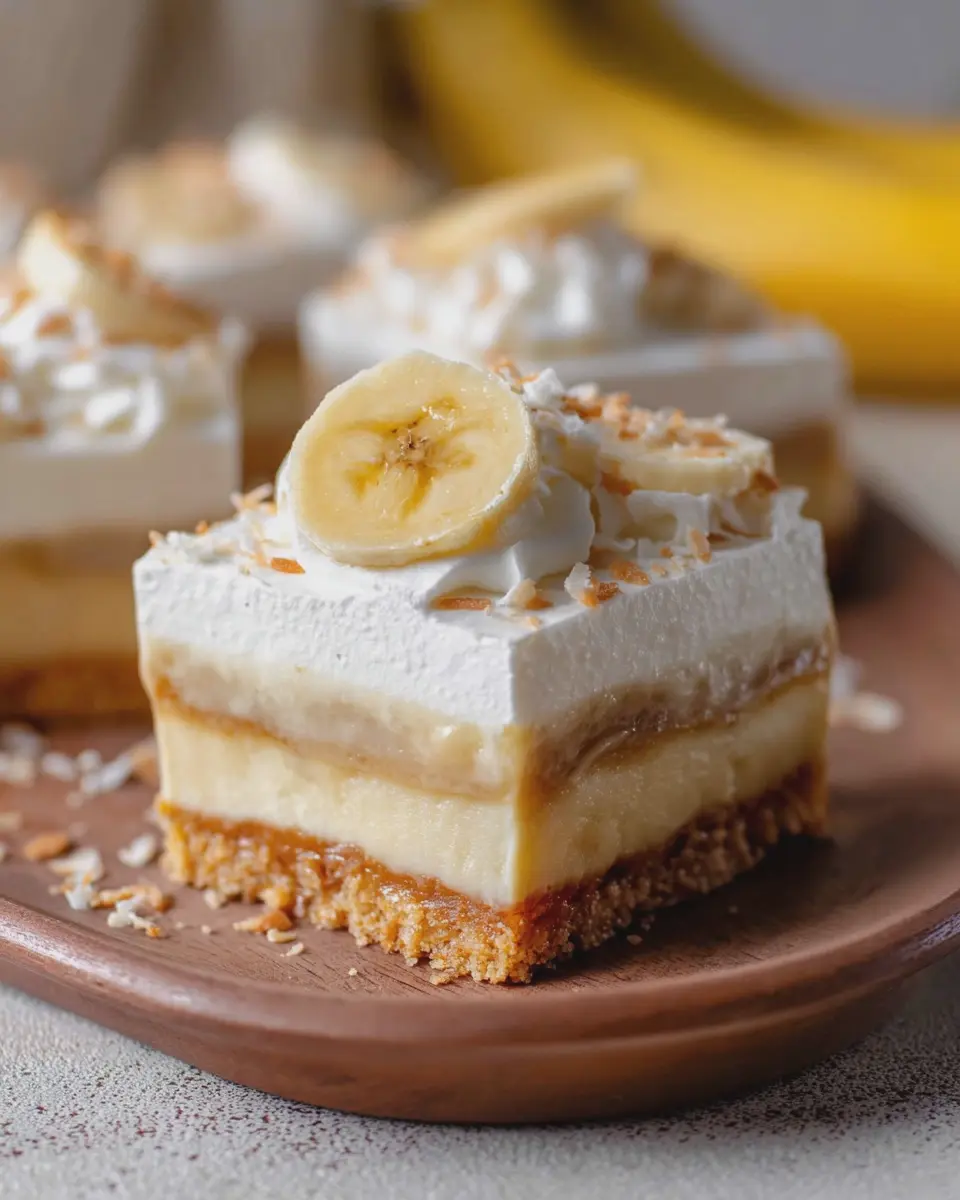
Variations on Banana Pudding Dessert Bars
Adding Different Fruits for a Twist
If you’re a fan of banana pudding dessert bars, why stop at just bananas? Consider mixing in various fruits to elevate your dessert game.
-
Strawberries: Fresh strawberries add a delightful touch of tartness while complementing the sweetness of bananas.
-
Mango: The tropical vibe of diced mango can transport your taste buds straight to the beach.
-
Blueberries: Consider a handful of blueberries for a burst of color and an antioxidant kick.
Don’t be afraid to experiment! Just remember to adjust the sweetness level of your pudding or whipped cream accordingly. For even more inspiration, check out this fruit pairing guide from Better Homes and Gardens.
Exploring Alternative Crust Options
While the classic graham cracker crust is a delicious choice, alternatives can deepen the flavor and create new textures in your banana pudding dessert bars. Here are some ideas:
-
Oreo Crust: Ground Oreo cookies give a rich, chocolaty base that contrasts beautifully with the creamy vanilla layers.
-
Almond Flour Crust: For a gluten-free option, try using almond flour mixed with a little coconut oil as a clean, healthy alternative.
-
Shortbread Crust: This buttery crust adds a rich flavor and pairs perfectly with the creamy filling.
Each crust option transforms the dessert into a unique experience, so choose based on what flavors excite your palate. It’s these little tweaks that keep your dessert versatile and inviting! Why not gather some friends and have a taste test?
Cooking Tips and Notes for Banana Pudding Dessert Bars
Creating delicious banana pudding dessert bars can be a fun and rewarding kitchen project! Here are some tips to help you nail this sweet treat.
Use Ripe Bananas
Selecting the right bananas is key. Look for bananas that have a few brown spots for maximum sweetness and flavor. Overripe bananas really enhance the taste of your pudding.
Layering for Flavor
Don’t rush the layering process! Allow your pudding to set for a bit before topping it with the vanilla wafers and sliced bananas. This helps to create a beautiful and textured finish, making each bar visually appealing.
Experiment with Toppings
Feel free to get creative with your toppings! Crushed vanilla wafers, a sprinkle of cocoa powder, or even a drizzle of caramel sauce can add an exciting twist to your banana pudding dessert bars.
Storage Tips
For the best texture, store your dessert bars in the refrigerator. They are best enjoyed chilled, and storing them properly can keep them fresh for several days.
If you’re looking for further inspiration, check out thekitchn.com for more dessert ideas! Happy baking!
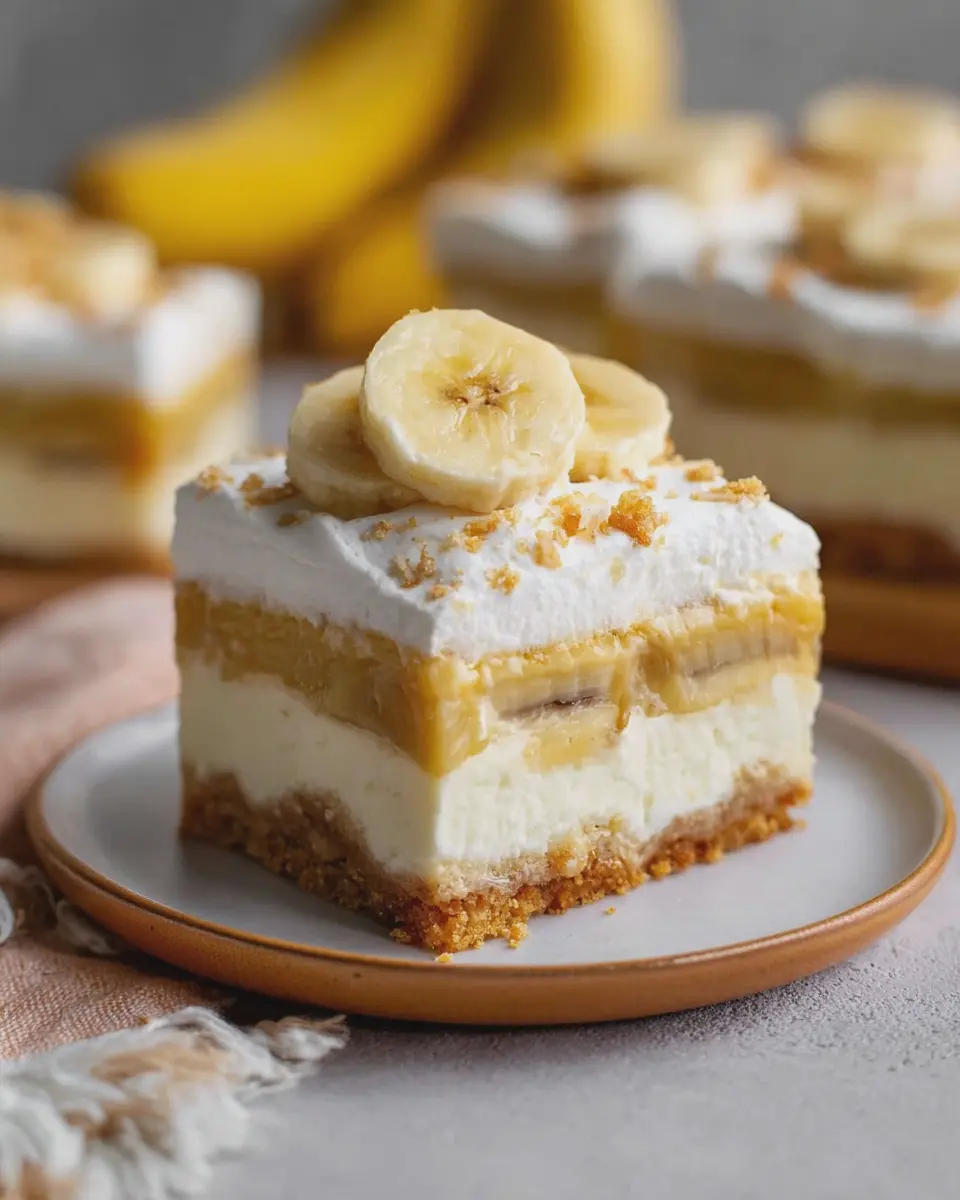
Serving Suggestions for Banana Pudding Dessert Bars
When it comes to enjoying your banana pudding dessert bars, the possibilities are wonderfully endless! These bars are not only a delicious treat but versatile enough to suit a variety of occasions. Here are some fun serving suggestions to elevate your dessert experience:
Personal Touch with Toppings
To give your banana pudding dessert bars a little flair, consider these tasty toppings:
- Crushed Nilla wafers for that crunchy texture
- A dollop of whipped cream for added creaminess
- Sliced fresh bananas to enhance that rich banana flavor
- A sprinkle of cinnamon or nutmeg for a warm spice touch
Perfect Pairings
Your dessert bars can shine even brighter when paired with complementary flavors. Try serving them with:
- A side of creamy vanilla ice cream
- A refreshing fruit salad, sourced from seasonal fruits
- Fresh brewed coffee or tea to balance the sweetness
Ideal Serving Occasions
Whether it’s a casual get-together, holiday feast, or a light brunch, these banana pudding dessert bars can be the star of the show. Their simplicity yet indulgent taste makes them a favorite among both guests and hosts! Think about making them for your next party or picnic — they're sure to impress!
For more inspiration and recipe ideas, check out Bon Appétit's dessert section or Food Network's dessert offerings.
Time Breakdown for Banana Pudding Dessert Bars
When you’re ready to whip up these delicious banana pudding dessert bars, it’s essential to know how to manage your kitchen time. Here’s a quick look at the time needed for each stage of the process:
Preparation time
Get your mixing bowls and ingredients ready! The prep time for these bars is about 15 minutes. You’ll be combining crushed cookies, ripe bananas, and creamy pudding—all the good stuff!
Chilling time
After mixing, patience is key. Allow your banana pudding dessert bars to chill in the fridge for at least 2 hours. This step helps the flavors meld together and sets the dessert perfectly.
Total time
In total, you’re looking at approximately 2 hours and 15 minutes. Not too shabby for a treat that's sure to impress your friends—perfect for a cozy gathering or a potluck.
Ready to make these delightful bars? Check out more tips and tricks on dessert preparation with resources from Allrecipes or Food Network for additional insights!
Nutritional Facts for Banana Pudding Dessert Bars
Calories per serving
When indulging in banana pudding dessert bars, it's good to keep an eye on the calories. Each bar contains approximately 200 calories, making it a delightful sweet treat that won't wreck your healthy eating goals. Perfect for a snack or even as a mini dessert after dinner!
Key nutrients
These bars pack a flavorful punch while serving up essential nutrients:
- Carbohydrates: Around 30g, providing energy to fuel your day.
- Protein: About 3g, which helps with muscle repair and satiety.
- Fats: Roughly 8g, mostly from the added oils or butters, giving that rich, creamy texture.
- Vitamins: Rich in vitamin C and potassium from bananas—great for overall health!
With banana pudding dessert bars, you're not just enjoying a delicious treat but also nourishing your body. For more information on the health benefits of bananas, check out this nutrition guide. Enjoy these bars guilt-free and in moderation!
FAQs about Banana Pudding Dessert Bars
Can I make these bars ahead of time?
Absolutely! One of the best things about banana pudding dessert bars is that they actually improve in flavor when made ahead of time. To get the best results, I recommend preparing them a day in advance. This allows the flavors to meld beautifully. Just make sure to store them in an airtight container in the refrigerator until you're ready to serve.
How do I store leftovers?
Storing leftovers of your delicious banana pudding dessert bars is quite simple! Here’s how to do it:
- Refrigerate: Place the bars in an airtight container to keep them fresh. They should last up to 3–5 days.
- Freeze: If you want to keep them longer, you can freeze the bars. Wrap them individually in plastic wrap and place them in a freezer-safe container. They can be kept in the freezer for about 2–3 months. Just make sure to let them thaw in the fridge overnight before enjoying again.
Are there any gluten-free options?
If you or your guests are following a gluten-free diet, you're in luck! You can easily make banana pudding dessert bars gluten-free by choosing gluten-free cookies for the crust. There are many excellent gluten-free cookie options available, such as almond flour cookies or gluten-free vanilla wafers. Always double-check the labels to ensure everything is certified gluten-free.
Have more questions or need tips? Check out this helpful guide on gluten-free baking for more information. Enjoy baking and indulging in your banana pudding dessert bars!
Conclusion on Banana Pudding Dessert Bars
In summary, banana pudding dessert bars are a delightful twist on a beloved classic, perfect for any occasion. Their creamy layers of pudding and banana, paired with a crunchy crust, make them a crowd-pleaser at picnics and gatherings. Whether you’re serving them up for a casual get-together or a celebratory feast, these bars are sure to impress.
For a twist, try swapping ingredients: consider using turkey bacon for a savory contrast or adding your favorite nuts for extra crunch! Don't hesitate to experiment with flavors. After all, sometimes the best desserts come from a little creativity in the kitchen. Enjoy every bite!
PrintBanana Pudding Dessert Bars: Easy Indulgence for Any Occasion
Delight in these easy-to-make Banana Pudding Dessert Bars, perfect for any gathering or sweet craving.
- Prep Time: 15 minutes
- Cook Time: 25 minutes
- Total Time: 40 minutes
- Yield: 12 servings 1x
- Category: desserts
- Method: baking
- Cuisine: American
- Diet: vegetarian
Ingredients
- 1 cup mashed bananas
- 1 cup vanilla pudding mix
- 2 cups milk
- 1 cup whipped topping
- 1 cup crushed Nilla wafers
- 2 tablespoons fresh lemon juice
Instructions
- Preheat the oven to 350°F (175°C).
- In a large bowl, mix the mashed bananas with lemon juice.
- In another bowl, whisk together the vanilla pudding mix and milk until smooth.
- Fold in the whipped topping into the pudding mixture and then combine with the banana mixture.
- In a baking dish, layer the crushed Nilla wafers, followed by the banana pudding mixture.
- Bake for 25 minutes or until set.
- Allow to cool and chill before serving.
Notes
- For extra flavor, add a pinch of cinnamon to the banana mixture.
- Use fresh bananas for the best texture and taste.
Nutrition
- Serving Size: 1 bar
- Calories: 150
- Sugar: 10g
- Sodium: 100mg
- Fat: 5g
- Saturated Fat: 2g
- Unsaturated Fat: 3g
- Trans Fat: 0g
- Carbohydrates: 22g
- Fiber: 1g
- Protein: 2g
- Cholesterol: 10mg
Keywords: banana pudding, dessert bars, easy dessert

Leave a Reply