
Introduction to Baked Cheesy Beef Wrap Pockets
If you're looking for a delicious, easy-to-make meal that fits seamlessly into your busy lifestyle, let me introduce you to baked cheesy beef wrap pockets. These delightful wraps combine tender beef, gooey cheese, and a flavorful filling all encased in a perfectly baked pocket. As a young professional, it can be challenging to find time to cook while managing work, social life, and personal commitments. That’s where these wrap pockets come in handy!
Why Baked Cheesy Beef Wrap Pockets are Perfect for Young Professionals?
Let's face it: life can get hectic. You may know the struggle of coming home after a long day at work, only to face a seemingly endless decision about what to make for dinner. Enter baked cheesy beef wrap pockets! They are not only quick to whip up but also offer versatility that suits any palate. You can easily customize the fillings based on what you have at home, or try experimenting with different spices to match your mood—who doesn't love a little variety?
Here are some reasons why these wraps are a go-to choice for many:
-
Quick Preparation: In less than 30 minutes, you can prep, bake, and enjoy these delicious pockets. This makes them perfect for busy weeknights or meal prepping for the week ahead.
-
Satisfying Flavor: The combination of beef and cheese creates a rich, mouthwatering flavor that's hard to resist. Plus, they make for hearty snacks or delightful dinners.
-
Easy Cleanup: With everything baked in a single wrap, cleanup is a breeze. Just one baking sheet and a few utensils are all you’ll need.
-
Great for Leftovers: Not only do these wraps reheat well, but they also make fantastic lunch options. You can pack them for the office or enjoy them at home without sacrificing taste.
Want to know more about the benefits of meal prepping? Check out this meal planning guide for tips that can complement your cooking during busy workweeks.
Next time you find yourself in the kitchen, remember that baked cheesy beef wrap pockets are a perfect companion in your culinary adventures! Whether you're hosting friends or treating yourself to a cozy meal, these wraps are guaranteed to please.
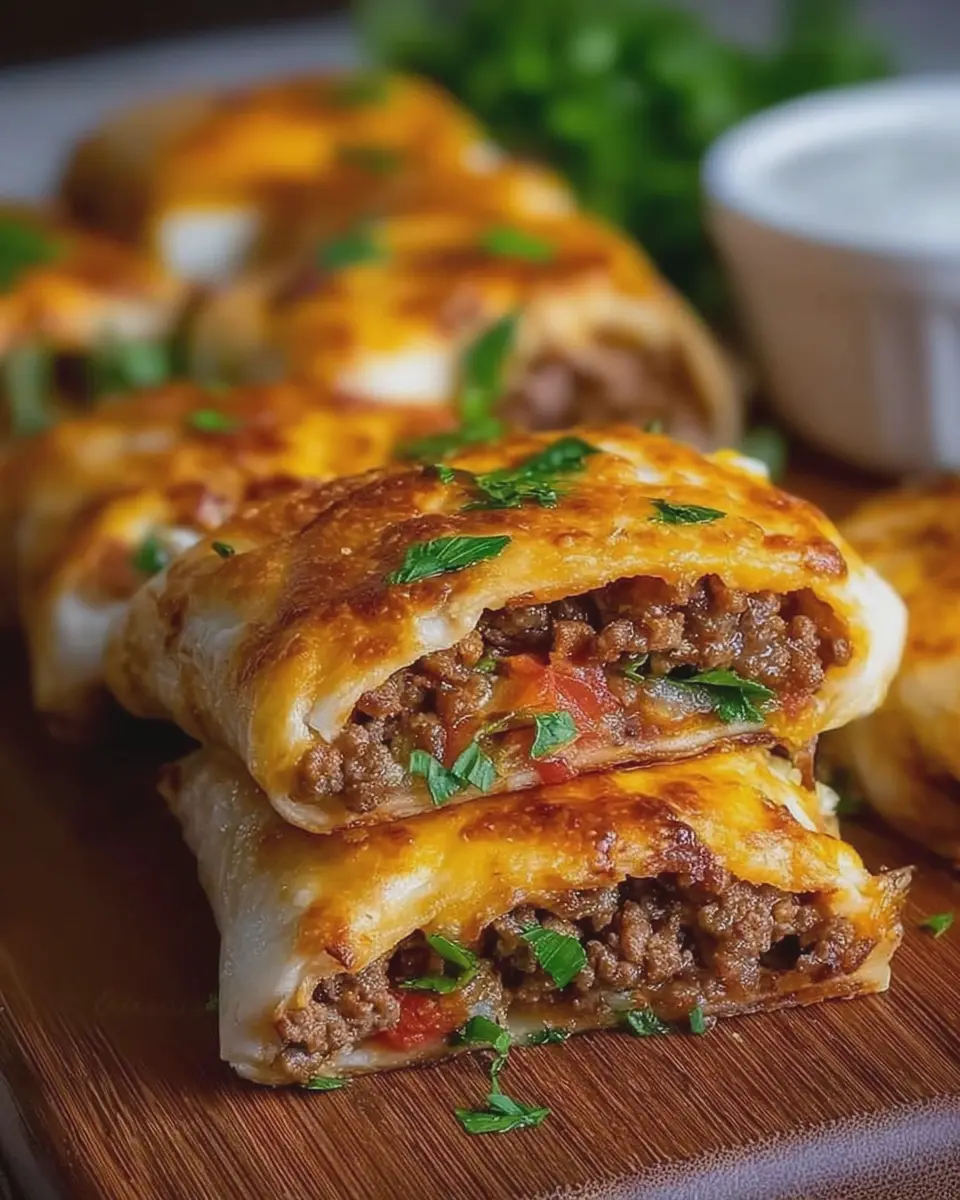
Ingredients for Baked Cheesy Beef Wrap Pockets
Creating the perfect Baked Cheesy Beef Wrap Pockets involves gathering some flavorful and easy-to-find ingredients. Here’s a list to get you started:
- Ground Beef: Aim for lean ground beef, which makes the wrap pockets hearty without being overly greasy.
- Turkey Bacon: For that smoky flavor, chopped turkey bacon adds a delightful twist. It’s a healthier option that pairs perfectly with the beef.
- Chicken Ham: This adds a delicious, savory touch and complements the beef like a charm. Look for lower-sodium options for a guilt-free meal.
- Cheddar Cheese: Grated cheddar gives that ooey-gooey texture we all crave. Feel free to mix it with other cheeses like mozzarella for added creaminess.
- Tortilla Wraps: Soft flour tortillas work best for wrapping but feel free to experiment with whole wheat for extra nutrients.
- Spices: Don’t forget some chili powder, garlic powder, and black pepper to kick things up a notch.
These ingredients not only enhance the flavor but also contribute to a satisfying meal. If you’re seeking alternatives to ground beef, consider checking out this resource on protein swaps. They may inspire some tasty variations!
Preparing Baked Cheesy Beef Wrap Pockets
Let's get those taste buds tingling! Baked cheesy beef wrap pockets make for a delicious, hearty meal that's just perfect for busy weeknights or casual get-togethers. With a crispy outside and cheesy, savory filling, these pockets are bound to become a family favorite. Ready to dive in? Here’s how to prepare them step by step.
Preheat and Prepare Your Baking Dish
First things first, let’s get your kitchen ready. Preheat your oven to 375°F (190°C). This step is essential because a hot oven will give you that perfect golden crust we all crave. While the oven warms up, grab a baking dish — I recommend a 9x13 inch one for this recipe. Lightly grease the dish with some cooking spray or a drizzle of olive oil to ensure nothing sticks to the bottom.
If you’re like me, you probably have a few favorite baking dishes piled up in your pantry. Feel free to use one that’s been a trusted friend in the kitchen!
Brown the Beef and Onion
In a large skillet, heat 1 tablespoon of oil over medium heat. Add about a pound of ground beef (lean is preferable) and a chopped onion. This duo is where the magic begins — the beef provides that rich protein punch while the onions add a savory sweetness.
Sauté the mixture for about 7-10 minutes, stirring occasionally. The beef should be fully cooked and browned, while the onions soften to release their wonderful flavor. If you want to spice things up, consider tossing in some diced garlic or bell peppers for an extra kick. According to the USDA, browning ground beef properly not only heightens the flavor, but it also helps in creating a safe meal.
Season the Beef Mixture
Once your beef and onions are sizzling beautifully, it’s time to season the blend. Sprinkle in some salt, pepper, and taco seasoning to taste. You can make your own seasoning blend at home, or opt for a store-bought one for convenience. I often add a pinch of cumin and chili powder for that extra flavor boost — trust me, it makes a difference!
Incorporating spices can turn a simple dish into something extraordinary, and it’s a great way to customize based on your preferences. Want to learn more about spices? Check out this guide on flavor profiles.
Fill the Tortillas
Now for the fun part: filling those tortillas! You’ll want to use large flour tortillas since they are easier to wrap around the filling. Lay each tortilla flat, and scoop in about ⅓ cup of the beef mixture, followed by a generous sprinkle of cheese. I recommend using a mix of cheddar and Monterey Jack for a perfect melty experience.
As you fill each tortilla, remember to leave some space at the edges. This will make rolling easier and minimize any spillage while baking.
Roll and Arrange in the Baking Dish
Starting from one end, roll each tortilla tightly to create a pocket. Place the seam side down in your greased baking dish. Make sure they’re snug but not overcrowded; you want to give the toppings room to crisp up. This is also a good moment to admire your handiwork!
Feel free to vary the arrangement by adding a few additional toppings, like diced jalapeños or black beans, depending on what you're craving.
Brush with Garlic Butter and Bake
To take your baked cheesy beef wrap pockets to the next level, let's not forget the garlic butter. In a small bowl, combine melted butter with a clove of minced garlic (or garlic powder) and whisk it together. Brush this mixture generously over the tops of the pockets for that rich, savory finish.
Pop your dish into the preheated oven and let them bake for about 20-25 minutes, or until they’re golden brown and crispy. Your kitchen will fill with a mouth-watering aroma — just be careful not to burn your hands when you pull them out!
Serving the baked cheesy beef wrap pockets with salsa or a fresh salad makes for an even happier mealtime. Who's ready to dig in?
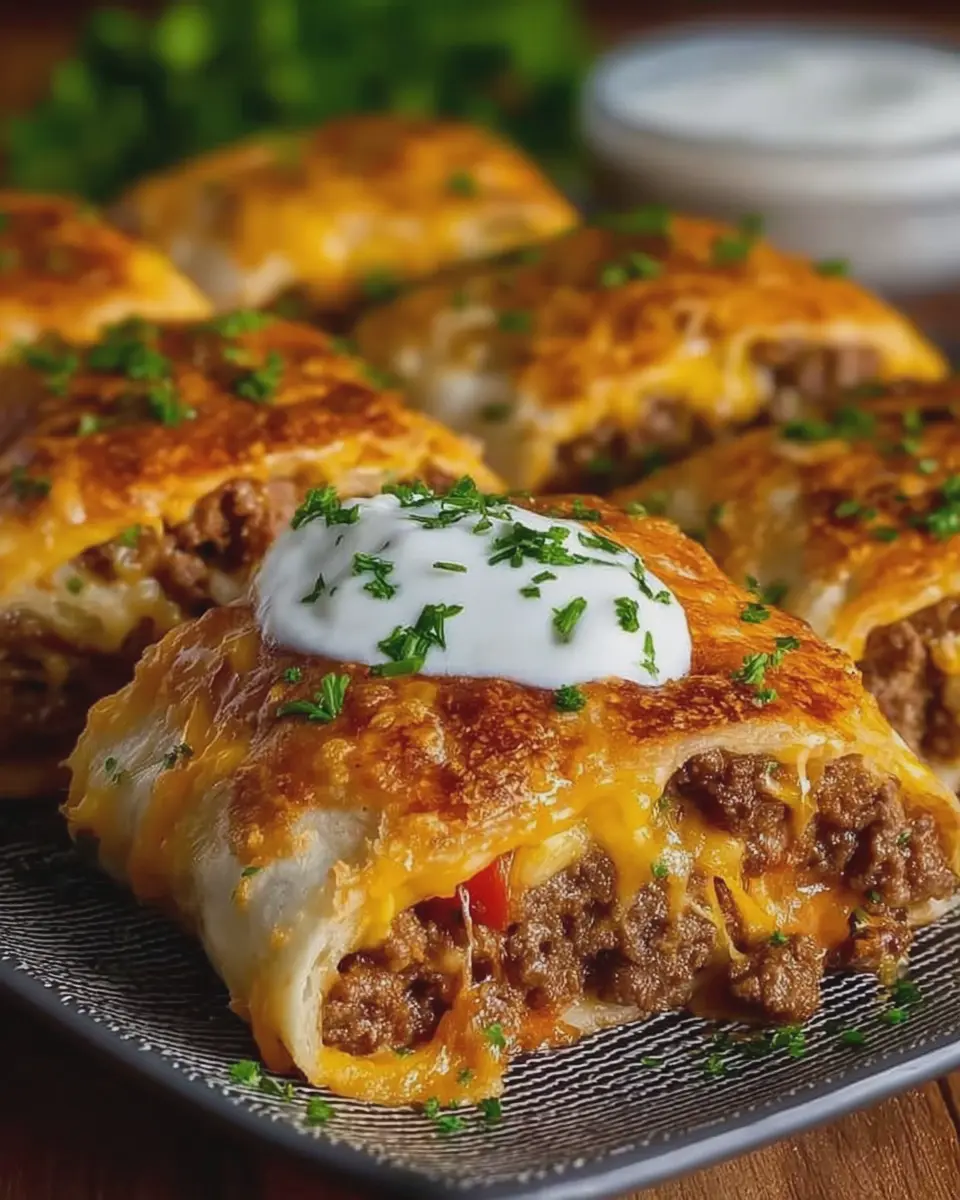
Variations on Baked Cheesy Beef Wrap Pockets
Who doesn’t love a delicious, portable snack? While the standard baked cheesy beef wrap pockets are a hit, let’s explore a couple of creative variations that are just as delightful. These alternatives cater to different dietary preferences and spice levels, making them perfect for family gatherings or a cozy night in.
Vegetarian Version with Beans and Cheese
If you want to lighten things up a bit, why not try a vegetarian take on these scrumptious pockets? Swap out the beef for a mix of black beans and pinto beans for that hearty texture. Combine these with shredded cheese, diced tomatoes, and a hint of cumin for a flavor punch. Rolled up in the same buttery wrap, they’re just as filling and satisfying!
- Ingredients:
- 1 cup black beans
- 1 cup pinto beans
- 1 cup shredded cheese (like cheddar or Monterey Jack)
- 1 diced tomato
- Tip: Serve with a side of guacamole or salsa for a delightful dip!
Spicy Twist with Jalapeños and Pepper Jack Cheese
For those who like to turn up the heat, try adding jalapeños and pepper jack cheese to your baked cheesy beef wrap pockets. Not only will it add flavor, but the spiciness can really amp up the taste profile of your pockets.
- Ingredients:
- 1 diced jalapeño (seeds removed for less heat)
- 1 cup pepper jack cheese
- A pinch of chili powder
- Suggestion: Pair with a refreshing drink like iced tea or lemonade to balance the heat!
These variations not only provide alternative tastes but also keep the spirit of the classic baked cheesy beef wrap pockets intact! For more exciting meal ideas, check out resources like Taste of Home for more inspiration. Happy cooking!
Cooking tips and notes for Baked Cheesy Beef Wrap Pockets
Tips for browning beef perfectly
To make the most of your baked cheesy beef wrap pockets, start with quality ground beef. Use a skillet that’s preheated and hot—this helps sear the meat quickly, locking in those juicy flavors. Break the beef up as it cooks and resist the urge to overcrowd the pan; this allows the meat to brown rather than steam. Aim for a nice golden-brown color, which enhances the overall flavor. For extra depth, consider adding minced garlic or chopped onions during the browning process.
Notes on tortilla sizes and types
When it comes to tortillas, size matters! Opt for larger tortillas (10-12 inches) to fill them generously without risking rupture. Flour tortillas tend to hold up best and have a delightful chewiness when baked, while corn tortillas add a unique flavor. If you’re feeling adventurous, try whole wheat or spinach tortillas for a twist. They not only look great, but they also add a nutritional boost. Remember to warm the tortillas before filling them; this makes them more pliable and less likely to crack.
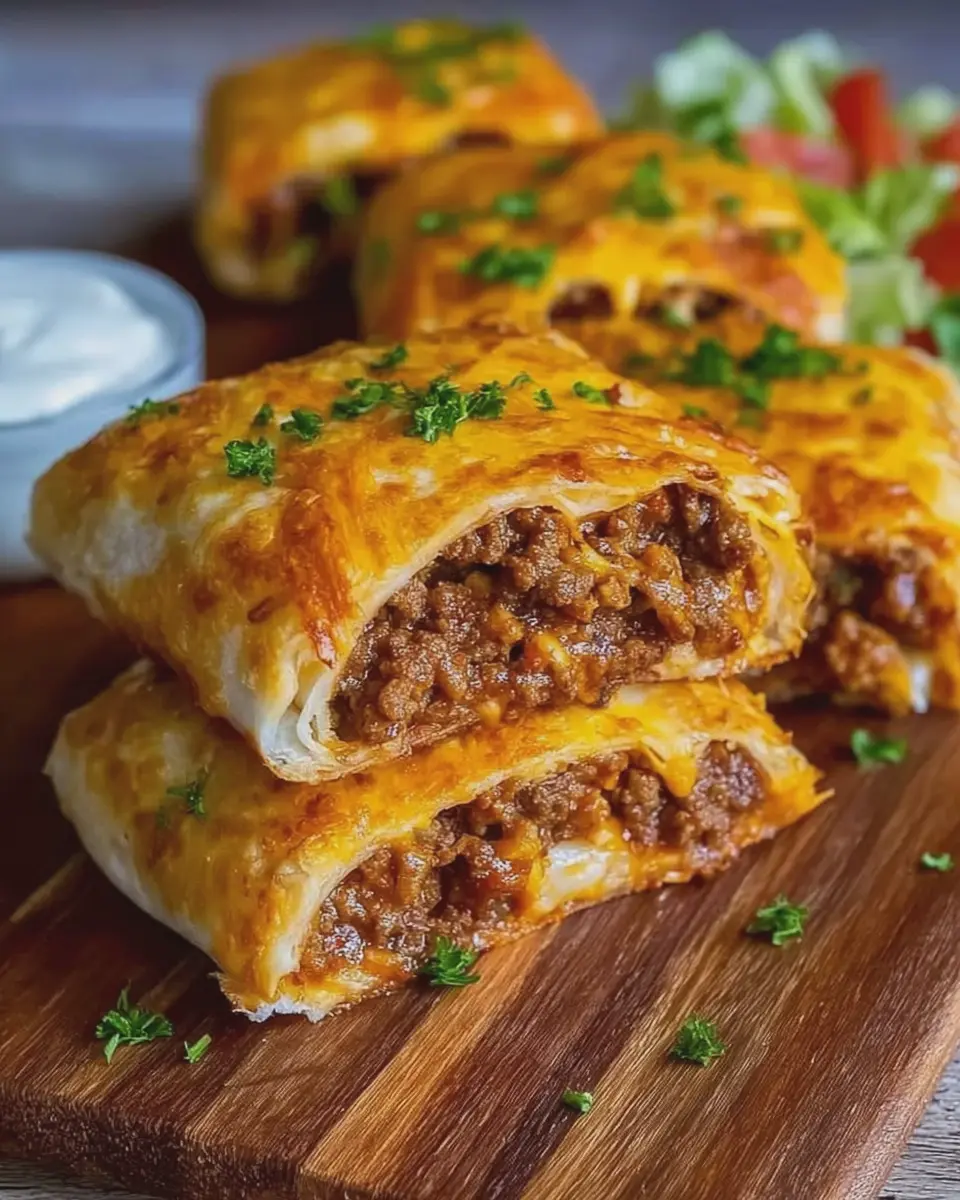
Serving suggestions for Baked Cheesy Beef Wrap Pockets
Dipping sauces to enhance flavor
Elevate your baked cheesy beef wrap pockets by pairing them with delicious dipping sauces that complement their rich flavors. Here are a few suggestions:
- Spicy Sriracha Mayo: A simple mix of mayonnaise and sriracha adds a tangy kick.
- Creamy Avocado Dip: Whip up a refreshing avocado dip with Greek yogurt, lime juice, and garlic for a creamy contrast.
- Garlic Butter Sauce: Melted garlic butter is perfect for that heartwarming, savory squirt.
Want to spice things up further? Consider making a zesty salsa or a sweet chili sauce that’ll thrill your taste buds!
Ideas for side dishes to serve with
Round out your meal with some tasty side dishes that pair well with baked cheesy beef wrap pockets:
- Fresh Garden Salad: Crisp greens drizzled with a lemon vinaigrette can brighten up your plate.
- Sweet Potato Fries: These add a hint of sweetness while still being hearty enough to satisfy.
- Steamed Vegetables: Broccoli, carrots, or bell peppers make for a colorful, nutritious addition.
Looking for more ideas? Check out this comprehensive list of side dishes from Epicurious. Each one brings a unique flair to your meal, ensuring you’ll leave the table satisfied!
Time breakdown for Baked Cheesy Beef Wrap Pockets
Preparation time
Getting started on your Baked Cheesy Beef Wrap Pockets doesn’t take long! You’ll want about 15-20 minutes to gather ingredients, chop your veggies, and mix everything together. Having a designated prep area makes this process flow smoothly.
Cooking time
Once your pockets are assembled, the magic happens in the oven. Expect around 25-30 minutes of cooking time, allowing the flavors to meld beautifully while achieving that perfect golden crust.
Total time
All said and done, you’re looking at about 40-50 minutes from start to finish. Not too shabby for a delicious, homemade meal that will surely impress your guests or satisfy a hungry solo night in! For inspiration, check out trusted sources like the Food Network for tips on meal prep.
Nutritional Facts for Baked Cheesy Beef Wrap Pockets
When it comes to enjoying a delicious meal like Baked Cheesy Beef Wrap Pockets, knowing the nutritional content can help you savor every bite guilt-free. Here’s a quick rundown of what you’ll find in each serving:
Calories
Each Baked Cheesy Beef Wrap Pocket contains approximately 320 calories. This makes it a reasonable option for a satisfying lunch or dinner without going overboard on calories.
Protein
With about 18 grams of protein per pocket, these wraps are a great choice for anyone looking to fuel their day. Protein plays a crucial role in muscle repair and energy, making this a smart option for post-workouts.
Sodium
One area to keep an eye on is sodium, as a single wrap has about 700 milligrams. If you’re watching your salt intake, consider pairing these pockets with a fresh salad or low-sodium dipping sauce to balance things out.
For more insights on healthy eating, check out resources like the American Heart Association or the USDA Nutrition site to learn how to create balanced meals.
FAQ about Baked Cheesy Beef Wrap Pockets
Can I make these wrap pockets in advance?
Absolutely! Baked cheesy beef wrap pockets are perfect for meal prepping. You can assemble them ahead of time and store them in the refrigerator for up to 24 hours before baking. If you want them to last even longer, consider freezing them unbaked. Just wrap them tightly in plastic wrap or place them in an airtight container. When you're ready to enjoy them, simply bake straight from the freezer, adding a few extra minutes to the cooking time.
What’s the best way to store leftovers?
Leftovers of your delicious baked cheesy beef wrap pockets can be stored in the fridge for 3 to 4 days. To keep them fresh, place them in an airtight container. If you find that they become a bit soggy in the fridge, you can reheat them in the oven for a few minutes to regain their crispy texture. For long-term storage, these pockets can also be frozen. Just label them with the date, and they should be good for up to three months. Need some tips on reheating? Check out this helpful guide!
Can I substitute ground beef with turkey or chicken?
Definitely! You can easily swap out ground beef for ground turkey or chicken in these wrap pockets. Both options offer a lighter alternative while still being packed with flavor. Just be mindful that turkey or chicken might need different seasoning or cooking times, so adjust accordingly based on your preferences. Experiment and find your favorite version!
Conclusion on Baked Cheesy Beef Wrap Pockets
In summary, baked cheesy beef wrap pockets are not just a delicious meal; they're a convenient and fun way to bring friends and family together. With their crispy exterior and savory filling, these wraps can easily become a weeknight staple. Plus, the addition of Turkey bacon and Chicken ham elevates the flavor while keeping it versatile.
Whether you're winding down after a long day or entertaining guests, these pockets are sure to impress. Try customizing them with various fillings or dipping sauces for a fun twist. Ready to embrace the deliciousness? Your taste buds will thank you! For more tips on baking and flavor combinations, check out Food Network or Serious Eats.
PrintBaked Cheesy Beef Wrap Pockets: Easy Comfort Food Delight

Baked Cheesy Beef Wrap Pockets are the ultimate comfort food, featuring seasoned beef wrapped in a cheesy delight, perfect for a quick meal.
- Prep Time: 10 minutes
- Cook Time: 20 minutes
- Total Time: 30 minutes
- Yield: 4 servings 1x
- Category: Main Course
- Method: Baking
- Cuisine: American
- Diet: Gluten-Free
Ingredients
- 1 pound ground beef
- 1 teaspoon garlic powder
- 1 teaspoon onion powder
- 1 cup shredded cheddar cheese
- 4 large flour tortillas
- ½ cup salsa
- 1 tablespoon olive oil
- ½ teaspoon salt
- ½ teaspoon black pepper
Instructions
- Preheat the oven to 375°F (190°C).
- In a skillet, heat olive oil over medium heat. Add ground beef, garlic powder, onion powder, salt, and pepper, cooking until browned.
- Stir in salsa and cheddar cheese until the cheese is melted.
- Place a generous amount of the meat mixture on each tortilla and wrap tightly.
- Place the wrapped tortillas seam-side down on a baking sheet.
- Bake for 15-20 minutes, until golden brown.
Notes
- For extra flavor, add diced bell peppers or jalapeños to the beef mixture.
- Serve with additional salsa or sour cream on the side.
Nutrition
- Serving Size: 1 wrap
- Calories: 350
- Sugar: 2g
- Sodium: 600mg
- Fat: 22g
- Saturated Fat: 10g
- Unsaturated Fat: 8g
- Trans Fat: 0g
- Carbohydrates: 30g
- Fiber: 2g
- Protein: 20g
- Cholesterol: 70mg
Keywords: Baked Cheesy Beef Wrap Pockets

Leave a Reply