
Introduction
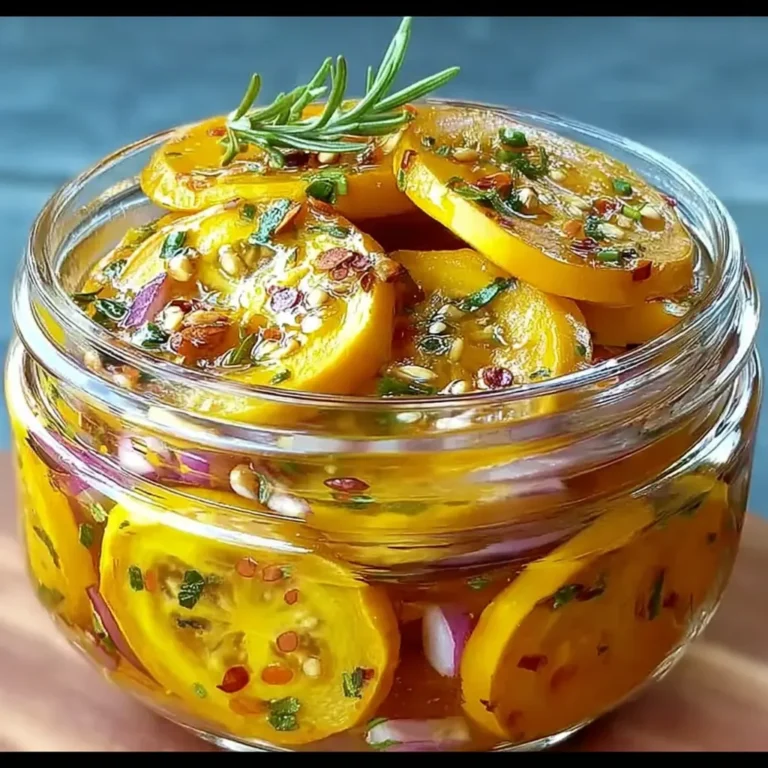
If you’re staring down a garden surplus of yellow squash, there’s one tasty solution that’s both satisfying and smart: Sweet and Tangy Yellow Squash Pickles. These crisp pickles are the perfect way to savor summer long after the harvest ends.
They combine the bright, sunny flavor of yellow squash with a sweet vinegar brine that’s spiced just right, creating a pickle that’s both zesty and refreshing. You’ll love the crunchy texture and bold flavor — a delicious contrast on burgers, a vibrant addition to cheese boards, or a standout side on a barbecue plate. Whether you’re into quick refrigerator pickles or want to explore water bath canning, this recipe is a foolproof way to put your produce to good use and preserve the flavor of summer.
Why Pickle Yellow Squash?
- Make the most of bumper crops: Summer gardens often overflow with yellow squash, and pickling is an ideal way to use it all without waste.
- Better than zucchini in pickles: While zucchini gets mushy fast, yellow squash maintains a firmer bite and a more vibrant golden color when pickled — a fact supported by guides like The Full Helping and Serious Eats.
- Nutritional bonus: Yellow squash is rich in vitamins A and C, low in calories, and high in hydration. When pickled with natural vinegar, it may also support digestive health by introducing beneficial acids and probiotic effects, especially when stored cold.
According to the National Center for Home Food Preservation (NCHFP), yellow squash is not only safe to pickle — it’s a flavorful choice with flexibility for both quick use and long-term canning.
Quick Pickles vs. Canning
Understanding the difference between quick refrigerator pickles and traditional canned pickles is crucial.
- Quick pickles (also called refrigerator pickles) are ready within 24 hours and stored in the fridge. They require no special tools and are great for beginners.
- Canned pickles are shelf-stable and processed in a hot water bath. They require sterilized jars and canning equipment but last for up to a year.
Pros & Cons:
- Quick: faster, no processing needed, shorter shelf life
- Canned: long-term storage, ideal for gifting, but needs boiling water bath and more care
If you’re new to preserving, AllRecipes offers excellent side-by-side comparisons and starter recipes. For those considering the canning route, Frugal Farm Wife breaks down water bath safety and equipment you’ll need. And Epicurious offers excellent brine advice if you want to experiment with other vegetables.
Ingredients Breakdown
Creating the perfect yellow squash pickle begins with understanding your ingredients.
- Yellow Squash & Red Onion
- Choose small, firm squash with tender skin. Slice into ¼-inch thick rounds for optimal texture.
- Red onions add color contrast and mild bite. For best results, check slicing tips at Southern Living or Inspired by Charm.
- Pickling Base
- Vinegar: White vinegar is traditional, but cider vinegar offers a milder, fruitier flavor. Avoid balsamic or red wine vinegars, which discolor squash.
- Sugar: White granulated sugar creates the sweet counterpoint to the vinegar’s tang.
- Salt: Kosher salt is ideal—never use iodized salt, which can make pickles cloudy. The Kitchn and NC Cooperative Extension recommend precise ratios for balance.
- Spices
- Classic spices include mustard seeds, celery seeds, and dry mustard.
- For deeper flavor or color, add turmeric, crushed red pepper, or black peppercorns. Refer to Taste of Home for more mix-ins and optional variations.
Step‑by‑Step Recipe Guide
Follow this simple process to make crisp, sweet, and tangy yellow squash pickles.
- 1. Prepare the Vegetables
- Wash and slice 4 small yellow squash into ¼-inch rounds.
- Thinly slice ½ cup of red onion.
- Toss both with 1 tablespoon of kosher salt in a large non-metal bowl.
- Cover and refrigerate for 1 hour. This step draws out moisture and improves crunch.
- 2. Drain and Set Aside
- After 1 hour, drain the liquid from the salted vegetables.
- You can rinse them lightly, then pat dry. Removing excess liquid prevents sogginess.
- 3. Make the Brine
- In a saucepan, combine:
- 1 cup granulated sugar
- ¾ cup white vinegar
- 1 tsp mustard seeds
- 1 tsp celery seeds
- 1 tsp dry mustard
- Bring to a gentle boil, stirring until sugar is fully dissolved.
- For inspiration on brine balance, check Inspired by Charm or Epicurious.
- In a saucepan, combine:
- 4. Combine Brine with Veggies
- Add the drained squash and onions to the boiling brine.
- Let the mixture return to a boil briefly—this helps infuse flavor.
- Remove from heat.
- 5. Fill Sterilized Jars
- Carefully ladle hot vegetables and brine into sterilized canning jars.
- Leave ½ inch of headspace at the top.
- Wipe the rims with a clean, damp cloth.
- Seal tightly with sterilized lids and bands.
For jar filling and headspace precision, refer to Feasting at Home or NCHFP.
- 6. Cool or Process
- For refrigerator pickles, let jars cool completely at room temperature. Then refrigerate and use within a month.
- For canning, process the jars in a boiling water bath for 10 minutes (adjust for altitude). For more on water bath technique, check Frugal Farm Wife or Southern Made Simple.
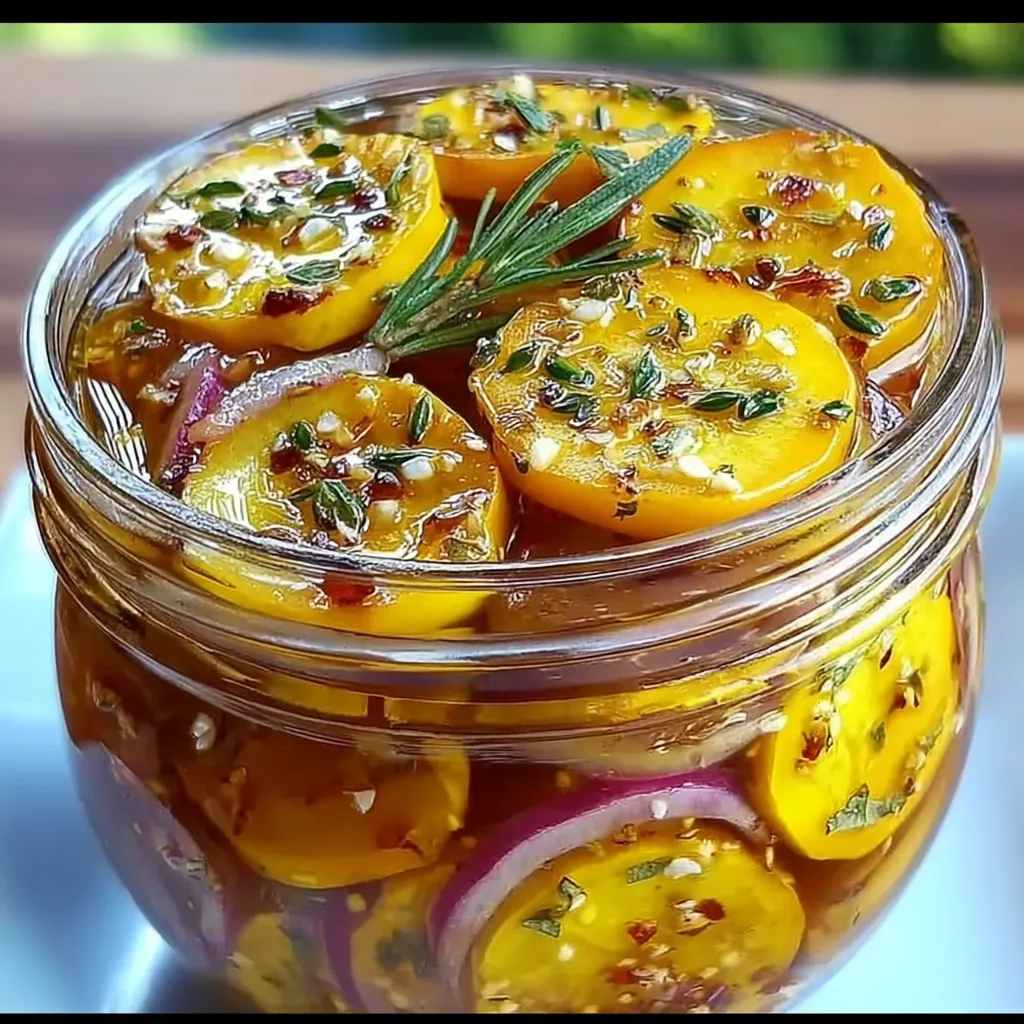
By following these steps carefully, you’ll create perfectly balanced pickles every time—sweet, tangy, crisp, and packed with flavor.
Flavor & Texture Tweaks
Getting the sweet and tangy flavor balance just right is key to customizing your yellow squash pickles.
- If the pickles are too sour, increase the sugar by a few tablespoons. If too sweet, reduce sugar or increase the vinegar slightly. You can even swap in apple cider vinegar for a milder acidity.
- To add some heat, mix in sliced jalapeños or a pinch of red pepper flakes while boiling the brine. This twist is especially popular in the version shared on Southern Made Simple.
- For bold color and earthy depth, try adding turmeric. Not only does it create a vibrant yellow hue, but it may also bring antioxidant benefits, as seen in The Full Helping.
- Want a different spice profile? Replace classic seeds with a pickling spice blend, or add subtle warmth using cloves or star anise. These spices pair beautifully with the natural sweetness of the squash and can be steeped in the brine for deeper infusion.
Experimentation ensures your pickles reflect your personal taste—and keeps each batch exciting.
Storage & Shelf Life
- Refrigerator pickles are the simplest to store. Once cooled, they should be kept in the fridge and are best consumed within 1–2 weeks, though they can last up to a month if stored in a clean, sealed jar.
- For long-term storage, water bath canning is necessary. Properly processed jars can be shelf-stable for up to 1 year. However, altitude matters—refer to the guidelines from NCHFP for accurate processing times.
- Always inspect pickles before eating. If the brine looks cloudy, the lid is bulging, or there’s an unusual smell, discard the jar immediately. Use clean utensils to avoid introducing bacteria and extend the pickles’ shelf life.
Whether you refrigerate or can, maintaining sterile jars and tight seals will make all the difference in freshness and safety.
Serving Ideas & Pairings
These sweet and tangy yellow squash pickles are as versatile as they are vibrant.
- Serve them as a condiment on sandwiches, wraps, and burgers to add crunch and zing. They’re also fantastic on cheese boards, as featured by Inspired by Charm.
- Chop them up and mix into salads, relishes, or grain bowls. This application is often highlighted on The Full Helping, giving dishes a pop of acidity and texture.
- Use them as a base for creative spins like squash relish or even homemade giardiniera. For inspiration, visit Southern Living and AllRecipes.
They bring a tangy punch wherever they go—no more boring sides!
Troubleshooting Common Issues
Even experienced picklers run into issues, but most problems are easy to fix.
- If the pickles turn out soggy, you may have sliced the squash too thin or skipped salting. Always allow the salted squash to sit for at least an hour.
- When the taste is off—too sweet or too tart—adjust your brine ratios. A balanced brine is key, so test it before adding the vegetables.
- If you see brine separation during stovetop prep, stir thoroughly and ensure the sugar dissolves fully. A gentle reheat usually solves it.
- In cases where the jar lid doesn’t seal after canning, refrigerate the jar instead and consume within two weeks.
Consistency improves with practice, so don’t be discouraged by one imperfect batch.
Recipe Variations
Want to explore beyond the classic? These fun variations keep things exciting:
- Add sliced jalapeños for a spicy twist, as seen in recipes from Food.com and Frugal Farm Wife.
- Try a turmeric and mustard seed combo for a more earthy, savory option. This golden version is detailed at Epicurious.
- For a sweet and sour profile, infuse your brine with clove, cinnamon, or star anise.
- Turn your pickles into a relish by shredding squash instead of slicing, then add chopped peppers and onions. It’s perfect for topping hot dogs or mixing into pasta salads.
These alternatives are perfect for using the same base with bold new flavors.
Frequently Asked Questions (FAQs)
- Can I use zucchini instead of yellow squash?
Yes! The method is the same, though the color and texture differ slightly. Zucchini tends to be softer but still delicious, according to The Full Helping. - Do I need to rinse the salted squash?
A light rinse is optional. Most recipes recommend just draining the liquid, as explained in Inspired by Charm. - How long before I can eat them?
For the best flavor, let your pickles chill at least 24 hours. The flavor deepens after 2–3 days. - Is water-bath canning necessary?
Only if you want to store your pickles at room temperature. For fridge storage, it’s not needed, per NC Cooperative Extension. - How long do pickled yellow squash last?
Refrigerator pickles last up to 1 month, while properly canned pickles can be stored for up to 1 year.
Conclusion
These sweet and tangy yellow squash pickles are the ultimate way to enjoy summer’s bounty year-round. They’re easy to make, highly customizable, and deliciously crisp with every bite.
Whether you keep them simple or spice things up with turmeric or jalapeño, you’ll love their vibrant flavor. Try the recipe, share a jar with friends, and bring a little sunshine to every bite—one pickle at a time.
PrintSweet and Tangy Yellow Squash Pickles

Crisp, sweet and tangy yellow squash pickles made with a flavorful brine of vinegar, sugar, and classic spices. Ideal for sandwiches, sides, or canning.
- Prep Time: 20 minutes
- Cook Time: 20 minutes
- Total Time: 40 minutes
- Yield: 2 pints 1x
- Category: Pickles
- Method: Boil and Can
- Cuisine: American
- Diet: Low Calorie
Ingredients
- 4 small yellow squash, sliced 1/4-inch thick (about 3 cups)
- 1/2 cup thinly sliced red onion
- 1 tablespoon kosher salt
- 1 cup granulated sugar
- 3/4 cup white vinegar
- 1 teaspoon mustard seeds
- 1 teaspoon celery seeds
- 1 teaspoon dry mustard
Instructions
- Combine sliced squash and onions in a non-metal bowl. Sprinkle with salt and refrigerate for 1 hour.
- Drain vegetables and set aside.
- In a saucepan, combine sugar, vinegar, mustard seeds, celery seeds, and dry mustard. Bring to a boil, stirring until sugar dissolves.
- Add vegetables to the brine and return to a boil, then remove from heat.
- Ladle hot mixture into sterilized jars, leaving 1/2-inch headspace.
- Seal with sterilized lids. Process in boiling water bath for 10 minutes, or cool and refrigerate for up to 1 month.
Notes
- For more color, add a pinch of turmeric.
- Add sliced jalapeños or pepper flakes for extra heat.
- Chill at least 24 hours before serving for best flavor.
- Always use sterilized jars for safe storage.
Nutrition
- Serving Size: 1/4 cup
- Calories: 80
- Sugar: 18g
- Sodium: 220mg
- Fat: 0g
- Saturated Fat: 0g
- Unsaturated Fat: 0g
- Trans Fat: 0g
- Carbohydrates: 20g
- Fiber: 1g
- Protein: 0g
- Cholesterol: 0mg
Keywords: yellow squash pickles, sweet pickles, summer squash, refrigerator pickles, canning vegetables