
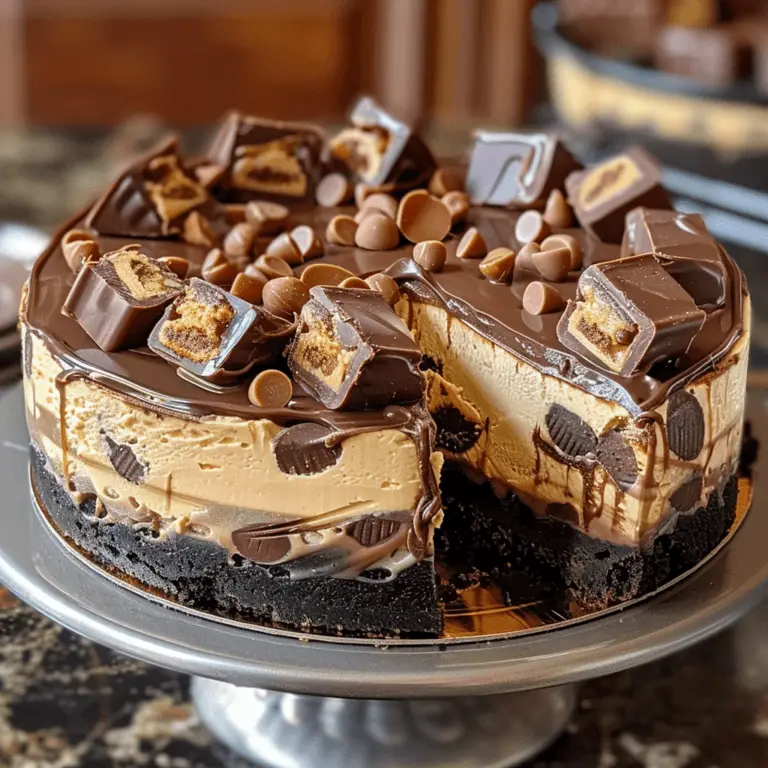
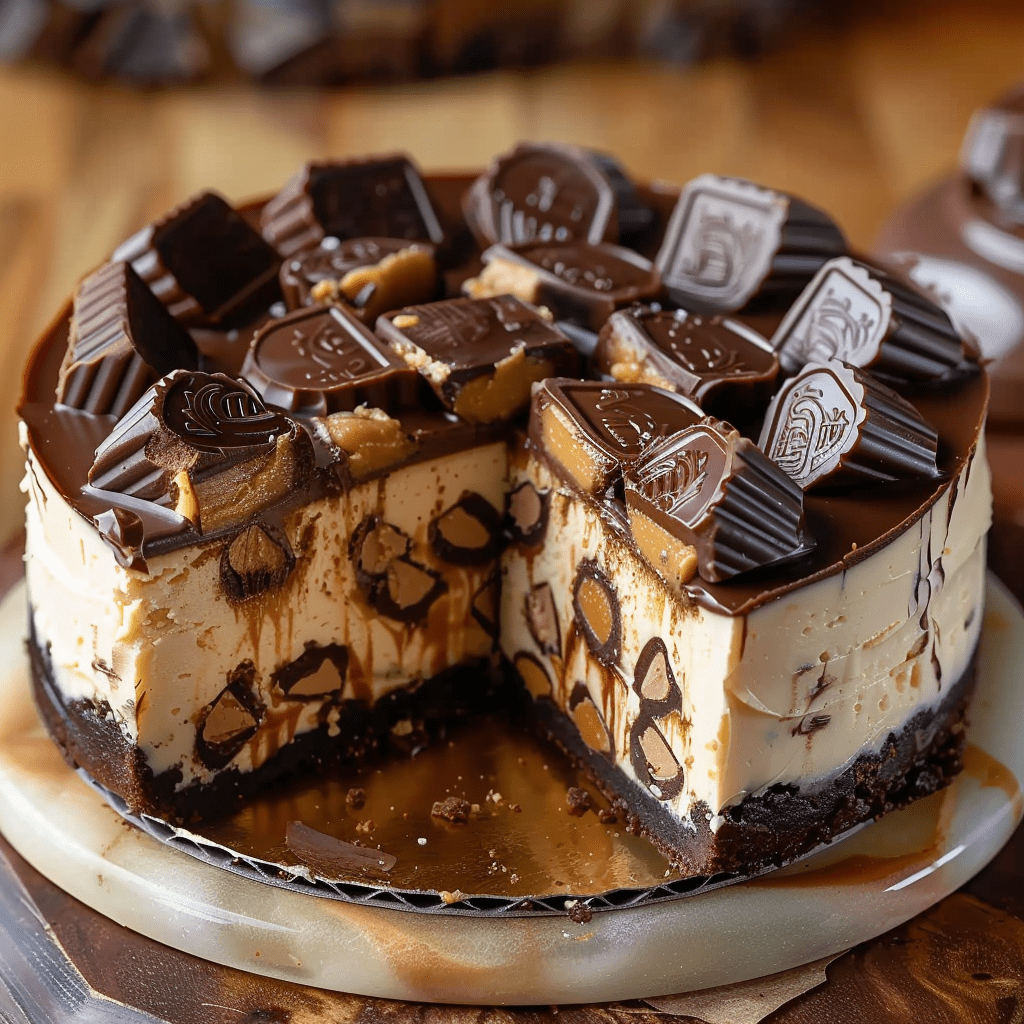
Reese’s Peanut Butter Cup Cheesecake is a decadent dessert that combines the rich, creamy texture of cheesecake with the irresistible flavor of Reese’s Peanut Butter Cups. This indulgent treat is perfect for special occasions, family gatherings, or simply when you’re in the mood for a luxurious dessert. With a chocolate graham cracker crust, a creamy peanut butter filling, and a topping of chocolate ganache and additional Reese’s Peanut Butter Cups, this cheesecake is sure to be a crowd-pleaser.
Ingredients
- 2 cups crushed chocolate graham crackers: Forms the base of the cheesecake crust.
- 1/2 cup unsalted butter, melted: Helps bind the crust together.
- 3 (8 oz) packages cream cheese, softened: The main component of the cheesecake filling.
- 1 cup smooth peanut butter: Adds a rich, nutty flavor to the filling.
- 1 cup granulated sugar: Sweetens the cheesecake filling.
- 1 teaspoon vanilla extract: Enhances the flavor of the cheesecake.
- 3 large eggs: Adds structure and richness to the cheesecake.
- 1/2 cup heavy cream: Adds creaminess and smooth texture.
- 2 cups chopped Reese’s Peanut Butter Cups: Infuses the cheesecake with the classic Reese’s flavor.
- Chocolate ganache (optional for topping): Adds a luxurious, glossy finish.
- Additional Reese’s Peanut Butter Cups for decoration: Enhances the visual appeal and adds extra flavor.
Instructions
- Preheat Oven:
- Preheat your oven to 325°F (165°C). Prepare a 9-inch springform pan by mixing the crushed graham crackers with melted butter and pressing the mixture firmly into the bottom of the pan. Set aside.
- Prepare Cheesecake Filling:
- In a large bowl, beat the softened cream cheese, smooth peanut butter, granulated sugar, and vanilla extract until smooth and well combined.
- Add Eggs:
- Add the eggs one at a time, ensuring each egg is fully incorporated before adding the next.
- Stir in Heavy Cream:
- Stir in the heavy cream until the mixture is smooth.
- Fold in Reese’s Peanut Butter Cups:
- Gently fold in the chopped Reese’s Peanut Butter Cups.
- Pour into Crust:
- Pour the cheesecake filling over the prepared crust in the springform pan.
- Bake:
- Bake the cheesecake in the preheated oven for 55-60 minutes, or until the center is just set and the top appears dull.
- Cool:
- Remove the cheesecake from the oven and cool on a wire rack for 10 minutes. Carefully run a knife around the edge of the pan to loosen the cheesecake, then allow it to cool for an additional hour.
- Refrigerate:
- Refrigerate the cheesecake overnight to allow it to fully set and develop its flavors.
- Decorate:
- Before serving, top the cheesecake with chocolate ganache (if using) and decorate with additional Reese’s Peanut Butter Cups for an extra touch of indulgence.
Nutrition Information (per serving)
- Calories: 720 kcal
- Fat: 54g
- Saturated Fat: 27g
- Cholesterol: 165mg
- Sodium: 440mg
- Carbohydrates: 54g
- Fiber: 3g
- Sugars: 42g
- Protein: 13g
Serving
Reese’s Peanut Butter Cup Cheesecake is best served chilled, straight from the refrigerator. Slice the cheesecake into 12 generous servings and top each slice with a drizzle of chocolate ganache and a piece of Reese’s Peanut Butter Cup for added indulgence. This cheesecake pairs wonderfully with a cup of coffee or a glass of cold milk.
Notes
- Crust: Ensure the graham cracker crust is firmly pressed into the bottom of the springform pan to prevent it from crumbling when sliced.
- Cheesecake: Beat the cream cheese mixture until smooth to avoid lumps in the cheesecake filling.
- Refrigeration: Allowing the cheesecake to refrigerate overnight helps it set properly and enhances the flavors.
- Decoration: Use a warm knife to slice the cheesecake for clean, even pieces. Wipe the knife clean between cuts.
- Storage: Store any leftovers in an airtight container in the refrigerator for up to 5 days. The cheesecake can also be frozen for up to 2 months. Thaw in the refrigerator before serving.
FAQs
Can I use a different type of crust? Yes, you can use an Oreo cookie crust or a traditional graham cracker crust instead of a chocolate graham cracker crust.
What if I don’t have a springform pan? A regular 9-inch cake pan can be used, but it may be harder to remove the cheesecake from the pan. Line the pan with parchment paper to help lift the cheesecake out.
Can I use chunky peanut butter? Smooth peanut butter is recommended for a creamy texture, but you can use chunky peanut butter if you prefer bits of peanuts in the cheesecake.
How do I prevent cracks in my cheesecake? Ensure all ingredients are at room temperature before mixing. Avoid overmixing the batter, and don’t open the oven door during baking. Cool the cheesecake gradually to prevent cracking.
Can I use low-fat cream cheese? Full-fat cream cheese is recommended for the best texture and flavor. Low-fat cream cheese may result in a less creamy cheesecake.
Can I add other toppings? Yes, you can add whipped cream, chocolate shavings, or caramel sauce for additional flavor and decoration.
What if I don’t have heavy cream? You can substitute heavy cream with half-and-half or a mixture of milk and melted butter (¾ cup milk + ¼ cup melted butter).
Can I use dark chocolate for the ganache? Yes, dark chocolate can be used for the ganache for a richer, more intense chocolate flavor.
How do I make the chocolate ganache? To make the ganache, heat 1 cup of heavy cream until simmering. Pour it over 8 ounces of chopped chocolate and let it sit for 5 minutes. Stir until smooth and let it cool slightly before pouring over the cheesecake.
Can I make this cheesecake ahead of time? Yes, this cheesecake can be made up to 2 days in advance and stored in the refrigerator until ready to serve.
In conclusion, Reese’s Peanut Butter Cup Cheesecake is a rich, decadent dessert that is perfect for any occasion. Its combination of creamy peanut butter filling, crunchy Reese’s pieces, and a smooth chocolate ganache topping makes it a crowd favorite. Enjoy making and sharing this luxurious treat with family and friends!