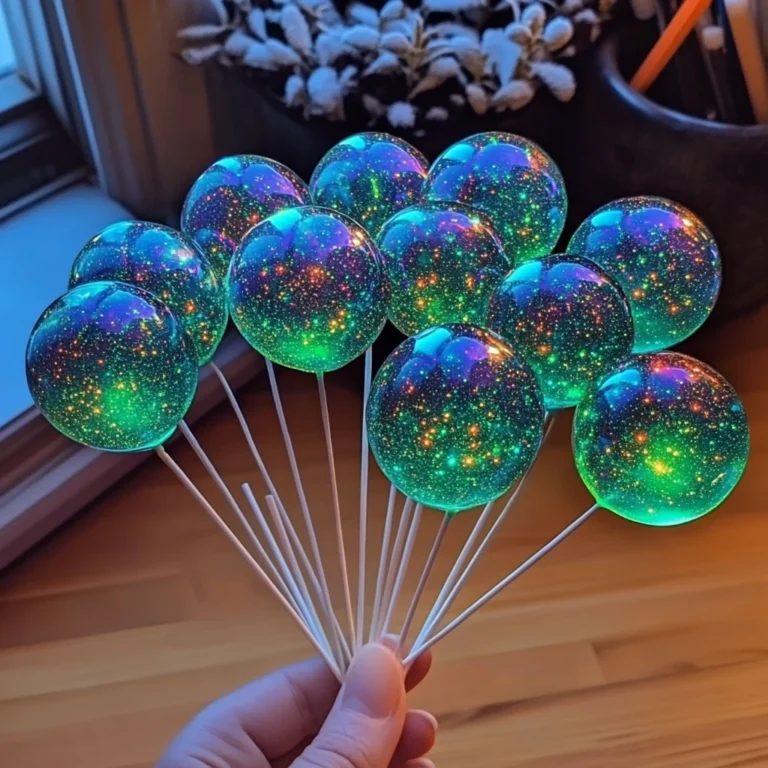
Introduction to Northern Lights Candy Glow
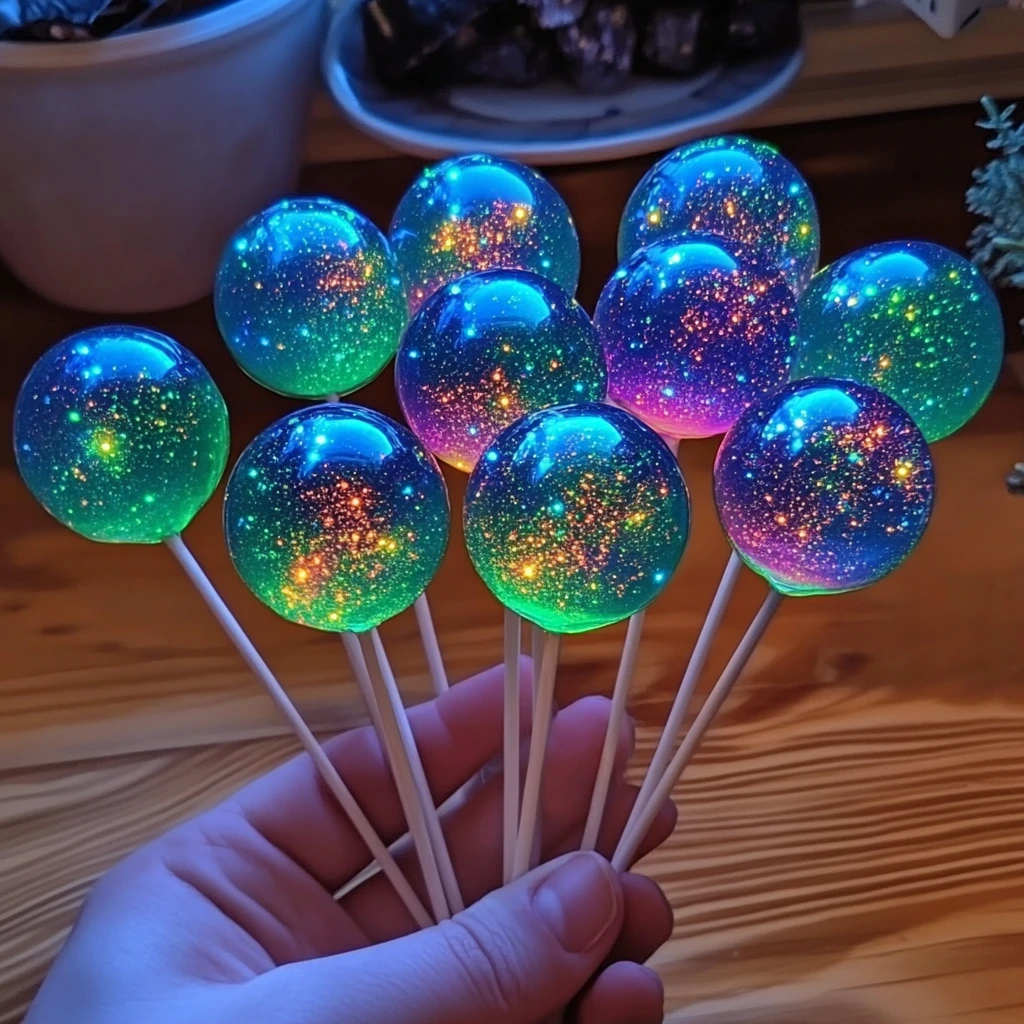
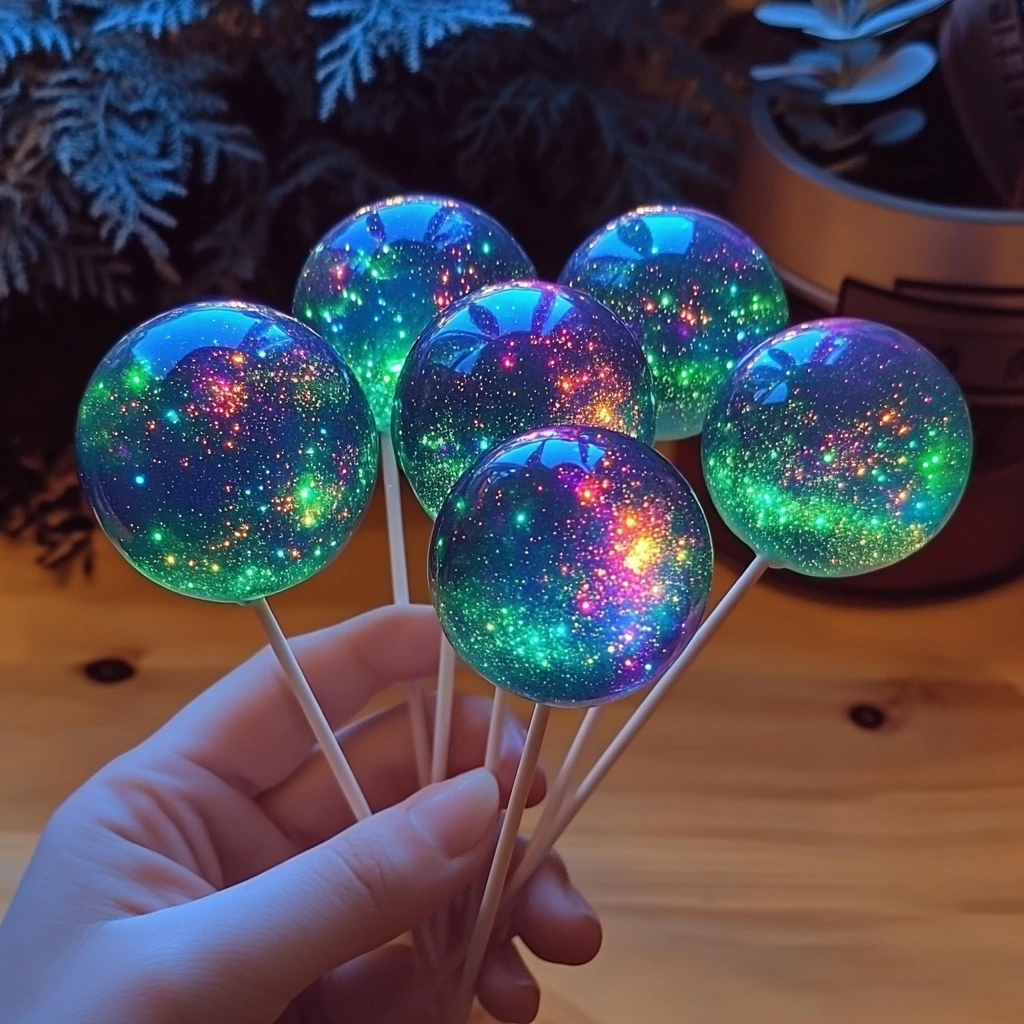
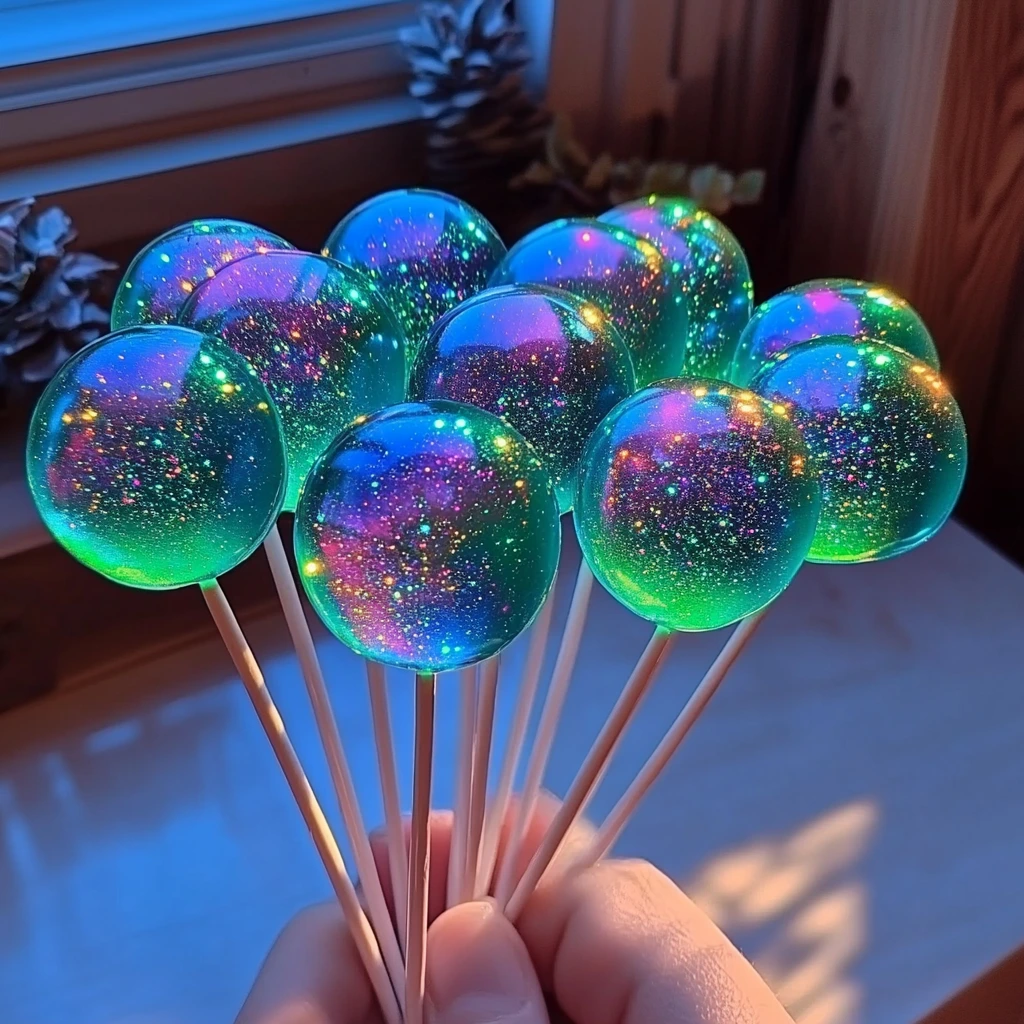
The Northern Lights Candy Glow draws its magical charm from the awe-inspiring beauty of the Aurora Borealis. This homemade treat is a visual and flavorful delight, inspired by the natural phenomenon of vibrant, swirling colors lighting up the Arctic skies. The candy mimics the ethereal glow of the northern lights, blending neon green, blue, and purple hues to create a show-stopping edible creation.
What makes this candy truly special is its vibrant, shimmering appearance, enhanced with edible glitter or shimmer dust. Its appeal goes beyond aesthetics—it’s a delicious and unique sweet that’s perfect for festive gatherings, holiday treats, or even as a thoughtful homemade gift. Whether you’re hosting a themed party or simply indulging your creative side in the kitchen, this candy brings a sense of wonder and joy.
Crafting this candy at home is a straightforward process that allows you to experiment with colors and flavors. If you’re intrigued by how colors can elevate a dish, explore creative ways to use food coloring to enhance your culinary creations. The Northern Lights Candy Glow offers a perfect opportunity to bring a touch of the Arctic’s magic right to your table.
The Inspiration: Aurora Borealis
The Aurora Borealis, commonly known as the Northern Lights, is a natural phenomenon where charged particles from the sun collide with Earth’s atmosphere, producing stunning light displays. These ethereal lights dance across the sky in shades of green, blue, and purple, captivating anyone lucky enough to witness them.
Much like the mesmerizing lights in the Arctic skies, the Northern Lights Candy Glow captures the magic through its vibrant colors and swirling designs. Each piece of candy is crafted to emulate the visual effect of these natural wonders, making it both a feast for the eyes and the taste buds.
The connection between nature’s beauty and culinary artistry makes this candy a standout. For more inspiration on incorporating natural aesthetics into your treats, discover tips on creating nature-inspired desserts. Let the Aurora Borealis guide your creativity as you craft these dazzling candies.
Ingredients Breakdown
To create the Northern Lights Candy Glow, understanding the role of each ingredient is crucial. Every element contributes to the candy’s structure, flavor, and visual appeal.
- Granulated Sugar: This is the backbone of the recipe, providing sweetness and forming the structure of the candy. The sugar undergoes a transformation during heating, creating the hard texture characteristic of this treat.
- Light Corn Syrup: Prevents crystallization during cooking, ensuring a smooth and shiny texture for the candy.
- Water: Combines with sugar and corn syrup, dissolving them into a cohesive base for the candy.
- Clear Vanilla Extract: Adds subtle flavor without altering the candy’s vibrant hues. For a twist, substitute with almond extract or other flavor options.
- Food Coloring (Neon Green, Blue, Purple): Recreates the swirling colors of the Aurora Borealis. Opt for high-quality, neon food coloring to achieve the brightest results.
- Edible Glitter/Shimmer Dust: Gives the candy a magical glow, elevating its visual appeal. For more tips on using edible glitter effectively, learn how to decorate candies.
A candy thermometer is a must-have to reach the hard-crack stage at precisely 300°F. Without it, the candy may not set correctly. These precise tools, alongside quality ingredients, ensure professional results.
Necessary Equipment
Making Northern Lights Candy Glow requires the right tools to achieve a perfect outcome. Here’s what you’ll need:
- Medium Saucepan: For heating the sugar mixture evenly without burning.
- Candy Thermometer: Essential for reaching the exact temperature needed to achieve the hard-crack stage. For tips on choosing the best thermometer, explore this guide.
- Heat-Safe Bowls: Used for dividing and coloring the candy mixture.
- Lollipop Molds or Parchment Paper: Lollipop molds help create uniform shapes, while parchment paper offers flexibility for freeform designs.
- Spoons or Spatulas: For stirring and layering colors.
Investing in quality equipment ensures the process runs smoothly. Choose materials that can withstand high temperatures, and always prepare your tools before starting. These preparations simplify the candy-making process, allowing you to focus on creating stunning Aurora-inspired treats.
Step-by-Step Preparation Guide
Creating the Northern Lights Candy Glow is a fun and rewarding process. Follow these detailed steps to ensure dazzling results.
Preparing the Candy Base
- In a medium saucepan, combine:
- 1 cup of granulated sugar.
- ½ cup of light corn syrup.
- ¼ cup of water.
- Stir gently over medium heat until the sugar completely dissolves. This forms the foundation for the candy.
Heating to Hard-Crack Stage
- Increase the heat to medium-high and let the mixture boil without stirring. Stirring at this stage can cause crystallization, which will ruin the candy’s smooth texture.
- Use a candy thermometer to monitor the temperature. When the mixture reaches 300°F (the hard-crack stage), remove it from the heat immediately. For more insights into mastering candy-making temperatures, check this guide.
Adding Flavor and Dividing Mixture
- Stir in ½ teaspoon of clear vanilla extract for subtle flavoring.
- Quickly divide the hot mixture into three separate heat-safe bowls. This step allows you to color the candy without mixing the shades.
Coloring the Candy
- Add a few drops of neon food coloring to each bowl:
- Green in one bowl.
- Blue in the second bowl.
- Purple in the third bowl.
- Stir quickly and thoroughly to achieve even color distribution. Neon food coloring creates the most vibrant effect, perfect for mimicking the Aurora Borealis. To explore more creative uses of food coloring, read this article.
Creating the Candy Glow
- Working swiftly, pour small dollops of each color onto lollipop molds or parchment paper. Alternate colors to layer and swirl them together, recreating the dynamic movement of the northern lights.
- Before the candy hardens, sprinkle edible glitter or shimmer dust over the surface to enhance its magical glow.
Cooling and Setting
- Allow the candies to cool completely at room temperature. This step is crucial to ensure the candy hardens properly.
- Once hardened, gently remove the candies from the molds or peel them off the parchment paper.
Your Northern Lights Candy Glow is now ready to shine at your next event! Store these treats in an airtight container to keep them fresh and vibrant. Enjoy the stunning colors and delightful flavor!
Tips for Success
Crafting the perfect Northern Lights Candy Glow requires some key strategies to ensure success. Here are the top tips to make your candy-making experience seamless and enjoyable:
Work Swiftly
- Speed is crucial during the coloring and shaping stages. The candy mixture begins to harden as it cools, so have your bowls, molds, and tools ready before starting.
- To keep the candy pliable for layering colors, work in a warm kitchen or consider using a heating pad under the bowls. For more time-saving candy-making hacks, explore these tips.
Proper Storage
- Once your candies have cooled and hardened, store them in an airtight container at room temperature. This prevents moisture from making the candies sticky and ensures they retain their texture and shine.
- Place parchment paper between layers of candy to avoid sticking.
Experiment with Customizations
- Don’t be afraid to experiment with flavors! Try adding extracts like mint, orange, or almond for unique variations.
- Switch up the colors to match specific holidays or events. For example, red and green for Christmas or pastel shades for Easter.
- Incorporate additional decorations like edible stars or gold dust to make the candies extra special. Learn more about creative candy decorations here.
With these tips, your Northern Lights Candy Glow will not only look spectacular but also delight anyone who tastes it!
Serving Suggestions
The Northern Lights Candy Glow is as versatile as it is beautiful, making it ideal for a variety of occasions.
Presentation Ideas
- Arrange the candies on a decorative platter at events to create a centerpiece that dazzles guests. Their vibrant colors and shimmering surface add a magical touch to any table setting.
- Wrap the candies individually in clear cellophane bags tied with colorful ribbons for party favors or stocking stuffers.
Pairing Suggestions
- Serve the candies alongside complementary treats like hot cocoa, flavored teas, or sparkling beverages. The sweetness pairs perfectly with warm drinks during the holidays.
- For a dessert spread, include them with light pastries or cookies for a balanced variety.
Creative Gifting
- Package the candies in small tins or jars lined with tissue paper. Add a personalized tag for a thoughtful homemade gift.
- For themed events, match the packaging to the candy colors to create a cohesive look. Learn more about creative candy gift ideas.
Variations and Customizations
Make the Northern Lights Candy Glow your own by experimenting with flavors, colors, and decorations.
Flavor Variations
- Add extracts like mint, citrus, or almond to give the candy a distinctive taste. A drop of peppermint extract works well for winter-themed events, while orange extract adds a refreshing twist.
Color Customizations
- Adjust the food coloring to match specific themes:
- Red and green for Christmas.
- Pastel shades for Easter.
- Orange and black for Halloween.
- To achieve softer hues, use gel-based colors for subtle, muted tones.
Decorative Enhancements
- Sprinkle edible stars or gold dust on the candies for an elevated look.
- Incorporate tiny edible shapes like hearts or snowflakes to match holiday themes.
- Use silicone molds with fun designs to create unique candy shapes. For inspiration, explore creative candy mold ideas.
These customizations allow you to tailor the candy for any event or celebration.
Safety Precautions
When working with hot sugar mixtures, safety is paramount.
Handling Hot Mixtures
- Always use heat-resistant tools and wear oven mitts to prevent burns.
- Avoid touching the mixture or utensils directly after heating as the candy can retain high temperatures.
Supervision for Children
- If children are helping, restrict them to safe tasks like adding food coloring or sprinkling decorations. Always supervise closely to avoid accidents.
Proper Storage
- Store candies in an airtight container away from humidity to maintain freshness and prevent stickiness.
- Place parchment paper between candy layers to prevent them from sticking together. Read more about candy storage tips.
By following these precautions, you’ll ensure a safe and enjoyable candy-making experience.
Frequently Asked Questions (FAQs)
Q1: Can I use different colors for the candy?
A1: Absolutely! Feel free to experiment with any colors to match the occasion. Just ensure the food coloring is suitable for candy-making.
Q2: How do I store the candy?
A2: Store the candy in an airtight container in a cool, dry place. It will stay fresh for up to two weeks. Proper storage prevents stickiness and maintains the candy’s texture.
Q3: Can I use a different type of sweetener?
A3: While the recipe is designed for sugar, you can experiment with alternatives like honey or maple syrup. Be aware that these may alter the candy’s texture and flavor.
Q4: Is this candy gluten-free?
A4: Yes, this candy is naturally gluten-free, as it contains no wheat or gluten-based ingredients. It’s a safe treat for those with dietary restrictions.
Q5: Can I make this candy without a candy thermometer?
A5: Using a candy thermometer is highly recommended for accuracy. However, you can test the mixture by dropping a small amount into cold water. If it hardens and breaks, it’s at the hard-crack stage.
Q6: Can I add flavors to the candy?
A6: Yes! Try adding a drop of mint, orange, or lemon extract to personalize the candy. Add flavors before mixing in food coloring.
Q7: Can I use silicone molds for this candy?
A7: Yes, silicone molds are perfect for creating fun shapes. Just ensure they’re heat-resistant to withstand the hot candy mixture.
Q8: Is this recipe suitable for kids to help with?
A8: Kids can help with tasks like adding food coloring and sprinkling glitter, but adult supervision is essential due to the hot candy mixture.
Q9: Can I make the candy glow in the dark?
A9: You can experiment with edible glow powder, but the vibrant colors and shimmer already mimic the Northern Lights beautifully.
Q10: Can I double the recipe?
A10: Yes! Ensure you use a larger pan and ample space to spread out the candy. Double batches are great for larger gatherings.
Conclusion
The Northern Lights Candy Glow is a dazzling, versatile treat inspired by nature’s breathtaking Aurora Borealis. Its vibrant colors and shimmering finish make it the perfect addition to festive gatherings or as a creative homemade gift.
This recipe offers endless opportunities for experimentation, from flavor variations to personalized color schemes. With simple ingredients and a touch of imagination, you can craft candies that are as delightful to make as they are to share. For beginners, the process is straightforward, and with tools like a candy thermometer, success is almost guaranteed.
We invite you to try this recipe and share your results with friends and family. Don’t forget to experiment with customizations to create candies that reflect your unique style.
PrintNorthern Lights Candy Glow
This Northern Lights Candy Glow recipe creates dazzling, vibrant candies inspired by the Aurora Borealis. With neon colors and edible glitter, these homemade treats are perfect for parties, gifts, or themed events.
Ingredients
- 1 cup granulated sugar
- ½ cup light corn syrup
- ¼ cup water
- ½ tsp clear vanilla extract (or almond extract)
- Neon food coloring (green, blue, purple)
- Edible glitter or shimmer dust (optional)
Instructions
- Combine sugar, corn syrup, and water in a medium saucepan. Stir over medium heat until sugar dissolves.
- Heat to 300°F without stirring, using a candy thermometer.
- Remove from heat, stir in vanilla extract, and divide into three bowls.
- Add neon food coloring to each bowl and mix quickly.
- Pour dollops onto lollipop molds or parchment paper, layering colors to mimic Northern Lights.
- Sprinkle with edible glitter and allow to cool completely.
- Remove from molds or parchment once hardened.
Notes
- Work swiftly to prevent hardening during layering.
- Store candies in an airtight container at room temperature.
- Experiment with different flavors or colors for variety.

