Introduction to Nilla Wafer Banana Pudding Walking Cups
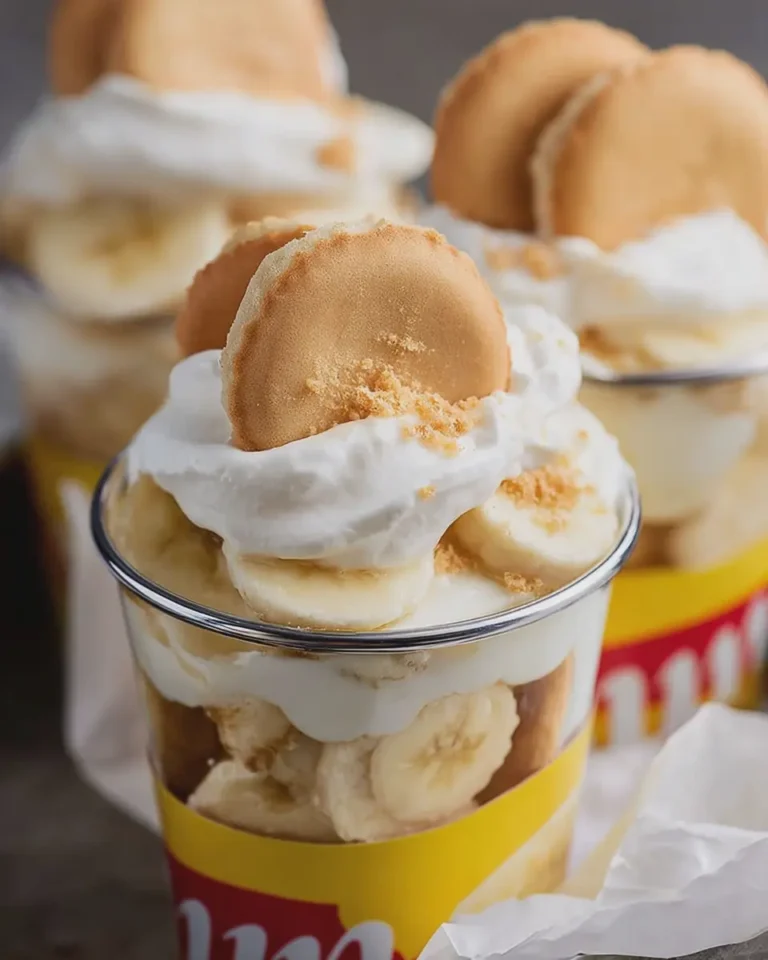
If you’re looking for a sweet treat that combines comfort and creativity, look no further than Nilla Wafer Banana Pudding Walking Cups. This delightful dessert transforms the classic banana pudding you know and love into a fun, portable version perfect for any occasion. Imagine indulging in layers of creamy banana pudding, sliced bananas, and crunchy Nilla wafers—all in a handy cup! It’s the epitome of dessert perfection that captures the hearts (and taste buds) of everyone it meets.
What Makes Nilla Wafer Banana Pudding So Irresistible?
One of the most appealing aspects of Nilla Wafer Banana Pudding Walking Cups is their incredible texture and flavor balance. The crunchiness of the Nilla wafers adds a delightful contrast to the smooth, velvety pudding and tender banana slices. This unique combination creates a multi-layered experience that is at once nostalgic and exciting.
But that’s not all! The ease of preparation and the convenience of serving these walking cups makes them a go-to dessert for gatherings or even just a cozy night in. You can whip them up in about 30 minutes, and they can chill in the fridge while you kick back and relax. What’s not to love?
Perfect for Any Occasion
Whether you’re planning a picnic, a birthday party, or simply craving a sweet treat after dinner, these cups are versatile enough to fit into any setting. Plus, they’re an excellent option for those who want to impress guests without spending hours in the kitchen. Just layer your ingredients, serve them in cute cups, and watch everyone dig in with delight.
If you want to dive deeper into the world of desserts, check out resources like The Science of Cooking for tips on flavors and textures that can elevate your creations.
In conclusion, preparing Nilla Wafer Banana Pudding Walking Cups is not just a cooking endeavor; it’s an experience that brings joy and nostalgia. So grab your ingredients, roll up your sleeves, and let’s make something utterly delicious together!
Ingredients for Nilla Wafer Banana Pudding Walking Cups
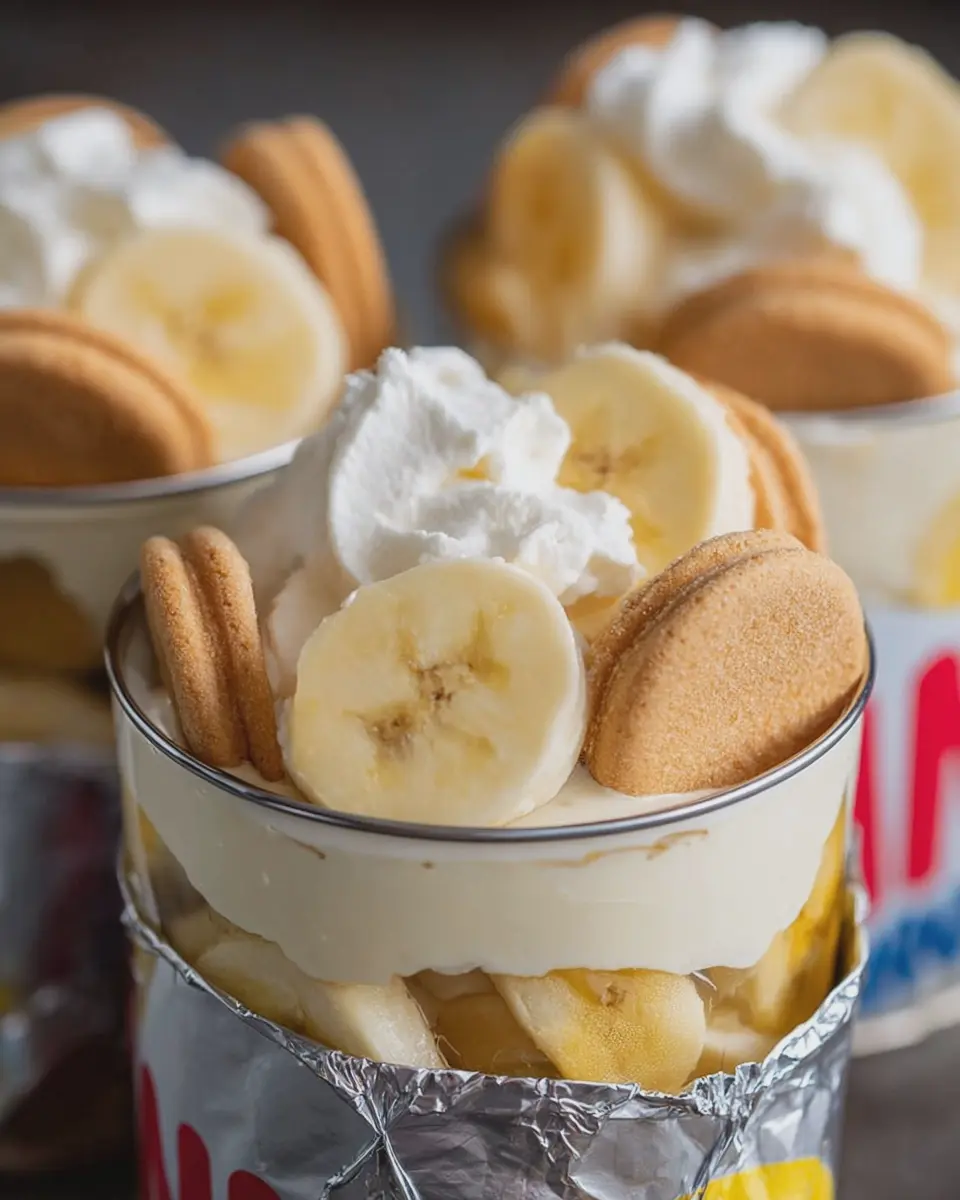
Creating delightful Nilla Wafer Banana Pudding Walking Cups is easier than you might think. Here’s what you’ll need for this fun, portable dessert that’s perfect for picnics or get-togethers.
Essential Ingredients
- Nilla Wafers: These iconic cookies form the base of your cups, adding both texture and sweetness.
- Bananas: Use ripe bananas for the best flavor; they should be just spotty enough to be sweet without being overripe.
- Vanilla Pudding: You can use store-bought instant pudding for convenience or make it from scratch for a richer taste (here’s a great vanilla pudding recipe).
- Whipped Topping: For that light, fluffy layer atop the pudding. You can opt for a non-dairy version if you prefer.
- Milk: Whole or 2% milk works best for creamy pudding.
Optional Add-Ons
- Peanut Butter: A dollop can add a delicious twist!
- Cinnamon: A sprinkle of cinnamon elevates the flavor beautifully.
With these simple ingredients, you’ll be well on your way to assembling your flavorful Nilla Wafer Banana Pudding Walking Cups. Grab your favorite cups and let’s get layering!
Step-by-step Preparation for Nilla Wafer Banana Pudding Walking Cups
Making Nilla Wafer Banana Pudding Walking Cups is a fantastic way to serve up a classic dessert in a playful and portable form. Whether you’re planning a picnic, a game day gathering, or just a sweet treat for movie night, these delightful cups will surely impress. Follow these easy steps to create your own delicious walking cups!
Gather your ingredients
Before diving into the preparation, let’s ensure you have everything you need on hand. Here’s what you’ll want to gather for your Nilla Wafer Banana Pudding Walking Cups:
- 1 box of vanilla instant pudding mix – This is the star of your dessert, adding creaminess and sweetness.
- 2 cups of cold milk – Regular or dairy-free milk works here to mix with your pudding.
- 3 ripe bananas – Ensure they’re just ripe enough for slice and sweetness.
- 1 box of Nilla Wafers – These crunchy cookies will provide a delightful contrast to the creamy pudding.
- Whipped cream – Store-bought or homemade, for that beautiful finishing touch.
- Optional toppings: Chopped nuts, chocolate chips, or additional crushed Nilla Wafers for some added flavor and texture.
Once you’ve got your ingredients ready, you’ll be all set to start making your walking cups. Having everything prepped and ready to go makes the process smoother and more enjoyable (and keeps the kitchen chaos at bay)!
Prepare the pudding
Now that we have our ingredients, let’s move on to preparing the pudding. This step is super simple and only takes a few minutes.
- In a mixing bowl, whisk together the vanilla instant pudding mix and cold milk for about two minutes. You’ll notice it thickening beautifully.
- Once mixed, let the pudding sit for about five minutes. This gives it time to firm up—no one wants runny pudding in their cups!
As you whisk, think about personalizing your pudding. Maybe you’d like to add a touch of vanilla extract or even a sprinkle of cinnamon for a warm flavor boost? Feel free to experiment!
For more tips on making homemade pudding, you might check out this useful guide by MyRecipes.
Assemble the walking cups
The fun part begins when you start assembling your Nilla Wafer Banana Pudding Walking Cups. Grab your favorite cups or glass containers and let’s build our multi-layered masterpiece!
- Start with a layer of Nilla Wafers at the bottom. You can break a few pieces to fill in the gaps.
- Next, add a layer of pudding on top of the cookies, filling the cups about halfway full.
- Follow with sliced bananas, evenly distributing them over the pudding layer.
- Repeat the layers until your cups are filled, usually 2-3 layers depending on the size of your cup.
Remember, layers don’t have to be perfect! Having those different textures show through the clear cup makes for a more visually appealing dessert.
Layer the fresh fruit
To take your Nilla Wafer Banana Pudding Walking Cups to the next level, it’s essential to have fresh fruit as part of your presentation. After you’ve added your pudding and bananas, here’s what to do next:
- Consider adding more sliced bananas for a fresh burst of flavor.
- You might also opt to include other fruits like strawberries or blueberries. They’re in season and can add vibrant colors to your cups!
- For an added crunch, sprinkle some crushed Nilla Wafers or nuts on top to finish off this pleasant layer.
Doing this not only enhances the taste but also adds a visual dimension to your dessert that can wow your guests!
Finalize with toppings
Your Nilla Wafer Banana Pudding Walking Cups are almost ready! The finishing touches are key, and there are so many delicious options available:
- Top with a dollop of whipped cream for added sweetness and presentation.
- Drizzle with chocolate syrup or caramel for those with a sweet tooth.
- You can also add sprigs of mint on top for a touch of elegance.
Once all your components are beautifully layered and topped, it’s time to serve! These cups can be made ahead of time and stored in the refrigerator for a few hours, which is especially handy when entertaining.
Enjoy every delightful spoonful of your creative Nilla Wafer Banana Pudding Walking Cups, and remember: the best moments often come from sharing delicious desserts with friends and family!

Variations on Nilla Wafer Banana Pudding Walking Cups
If you’re a fan of the classic Nilla Wafer Banana Pudding but want to add a refreshing twist, these variations will take your dessert game to the next level. Perfect for parties or a cozy night in, these Nilla Wafer Banana Pudding Walking Cups enhance your indulgence and keep things fun!
Nilla Wafer Strawberry Banana Pudding Cups
Imagine biting into luscious strawberry goodness coupled with the heartiness of banana! To whip up these delightful cups:
- Substitute half the bananas with fresh strawberries, sliced thinly.
- Prepare the classic vanilla pudding and layer it alternately with fresh strawberries and Nilla wafers in your cups.
- Drizzle a little strawberry puree on top for an extra punch!
This version not only looks pretty but also adds a delightful fruity flavor. Strawberries are packed with vitamin C, making this variation a little healthier too! For more strawberry recipes, check out this Strawberry Recipe Collection.
Nilla Wafer Chocolate Banana Pudding Cups
For the chocolate lovers out there, this variation is a dream come true! Here’s how you can create your rich and decadent cups:
- Mix some cocoa powder into the vanilla pudding for a chocolatey base.
- Layer the cocoa pudding, sliced bananas, and crushed Nilla wafers alternately in your cups.
- Top it off with whipped cream and a sprinkle of chocolate shavings for a luxurious finish.
Did you know that dark chocolate has health benefits? It’s rich in antioxidants and may even improve heart health. Check out more about the health benefits of chocolate here.
With these twists on your classic Nilla Wafer Banana Pudding Walking Cups, you’ll have everyone asking for seconds—happy indulging!
Cooking Tips and Notes for Nilla Wafer Banana Pudding Walking Cups
Important tips for perfect pudding consistency
For deliciously smooth Nilla Wafer Banana Pudding Walking Cups, getting the pudding right is essential. Here are some tips to achieve that dreamy consistency:
- Use heavy cream: Opting for heavy cream in place of regular milk adds richness and stability.
- Mix well: When combining the pudding mix with your liquids, whisk thoroughly to avoid lumps. This ensures a velvety texture.
- Chill time: Let your pudding chill in the fridge for at least an hour before assembly. This sets the pudding perfectly and enhances the flavors.
Curious about other tips? Check out this article on pudding techniques.
How to store leftovers properly
If you find yourself with extra Nilla Wafer Banana Pudding Walking Cups, storing them correctly is crucial to keep your dessert fresh:
- Airtight containers: Transfer the cups to airtight containers to prevent drying out.
- Refrigerate promptly: Place them in the fridge as soon as they cool. They’ll stay good for about 2-3 days.
- Keep toppings separate: If you’ve added fresh banana slices, it’s best to keep those separate until you’re ready to dive in to prevent browning.
These simple storage solutions will help maintain your delightful creation, ensuring every bite is as good as the first!
Serving Suggestions for Nilla Wafer Banana Pudding Walking Cups
Creative Serving Ideas for Parties
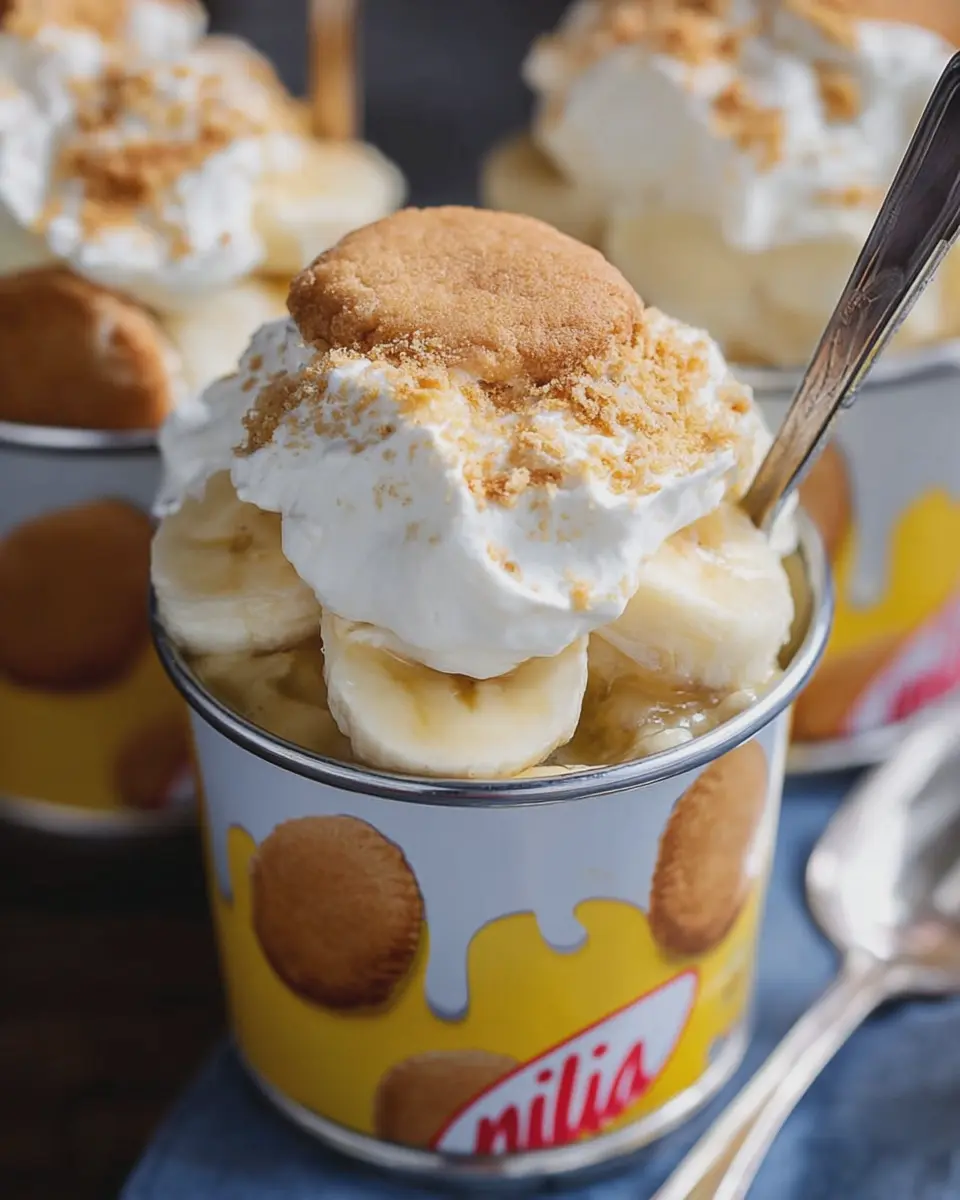
When it comes to serving Nilla Wafer Banana Pudding Walking Cups, the presentation can elevate your dessert from ordinary to extraordinary. Think about layering them in clear plastic cups to showcase those beautiful banana slices and creamy pudding. Set up a dessert bar where guests can personalize their cups with toppings like crushed Nilla Wafers, whipped cream, or even a sprinkle of cinnamon. This interactive approach creates a fun atmosphere—who doesn’t love building their own sweet treat?
Perfect Beverage Pairings
Now, let’s chat about beverages. These delightful cups pair beautifully with light drinks that won’t overpower their sweetness. Consider serving them alongside:
- Iced Tea: A refreshing option that can be sweetened or flavored to complement the dessert.
- Lemonade: The citrusy zing cuts through the creaminess.
- Sparkling Water: Add a slice of lemon or lime for a fancy touch.
Offering these paired options not only enhances the dessert experience but also makes your gathering feel more cohesive. For more beverage pairing ideas, check out resources like Epicurious or Food & Wine.
With these suggestions, your Nilla Wafer Banana Pudding Walking Cups are sure to be a hit!
Time Breakdown for Nilla Wafer Banana Pudding Walking Cups
Preparation Time
Getting started on your Nilla Wafer Banana Pudding Walking Cups is a breeze. You’ll only need about 15 minutes to gather your ingredients and whip up the pudding mixture. Prepping the bananas and layering everything in cups is pretty straightforward, making this a fun task for a quick treat.
Chill Time
Once your walking cups are assembled, let them chill in the refrigerator for 2 hours. This step is crucial as it allows all the flavors to meld beautifully, ensuring that each bite is rich and creamy. If you’re in a hurry, you can skip the full chill time, but trust me—waiting is worth it!
Total Time
In total, you’re looking at 2 hours and 15 minutes from start to finish. That’s just a little time investment for a delicious dessert that’s sure to impress your friends at the next gathering. Plus, these cups are perfect for on-the-go snacking or casual entertaining!
For more delightful recipes and tips, check out Serious Eats for inspiration.
Nutritional Facts for Nilla Wafer Banana Pudding Walking Cups
Calories per serving
Each serving of Nilla Wafer Banana Pudding Walking Cups packs around 150 calories, making it a delightful treat that won’t weigh you down. This moderate caloric content allows you to indulge without the guilt—perfect for those busy days when you crave something sweet.
Sugar content
When it comes to sweetness, these cups contain approximately 15 grams of sugar per serving. While it satisfies that sweet tooth, it’s wise to enjoy these in moderation. For more details on sugar intake recommendations, check out the American Heart Association’s guidelines.
Protein content
You can expect about 2 grams of protein in a serving. Although not a significant source of protein, the combination of Nilla Wafer and banana adds a touch of nutritional balance. This pudding cup is more about joy than heavy nutrition, making it an enjoyable dessert option after a meal.
Incorporating Nilla Wafer Banana Pudding Walking Cups into your dessert rotation can bring a little bit of sunshine to any occasion!
FAQs about Nilla Wafer Banana Pudding Walking Cups
Can I make this dessert ahead of time?
Absolutely! One of the great things about Nilla Wafer Banana Pudding Walking Cups is that they can be made a day in advance. Just layer your ingredients—vanilla pudding, sliced bananas, and crushed Nilla wafers—in your cups and refrigerate. This allows the flavors to meld beautifully. However, if you want those wafers to retain their crunch, consider adding them right before serving. Trust me, that extra texture makes a big difference!
What can I substitute for vanilla wafers?
If you’re looking to switch things up or just don’t have Nilla Wafers on hand, fret not! Here are a few tasty alternatives:
- Shortbread Cookies: They bring a buttery flavor that pairs well with the pudding.
- Graham Crackers: A classic choice that adds a nice crunch.
- Ladyfingers: Perfect for a light and airy texture.
Each of these substitutes will give you a slightly different flavor, but they’ll still create delicious walking cups that your friends will rave about.
Are there any gluten-free alternatives?
For those who need to avoid gluten, you can easily adapt your Nilla Wafer Banana Pudding Walking Cups. Look for gluten-free cookie options available in most grocery stores. Brands like Glutino offer wonderful gluten-free wafers. You might also consider using crushed gluten-free graham crackers or even homemade gluten-free cookies for that added personal touch. This way, everyone can enjoy your delightful dessert!
Feel free to explore more about gluten-free baking on websites like Celiac Disease Foundation. Enjoy your culinary adventure!
Conclusion on Nilla Wafer Banana Pudding Walking Cups
In conclusion, Nilla Wafer Banana Pudding Walking Cups are a delightful and convenient dessert option for any occasion. They’re not just visually appealing; they also deliver layers of classic flavors that transport you back to childhood. Whether it’s a picnic, potluck, or just a casual night in, these cups are sure to impress your friends and family.
Make the recipe your own by experimenting with additional toppings or alternative layers, like adding whipped cream or chopped nuts. If you’re curious about variations, check out this banana pudding history to spark your creativity.
Why not whip up these delicious cups for your next gathering and share your experience? You may just create a new tradition!
PrintNilla Wafer Banana Pudding Walking Cups: Easy & Indulgent Treats

A delightful take on a classic dessert, these Nilla Wafer Banana Pudding Walking Cups are easy to make and perfect for any occasion.
- Prep Time: 15 minutes
- Total Time: 15 minutes
- Yield: 4 servings 1x
- Category: Dessert
- Method: No-bake
- Cuisine: American
- Diet: Vegetarian
Ingredients
- 1 box Nilla wafers
- 2 cups banana pudding
- 3 ripe bananas, sliced
- 2 cups whipped cream
- 1 teaspoon vanilla extract
- 1/2 cup chocolate chips (optional)
Instructions
- In a cup, layer the bottom with Nilla wafers.
- Add a layer of banana pudding.
- Place a few banana slices on top.
- Add a layer of whipped cream.
- Repeat the layers until the cup is full.
- Top with chocolate chips if desired.
Notes
- For added flavor, you can mix some crushed Nilla wafers into the whipped cream.
- Serve immediately for the best texture.
Nutrition
- Serving Size: 1 cup
- Calories: 300
- Sugar: 20g
- Sodium: 200mg
- Fat: 15g
- Saturated Fat: 7g
- Unsaturated Fat: 5g
- Trans Fat: 0g
- Carbohydrates: 36g
- Fiber: 1g
- Protein: 3g
- Cholesterol: 30mg
Keywords: Nilla wafer, banana pudding, dessert, walking cups, easy treats