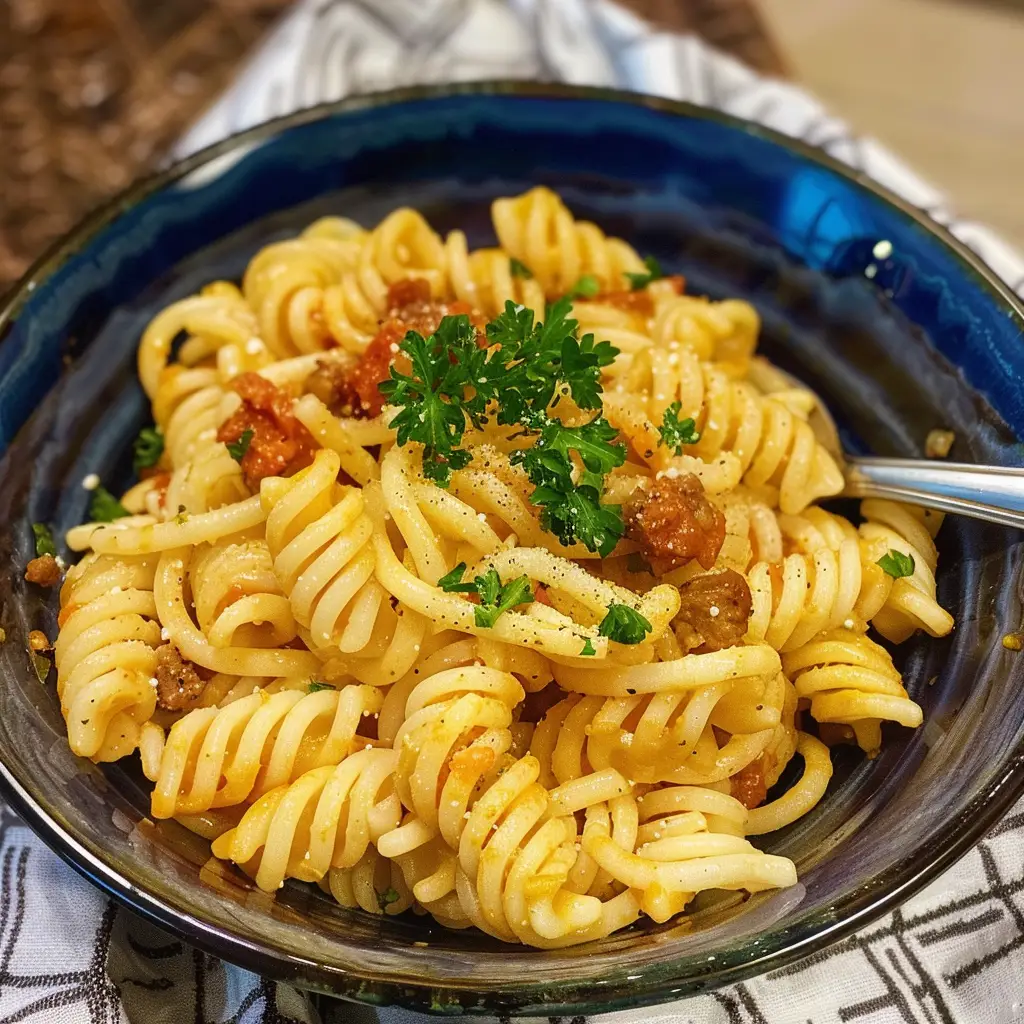
Homemade Pasta Roni
Pasta Roni, a popular packaged food known for its convenience and variety, has become a staple in many households since its inception. This quick side dish, often referred to as “The San Francisco Treat,” originated in the 1950s when the Golden Grain Macaroni Company introduced it to the American market. Over the years, Pasta Roni has evolved, introducing numerous flavors to cater to a wide range of taste preferences.
However, there’s been a growing trend towards creating homemade versions of this beloved product. Food enthusiasts and home cooks are increasingly favoring homemade Pasta Roni for its versatility, the joy of cooking, and the ability to customize it to personal tastes and dietary needs. This shift reflects a broader movement towards meals made from scratch, emphasizing the desire for healthier and more personalized dining experiences.
Why Make Pasta Roni at Home?
Opting to make Pasta Roni at home comes with a myriad of benefits, chief among them being the use of healthier ingredients and the ability to customize the dish. Here’s why you might consider preparing it in your own kitchen:
- Healthier Ingredients: When you choose to make Pasta Roni at home, you have complete control over the ingredients used. You can opt for whole grain pasta, organic stock, and fresh herbs, significantly boosting the nutritional profile of the dish. Additionally, homemade versions allow for the reduction or elimination of sodium and the use of high-quality fats, contributing to a healthier meal overall.
- Customization: Homemade Pasta Roni can be easily adapted to suit dietary restrictions or personal taste preferences. Whether you’re catering to a gluten-free diet by using alternative pasta options or adding a variety of proteins and vegetables to make the dish more substantial, the possibilities are endless. This flexibility ensures that the meal can be enjoyed by everyone at the table, regardless of their dietary needs.
- Avoiding Preservatives and Artificial Flavors: Packaged foods often contain preservatives and artificial flavors that many individuals prefer to avoid. By making Pasta Roni from scratch, you eliminate these additives, resulting in a cleaner, more wholesome dish. This not only contributes to better health but also enhances the natural flavors of the ingredients used.
Creating Pasta Roni at home is not just about avoiding negatives like preservatives and artificial flavors; it’s also about embracing the positives. The use of healthier ingredients and the ability to customize the dish to your liking make the homemade version a far superior choice. Whether you’re looking to recreate a classic flavor or invent something entirely new, the journey of making Pasta Roni at home is sure to be a rewarding one.
In today’s fast-paced world, taking the time to prepare meals from scratch, such as homemade Pasta Roni, is a choice that pays dividends in both health and satisfaction. As we continue to seek out ways to nourish our bodies and delight our palates, turning to our kitchens and the wholesome ingredients within them is a step back to basics that many are eager to embrace.
The Homemade Pasta Roni Recipe
Ingredients and Substitutions
Creating homemade Pasta Roni begins with assembling the right ingredients. Here are the essentials you’ll need, along with substitutions to accommodate various dietary needs:
- Essential Ingredients:
- Angel hair pasta or your pasta of choice
- Olive oil
- Fresh garlic, minced
- Unsalted butter
- Chicken or vegetable stock
- Parmesan cheese, grated
- Heavy cream
- Salt and pepper
- Fresh or dried parsley
- Substitutions:
- Gluten-Free: Use gluten-free pasta as a direct substitute for traditional pasta.
- Vegan Options: Olive oil can replace butter, and there are many plant-based alternatives for chicken stock, parmesan cheese, and heavy cream available in the market.
- Dairy-Free: Opt for dairy-free cheese options and heavy cream substitutes like coconut cream.
These ingredients and substitutions allow for a versatile foundation, ensuring that everyone can enjoy this comforting dish regardless of dietary restrictions. For more details on substitutions, consider consulting resources on adapting recipes for specific dietary needs.
Step-by-Step Cooking Guide
- Preparation: Start by gathering all your ingredients. Measure everything out to streamline the cooking process.
- Cook the Garlic: In a large pot, heat 2 teaspoons of olive oil over medium-low heat. Add 6 cloves of minced garlic and cook for 1-2 minutes, or until fragrant.
- Melt the Butter: Add 2 tablespoons of unsalted butter to the pot, stirring until it’s fully melted.
- Add Liquids: Pour in 3 cups of chicken stock (or vegetable stock for a vegetarian version), and bring the mixture to a boil over high heat.
- Cook the Pasta: Add the angel hair pasta, cooking according to the package instructions, usually 4-5 minutes, until tender.
- Final Touches: Reduce the heat to medium. Stir in 1 cup of grated parmesan cheese, ¾ cup of heavy cream, and 1 tablespoon of parsley until the cheese is melted and the sauce is creamy.
- Serve: Remove the pot from heat and serve your homemade Pasta Roni immediately for the best flavor and texture.
Tips for Perfect Texture and Flavor:
- Ensure your garlic doesn’t burn when sautéing; it should be golden and fragrant.
- Use freshly grated parmesan for the best melting quality and flavor.
- Consider adding a pinch of red pepper flakes for a subtle heat if desired.
For those looking to perfect their pasta cooking technique, this guide to cooking perfect pasta every time can be a valuable resource. It’s essential to pay attention to the details, from the sautéing of garlic to the final stir of creamy sauce, to achieve the homemade Pasta Roni that’s just right for you and your loved ones.
Variations of Pasta Roni
Exploring variations of the classic Pasta Roni recipe can transform this beloved side dish into an endless array of meals. Here’s how you can get creative:
- Adding Vegetables: Incorporate vegetables like spinach, mushrooms, or sun-dried tomatoes for added nutrition and flavor. These can be sautéed along with the garlic or added towards the end of the cooking process, depending on their required cooking time.
- Protein Boost: Make your Pasta Roni a more filling meal by adding proteins such as grilled chicken, shrimp, or tofu. These can be cooked separately and mixed in once the pasta is done.
- Flavor Twists: Adjust the recipe to mimic different Pasta Roni flavors by altering the spices and herbs. For a Cheesy Garlic version, add more cheese and garlic; for a Creamy Mushroom, include sautéed mushrooms and a dash of truffle oil.
For inspiration on how to incorporate these variations, explore resources like Taste of Home, which offer a plethora of pasta recipes that can be adapted to the Pasta Roni format.
Pairing with Main Courses
Homemade Pasta Roni pairs beautifully with a variety of main courses. Here are some recommendations:
- Grilled or Roasted Meats: The creamy texture of Pasta Roni complements the savory flavors of grilled chicken, steak, or pork chops.
- Fish and Seafood: Serve alongside grilled salmon or shrimp for a lighter, yet satisfying meal.
- As a Standalone Meal: Enhance your Pasta Roni with add-ins like roasted vegetables and diced chicken or keep it simple with extra cheese and herbs for a comforting dish on its own.
Pairing suggestions are designed to make meal planning easier, ensuring a harmonious blend of flavors that elevate the dining experience.
Storing and Reheating
To maintain the quality and texture of leftover Pasta Roni:
- Storing: Cool the Pasta Roni quickly and transfer it to an airtight container. It can be stored in the refrigerator for up to 3 days.
- Reheating: Gently reheat in a saucepan over low heat, adding a splash of water or stock to loosen the sauce. Stir frequently to prevent sticking and ensure even warming.
These best practices ensure that your Pasta Roni remains delicious, even as leftovers. For more detailed tips on storing and reheating pasta dishes, consider resources dedicated to food storage and safety.
By exploring variations, pairing with complementary dishes, and following best practices for storage and reheating, you can enjoy homemade Pasta Roni in numerous delicious and satisfying ways.
FAQs Section
Addressing common queries about homemade Pasta Roni can help ensure a smooth cooking experience. Here are answers to some frequently asked questions, along with troubleshooting tips:
- Why is my pasta sticking together?
- To prevent pasta from sticking, make sure to use enough water when boiling and stir occasionally. Adding a teaspoon of olive oil to the boiling water can also help keep the strands separate.
- How can I thicken the sauce if it’s too runny?
- If your sauce is not thickening, continue cooking it over low heat to reduce the liquid. Alternatively, a slurry made from a teaspoon of cornstarch and water can be added and simmered until the desired thickness is achieved.
- Can I make Pasta Roni ahead of time?
- Yes, but it’s best enjoyed fresh. If you need to prepare it in advance, store it properly in the fridge and gently reheat, adding a little extra liquid to refresh the sauce.
- Is it possible to freeze homemade Pasta Roni?
- Freezing is not recommended as it can significantly alter the texture of the pasta and sauce. For best results, consume within 3 days of making it.
For more detailed guidance on cooking pasta perfectly and solving common kitchen mishaps, resources like Cooking Light provide extensive tips and tricks that can be applied to making homemade Pasta Roni.
Addressing these FAQs can help enhance your cooking process, ensuring every batch of homemade Pasta Roni turns out just as delicious as intended.