

Introduction: The Legacy of Grandma’s Pie Crust
There’s something heartwarming about a pie crust recipe passed down through generations. For many of us, the scent of a freshly baked pie brings back cherished memories of time spent in the kitchen with loved ones. Grandmother’s pie crust is more than just a recipe—it’s a tradition, a lesson in patience, and a reminder that cooking is an act of love.
What sets this crust apart is Grandma’s secret ingredient: cream of tartar. This surprising addition ensures the crust remains tender and flaky, a texture that modern recipes often miss. Unlike store-bought crusts or even some trendy all-butter versions, this one balances flavor and workability beautifully. According to Real Simple, the key to a great crust lies in simplicity, tradition, and the right technique.
Ultimately, this recipe delivers a result that’s consistent, crowd-pleasing, and brimming with nostalgic charm.
Ingredients Breakdown: Understanding Each Component
Crafting the perfect pie crust starts with understanding each ingredient’s purpose. Every component plays a critical role in delivering the texture, taste, and performance you expect.
- Flour: The structure of the crust depends heavily on flour. Use all-purpose flour for balanced protein levels that support flakiness without becoming tough.
- Cream of Tartar: This secret weapon enhances tenderness by stabilizing the dough’s structure and preventing the crystallization of fats. It also slightly acidifies the dough, which softens the gluten strands.
- Salt: Often underestimated, salt enhances the overall flavor of your crust. A pinch is enough to balance the richness of the fat.
- Crisco (Shortening): For exceptional flakiness, Crisco beats butter due to its high melting point. The Pioneer Woman explains that shortening helps keep the dough pliable and easier to handle, especially for beginners.
- Cold Water: Cold water binds the ingredients while keeping the fat solid, which is vital for a flaky crust.
- Egg: Adding a beaten egg gives the crust richness and structure, contributing to its beautiful finish.
- Vinegar: Just a tablespoon makes a big difference. It prevents gluten overdevelopment, ensuring your crust stays tender. As highlighted on Southern Living, vinegar is a classic pro move.

Step-by-Step Preparation Guide
Executing the right steps is just as important as the ingredients themselves. Let’s break it down.
- Keeping Ingredients Cold
Temperature control is crucial. Grandma always emphasized using chilled Crisco, flour, and even a cold mixing bowl. This prevents the fat from melting too soon, which keeps the crust flaky. The Kitchn recommends even freezing your flour if working in a hot kitchen. - Mixing Dry Ingredients
Combine flour, cream of tartar, and salt with a whisk to ensure even distribution. This step ensures that your flavor and leavening are balanced throughout the dough. - Cutting in Shortening
Use a pastry cutter or your fingers to work the shortening into the flour until the mixture resembles coarse crumbs. According to Cleobuttera, this technique creates little pockets of fat that lead to optimal flakiness. - Combining Wet Ingredients
In a small bowl, beat the egg and add vinegar and cold water. Gradually incorporate the liquid into the flour mixture, one tablespoon at a time. The dough should come together loosely—not sticky, and not dry. - Forming the Dough
Knead lightly just until the dough forms. Avoid overworking to prevent a tough crust. - Chilling the Dough
Wrap your dough discs in plastic and refrigerate for at least 30 minutes. This relaxes the gluten and makes rolling easier. - Rolling Out
Lightly flour your surface and roll from the center outwards, turning the dough frequently. This method ensures even thickness and helps maintain the dough’s round shape, as noted by Reddit users who share professional rolling tips.
Baking Tips for the Perfect Crust
Even after rolling out a beautiful dough, baking is where the magic (or mishaps) happen. Here’s how to get it right.
- Blind Baking
If your pie has a wet filling or won’t be baked long, you’ll need to blind bake the crust. To do this, place parchment paper over the crust and fill with pie weights or dried beans, then bake until just golden. Wyse Guide offers a helpful tutorial on blind baking techniques for any pie type. - Preventing Shrinkage
Shrinking can ruin even the most perfectly rolled dough. Chill your crust in the pie dish for 15 minutes before baking to firm it up. Then, use weights during blind baking to keep it in place. Epicurious explains that skipping this step is a common baking pitfall. - Achieving Golden Color
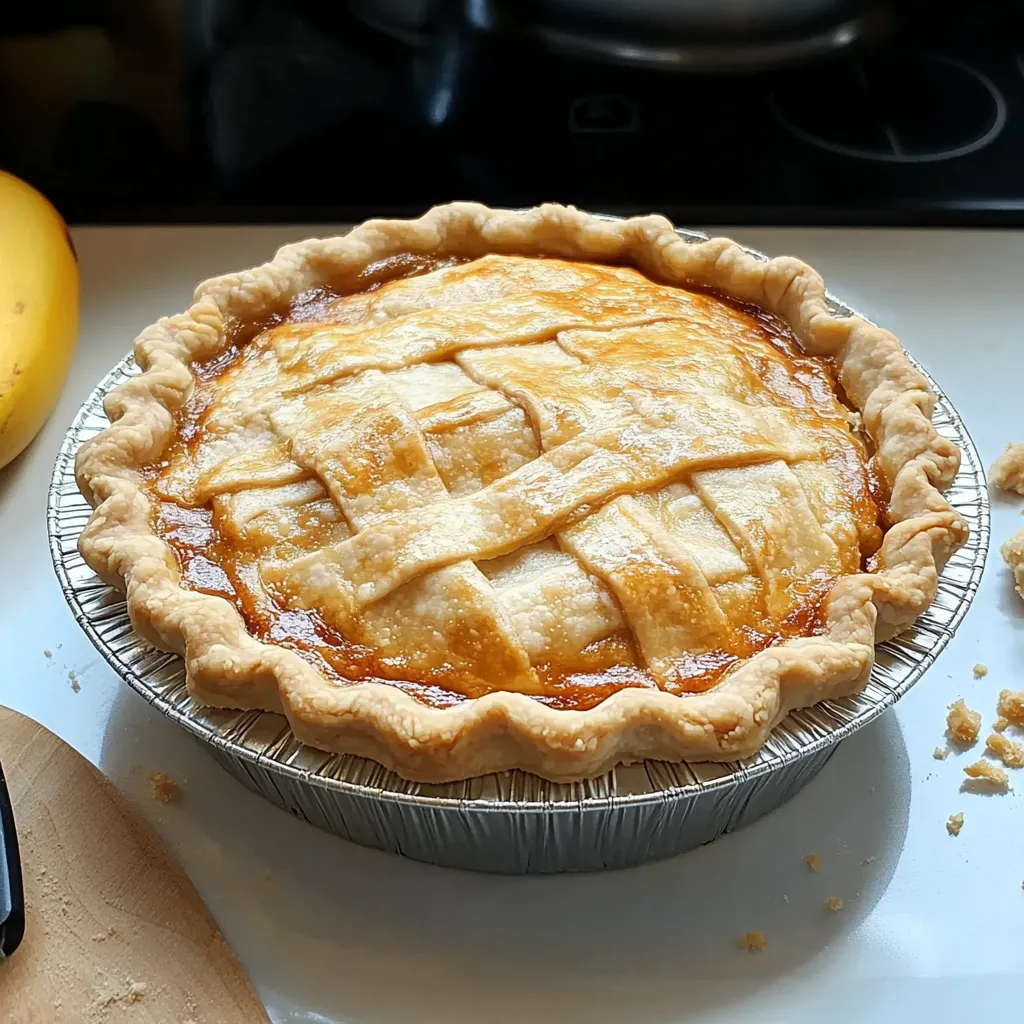
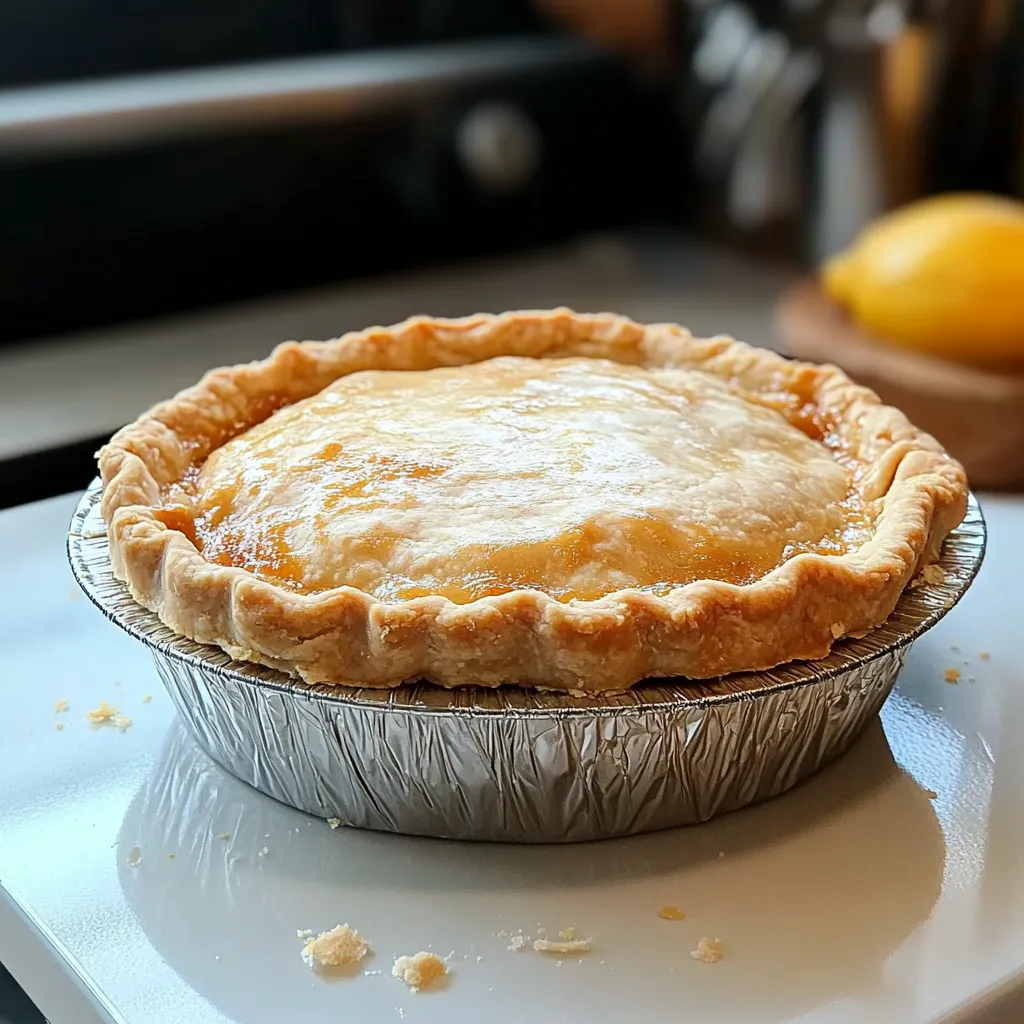
For that picture-perfect look, apply a thin egg wash made from a beaten egg and a teaspoon of water. Brush it evenly over the edge of the crust before baking. As demonstrated on Southern Living, this gives your pie that classic glossy golden finish that makes everyone swoon.
Variations and Substitutions for Grandma’s Pie Crust
Even though Grandmother’s pie crust is near-perfect, modern dietary needs often require slight tweaks. Thankfully, you can customize this recipe without sacrificing its nostalgic charm.
- Butter vs. Shortening
If you prefer butter over Crisco, you’re not alone. While butter provides a richer flavor, shortening delivers a flakier texture due to its higher melting point. According to Sally’s Baking Addiction, a half-butter, half-shortening blend offers the best of both worlds for those seeking balance. - Gluten-Free Options
For those with gluten intolerance, you can use a 1:1 gluten-free flour blend. Make sure the mix includes xanthan gum or another binder to prevent crumbling. Allrecipes suggests chilling the dough longer to enhance its workability. - Vegan Adaptations
To make this recipe vegan-friendly, replace the egg with a flaxseed egg (1 tbsp ground flax + 3 tbsp water), and opt for plant-based shortening or chilled coconut oil. Everyday Pie notes that consistency is key—chill all ingredients for optimal results.
Common Mistakes and How to Avoid Them in Homemade Pie Crust
Every baker makes mistakes, but many crust disasters are avoidable with a bit of know-how.
- Overworking the Dough
Handling the dough too much can lead to a tough crust. Mix gently and stop as soon as the ingredients come together. Epicurious emphasizes the importance of treating dough like a delicate pastry, not bread. - Incorrect Measurements
Accuracy is crucial in baking. A slight imbalance—too much water or flour—can completely alter the texture. Use spoon-and-level methods for dry ingredients and measuring cups for liquids. Real Simple breaks down how small errors can have big consequences. - Improper Rolling Techniques
Rolling too thin or too thick creates an uneven bake. Instead, roll from the center outward, rotating the dough every few inches to maintain shape and thickness. Wyse Guide demonstrates this method with step-by-step clarity, making it ideal for beginners.
Serving Suggestions and Pie Pairings
A good pie crust deserves a great filling and beautiful presentation. Whether sweet or savory, here’s how to serve it best.
- Classic Fillings
This flaky pie crust pairs wonderfully with traditional fillings like apple, cherry, and pumpkin. These options allow the buttery texture to shine while balancing sweet and tangy flavors. The Pioneer Woman often pairs her crusts with hearty fruit fillings. - Savory Options
This crust isn’t just for dessert. Try it in chicken pot pie or vegetable quiches for a cozy, satisfying dish. Sally’s Baking Addiction shares how the crust holds up beautifully under rich, savory fillings. - Presentation Tips
Lattice tops, fluted edges, and seasonal cut-outs elevate your pie’s appearance. Use a small cookie cutter for decorative touches. Gourmandize recommends brushing with egg wash for a golden finish.
Storage and Make-Ahead Tips for Pie Dough
Planning ahead? This crust stores like a dream, letting you bake stress-free when the time comes.
- Refrigeration
Wrap dough disks tightly in plastic and store in the fridge for up to 3 days. Let it sit at room temperature for 10–15 minutes before rolling to prevent cracking. - Freezing
For longer storage, freeze the dough for up to 3 months. Cleobuttera suggests double-wrapping with plastic and foil to avoid freezer burn. Thaw in the fridge overnight before using. - Reheating Baked Crusts
If you’ve blind baked your crust, reheat in a 300°F oven for 10 minutes to refresh the texture. This keeps the crust from becoming soggy once filled.
FAQs: Answering Popular Pie Crust Questions
Got questions? You’re not alone. Here are some of the most asked about this nostalgic crust.
- Why use cream of tartar in pie crust?
It tenderizes the dough and adds lightness. - Can I substitute butter for shortening?
Yes, but it changes the texture. Use half of each for best results. - How do I prevent my crust from becoming soggy?
Blind bake or brush with egg white before filling. - Is it necessary to chill the dough before rolling?
Absolutely. It relaxes gluten and prevents shrinking. - Can I make the dough ahead of time?
Yes! Refrigerate for 3 days or freeze for up to 3 months. - How do I fix a crumbly dough?
Add cold water 1 tsp at a time until it comes together. - What is blind baking and when should I do it?
It’s pre-baking the crust, ideal for cream or custard pies. - Can I freeze the pie crust dough?
Yes, double-wrap and store for 3 months. - How do I achieve a flaky texture?
Keep ingredients cold and don’t overmix. - What type of vinegar is best for pie crust?
Use white or apple cider vinegar in small amounts.
Conclusion: Embracing Tradition in Modern Pie Baking
At its core, Grandmother’s pie crust is more than a recipe—it’s a piece of family history. With simple ingredients and heartfelt technique, it brings people together around the table. Whether you’re preserving tradition or adapting for modern needs, this crust offers both nostalgia and versatility. From its flaky layers to its adaptable nature, it continues to stand the test of time. Encourage your family to make it, tweak it, and most importantly, pass it on. Because recipes like this one are meant to be shared, cherished, and enjoyed for generations to come.
PrintGrandmother’s Pie Crust Recipe: A Timeless Tradition

A tender, flaky pie crust passed down through generations—made with shortening, egg, vinegar, and Grandma’s secret touch: cream of tartar.
- Prep Time: 20 minutes
- Cook Time: Varies (usually 10–15 mins blind bake or 30–45 mins with filling)
- Total Time: 50 minutes (including chilling)
- Yield: 2 pie crusts (for 9-inch pies)
- Category: Baking
- Method: Mixed by hand
- Cuisine: American
- Diet: Vegetarian
Ingredients
– 3 cups all-purpose flour
– ¼ tsp cream of tartar
– 1 tsp salt
– 1½ cups Crisco (vegetable shortening)
– 4–8 tbsp very cold water
– 1 egg, well-beaten
– 1 tbsp vinegar
Instructions
1. Chill all ingredients and mixing tools.
2. Whisk together flour, salt, and cream of tartar.
3. Cut in Crisco until crumbly.
4. Mix cold water, beaten egg, and vinegar.
5. Gradually add liquid to dry mix until dough forms.
6. Divide, shape into disks, wrap, and chill for 30+ mins.
7. Roll out on floured surface and use as needed.
Notes
– Do not overmix or overhandle the dough.
– Keep everything cold for the flakiest crust.
– Dough can be frozen for later use.