
Introduction to Banana Pudding Cheesecake Cones
Have you ever craved a dessert that combines the creamy richness of cheesecake with the nostalgic flavors of banana pudding? Enter banana pudding cheesecake cones—a delightful treat that’s not just easy to make but also fun to serve. Picture this: a crispy cone filled with layers of velvety cream cheese mixture, fresh banana slices, and a sprinkle of vanilla wafer crumbs. It’s a showstopper for any gathering, and best of all, it’s a homemade treat that you can whip up on a relaxing weekend.
Why Banana Pudding Cheesecake Cones are a Great Homemade Treat
There’s something uniquely satisfying about creating a dessert from scratch that feels indulgent yet approachable. These banana pudding cheesecake cones tick all the boxes:
- Versatile: Feel free to mix and match flavors! Use other fruits like strawberries or peaches for a twist, or experiment with different toppings to suit your palate.
- Portable: Thanks to their cone shape, these desserts are incredibly convenient for on-the-go treats or gatherings. Just grab one and savor the layers without the fuss of plates and utensils.
- Kid-Friendly: Getting your kids involved in the kitchen can be a fun way to bond. Let them help layer the cones, and you’ll have a delightful family activity coupled with a delicious reward!
Not only are they delightful for adults, but banana pudding cheesecake cones also pique children’s curiosity and create excitement at any gathering. Did you know that desserts with fruit typically result in a higher satisfaction rating from taste tests? (Source: Journal of Food Science)
Moreover, the nostalgic comfort that comes with banana pudding reminds many of their childhood. Picture the fun summer afternoons with family, gathered around to dig into bowls of this delightful treat. By serving them in cones, you’re bringing back those warm memories but in a fun, modern twist.
Whether you’re looking to impress guests or satisfy your own sweet tooth, banana pudding cheesecake cones provide endless opportunities for creativity in the kitchen. Plus, who wouldn’t want to indulge in such a delightful combination of flavors and textures?
So grab those ingredients and let’s dive into creating this delicious treat! You’re going to love it.
Ingredients for Banana Pudding Cheesecake Cones
Essential ingredients for the recipe
Creating delicious banana pudding cheesecake cones starts with some essential ingredients that will make your dessert truly standout. Here’s what you’ll need:
- Cream Cheese: For that rich, creamy base that sets the stage.
- Bananas: Ripe ones preferred for that perfect sweetness and flavor.
- Pudding Mix: Vanilla works wonders to enhance the banana flavor.
- Heavy Cream: To whip up a luscious and airy topping.
- Sugar: Just the right amount to balance flavors.
- Graham Cracker Crumbs: For a delightful crunch in your cones.
- Ice Cream Cones: Choose your favorite; they’re the vessel for your delicious creation!
Optional add-ins for customization
Feel free to get creative with your banana pudding cheesecake cones! Consider adding:
- Turkey Bacon Crumbles: For a sweet-salty twist, adding a unique flavor.
- Chocolate Chips: A sprinkle of these can elevate your dessert experience.
- Chopped Nuts: Almonds or pecans add a lovely texture.
- Caramel Sauce: Drizzle it over for added sweetness.
Experimenting with these extras can lead to a satisfying treat that matches your personal taste. You can check out Serious Eats for more inspiration on dessert customization!
Preparing Banana Pudding Cheesecake Cones
If you find the thought of indulging in banana pudding cheesecake cones absolutely irresistible, you’re not alone! With their delightful combination of creamy cheesecake, smooth banana puree, and crunchy vanilla wafers all housed in a crispy waffle cone, these desserts are perfect for any occasion. And guess what? They’re pretty simple to whip up! Let’s walk through the steps together.
Gather and prepare your ingredients
Before diving into this delightful dessert, it’s essential to gather all your ingredients. Here’s what you’ll need:
- 8 oz cream cheese (softened)
- 1 cup powdered sugar
- 1 teaspoon vanilla extract
- 1 ripe banana (mashed)
- 1 cup heavy whipping cream
- ½ cup crushed vanilla wafers
- Waffle cones (pack of 6-8)
- Extra banana slices for topping
- Additional whipped cream for garnish
Preparation is key, so measuring everything in advance will make the process a breeze. Also, make sure your cream cheese is softened—this will help it blend much smoother!
Mix the cream cheese until smooth
In a large mixing bowl, it’s time to get that cream cheese as smooth as a jazz tune on a summer evening. Using either an electric mixer or a good old-fashioned whisk, cream the softened cream cheese until it’s fluffy. The texture should be silky and free of lumps, which is essential for a creamy filling. If you’re unsure about whether it’s fully mixed, a quick taste test can assure you it’s ready to go—or at least ready to be mixed with deliciousness!
Combine in the sweet ingredients for flavor
Now, it’s time to kick up the sweetness! Add the powdered sugar and vanilla extract to your cream cheese mixture. The powdered sugar balances out the richness of the cream cheese, while the vanilla adds a warm, inviting flavor. Mix these together until everything is fully combined. This is where the magic really begins!
Fold in banana puree and vanilla wafers
Next up, you’ve got to fold in the star ingredient—our beloved banana! Mash a banana and gently mix it into your cream cheese combo until it’s evenly distributed. Here’s a tip: don’t overmix; you want to keep some little banana chunks for added texture. Then, add in the crushed vanilla wafers. This creates that delightful crunch that contrasts beautifully with the creamy filling.
Chill the mixture for the perfect consistency
While anticipation might be building, resist the urge to dive right in! Cover your bowl and let it chill in the refrigerator for at least 30 minutes. Chilling helps to firm up your mixture, making it easier to pipe into the cones. Plus, it lets those flavors meld beautifully. According to food scientists, chilling mixtures can enhance flavors, so this step is non-negotiable!
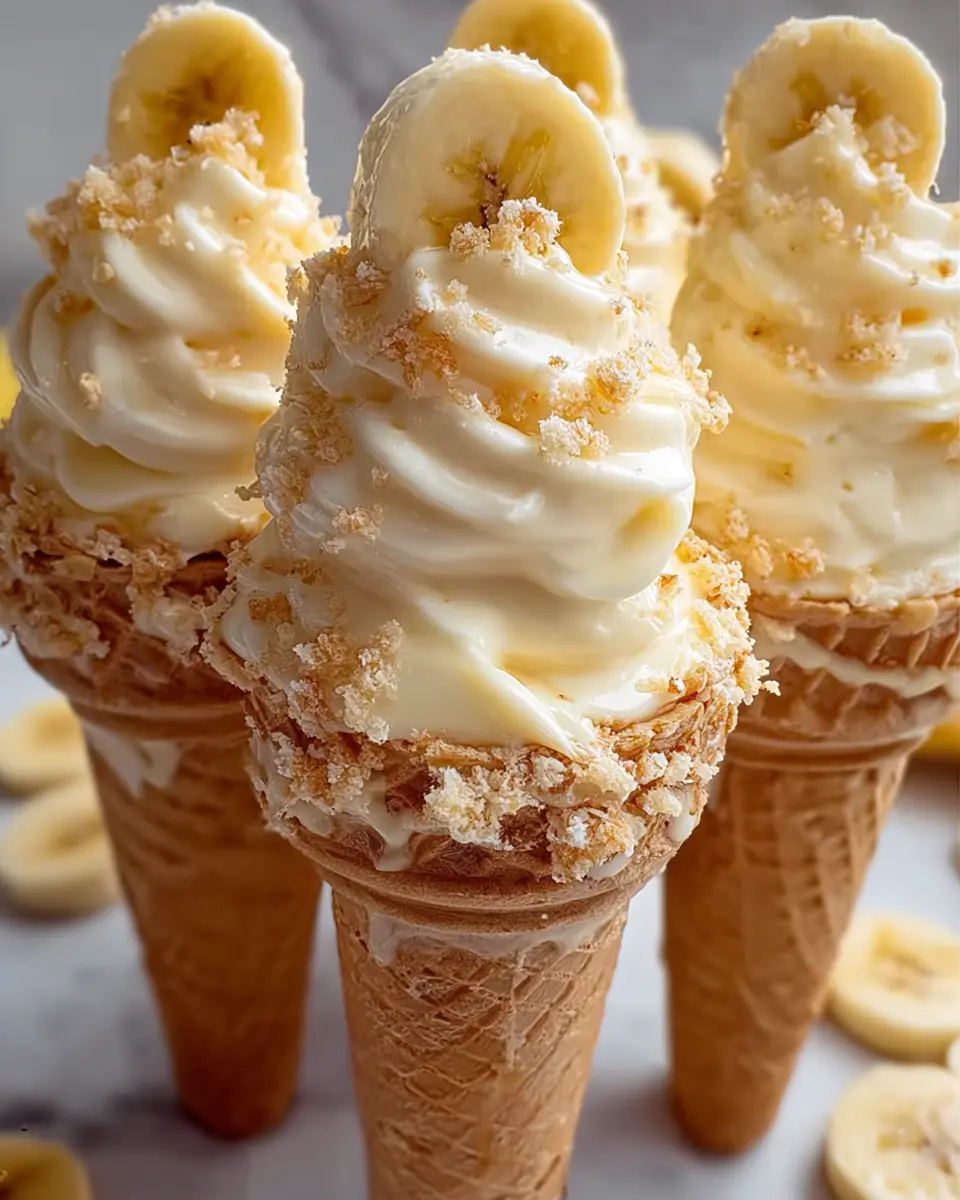
Pipe the mixture into waffle cones
Once chilled, it’s time for some fun! Using a piping bag or a simple zip-top bag with the corner snipped off, fill those crispy waffle cones with your delightful banana cheesecake mixture. Just picture it as if you’re artistically adding layers of joy and flavor into a canvas cone! Don’t worry about being perfect—it’s the deliciousness that counts.
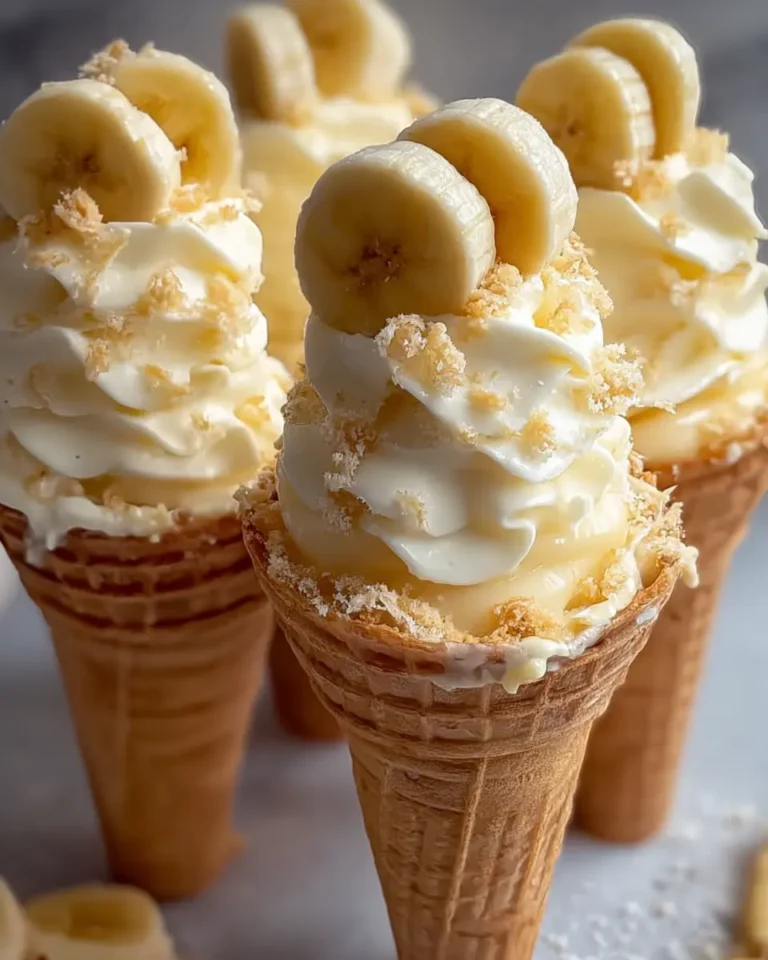
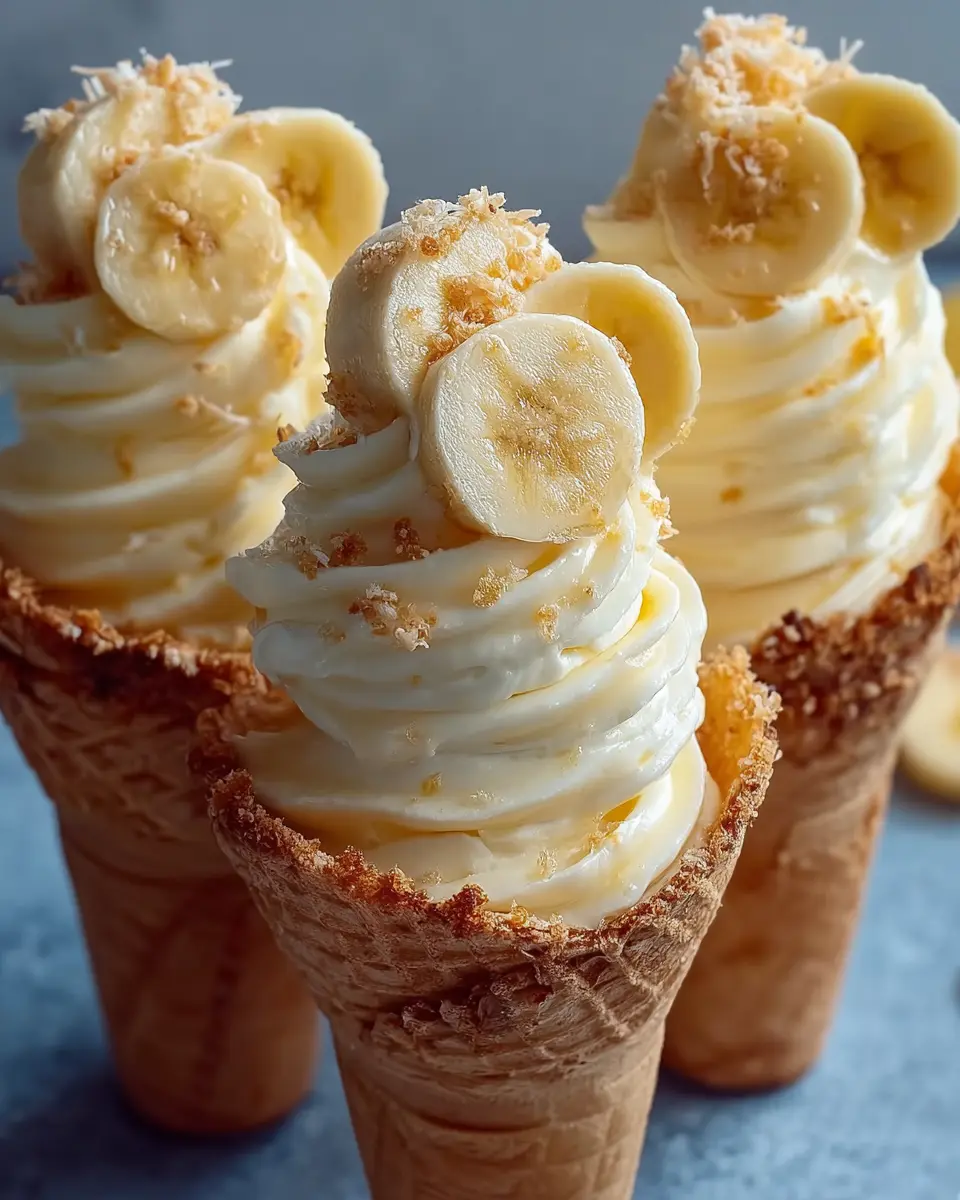
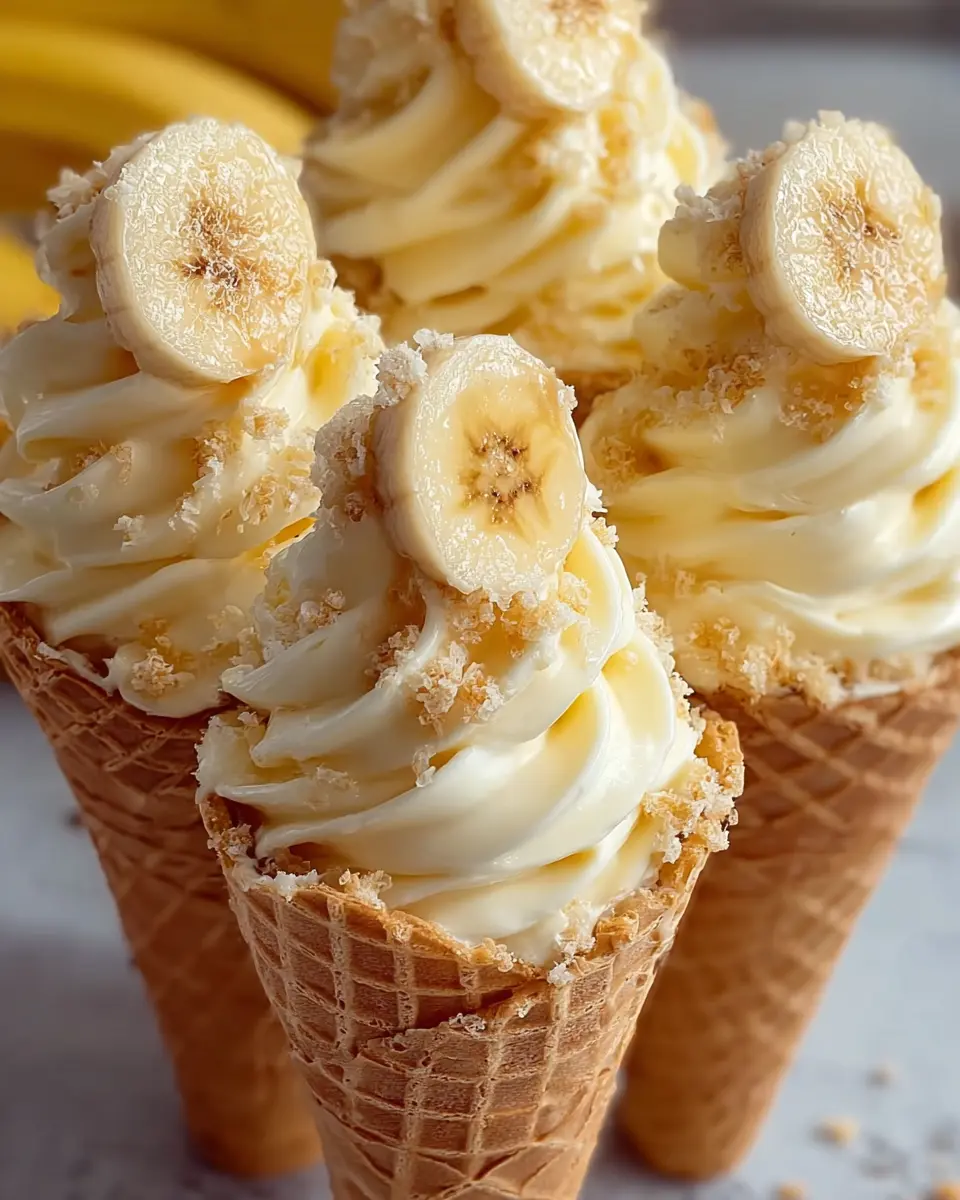
Top with banana slices and whipped cream
Finally, the pièce de résistance: topping your banana pudding cheesecake cones. Add a few fresh banana slices on top, and for the ultimate indulgence, finish with a dollop of whipped cream. The extra touch of decoration not only looks inviting but also adds a delightful taste and texture.
Feel free to serve them immediately or chill them for a bit longer if you like them extra cold. These cones are a fantastic way to enjoy a classic dessert in a fun new format—perfect for impressing friends at a gathering or enjoying a cozy night in!
So, are you ready to whip up some of these sweet banana pudding cheesecake cones? Grab your ingredients and let the delicious adventure begin! If you’re curious for more dessert ideas, check out some of our favorite cheesecake variations here. Your taste buds will thank you!
Variations on Banana Pudding Cheesecake Cones
Chocolate Banana Pudding Cheesecake Cones
If you’re a fan of rich flavors and mouthwatering combinations, consider transforming your banana pudding cheesecake cones into a delightful chocolate version. Start by adding cocoa powder to your cheesecake filling for that intense chocolate taste that beautifully complements the creaminess of the bananas. To elevate it further, drizzle some melted chocolate over the top or include mini chocolate chips for added texture and sweetness.
You can also think about pairing this dessert with a chocolate cone instead of the traditional waffle cone, giving your treat a double dose of chocolate goodness. It’s a perfect option for when you’re craving something sweet, and the chocolate-to-banana ratio is oh-so-satisfying!
Add Peanut Butter for a Twist
For those who adore the classic bananas and peanut butter combo, incorporating peanut butter into your cheesecake filling can elevate the flavor profile to new heights. Simply mix a tablespoon or two of creamy peanut butter into your cheesecake base for that rich, nutty essence that pairs perfectly with bananas.
Feel free to top your cones with crushed peanuts or even a dollop of peanut butter drizzle. Did you know that bananas and peanut butter are not only delicious together but also packed with potassium and protein? It’s a win-win! For a different flair, you might even explore using graham cracker crumbs mixed with a touch of cinnamon for the cone topping, a nod to a classic cheesecake crust.
When it comes to making your banana pudding cheesecake cones uniquely yours, the possibilities are endless! For more ideas and variations, check out resources from Real Simple and Food Network. Happy experimenting!
Cooking Tips and Notes for Banana Pudding Cheesecake Cones
Ensuring the cream cheese is perfectly softened
To achieve the best results in your banana pudding cheesecake cones, it’s essential that your cream cheese is perfectly softened. Start by taking it out of the refrigerator about 30 minutes before mixing. This not only helps in blending seamlessly but also enhances that creamy texture we all love. If you’re short on time, you can cut it into small cubes and microwave for about 10-15 seconds—just be careful not to heat it too much!
Avoiding over-mixing to maintain texture
When crafting your cheesecake filling, less is more! Over-mixing can lead to a gummy texture rather than the light, fluffy one you desire. Mix your ingredients just until they’re combined; a few lumps are perfectly acceptable. This keeps the banana pudding cheesecake cones airy and delightful. Remember, you want that dreamy flavor to shine through without compromising the texture.
If you’d like more tips on perfecting your cream-based desserts, check out this guide on the science of cream cheese for more insights!
Serving Suggestions for Banana Pudding Cheesecake Cones
Creative Ways to Present Your Cones
Making your banana pudding cheesecake cones visually appealing can elevate the whole experience. Consider these ideas:
- Layer it Up: Stack your components in clear plastic cups before transferring to cones. This adds visual depth and excitement.
- Fun Toppings: Add mini banana slices, crushed vanilla wafers, or a drizzle of chocolate sauce on top to create an inviting look.
- Colorful Accents: Use sprinkles or edible flowers for a pop of color—every scoop can entice your guests even before they take a bite!
For more fresh presentation ideas, check out The Kitchn.
Perfect Pairings with Beverages
To complement your banana pudding cheesecake cones, think about enjoying them with refreshing beverages.
- Iced Tea: A glass of sweetened or unsweetened iced tea provides a nice balance and quenches your thirst.
- Coffee: The deep flavor of coffee can contrast wonderfully with the creamy sweetness of the cones. A splash of cream can even make it a decadent pairing.
- Sparkling Water: Opt for flavored sparkling water to cleanse your palate between bites.
Remember, the right beverage can amplify the joy of your dessert, making your treat even more satisfying!
Time Breakdown for Banana Pudding Cheesecake Cones
When it comes to whipping up these delightful banana pudding cheesecake cones, it’s all about planning ahead to maximize yumminess. Here’s a quick overview of how your time will break down:
Preparation time
First up, you’ll need about 20-30 minutes to gather your ingredients and craft that luscious cheesecake filling. It’s quicker than you’d think, especially if you have everything prepped in advance.
Chilling time
After assembling those cones, patience is key! You’ll want to chill the banana pudding cheesecake cones in the refrigerator for at least 2 hours—this helps the flavors meld.
Total time
All in all, expect a total time commitment of around 2.5 to 3 hours. But don’t worry; most of that is hands-off chilling time, making it perfect for a weekend treat.
For more tips on prepping dessert sensations, check out resources like Martha Stewart’s dessert page for additional inspiration. Happy chilling!
Nutritional Facts for Banana Pudding Cheesecake Cones
Calories per serving
When indulging in a delightful treat like banana pudding cheesecake cones, it’s helpful to know you’ll be enjoying about 200 calories per serving. This makes them a fun choice for a sweet snack that won’t derail your day.
Key nutrients and what they provide
These cones pack a delightful mix of flavors and nutrition:
- Calcium: Essential for bone health, found in the cream cheese and any milk alternative used.
- Vitamin C: Bananas provide an excellent source of this vital nutrient, which supports your immune system.
- Fiber: With bananas and the cone itself, you’re getting fiber that aids digestion and keeps you fuller longer.
Understanding these nutritional elements can help you make better choices in your desserts, ensuring you enjoy flavors without the guilt. If you’re curious about the benefits of calcium or vitamin C, check out the National Institutes of Health for more detailed insights.
So, the next time you’re craving something sweet, consider whipping up these banana pudding cheesecake cones—a tasty treat that’s just as good for your palate as it is for your body!
FAQs about Banana Pudding Cheesecake Cones
Can I make these cones ahead of time?
Absolutely! One of the best things about banana pudding cheesecake cones is their make-ahead potential. You can prepare the cheesecake filling and crumble your banana wafers in advance. Just assemble the cones a few hours before you plan to serve them to maintain that delightful crunch. Be mindful, though—once filled, the cones may soften if left too long. Packing the filling in separate containers can help ensure freshness.
What are some storage tips for leftovers?
If you find yourself with leftover banana pudding cheesecake cones, don’t fret! To keep them fresh, store the filling and cones separately in airtight containers. The cheesecake filling can last up to five days in the fridge, while the cones should be kept dry to retain their crispness. If you’ve already assembled the cones and have leftovers, try to enjoy them within a day for the best texture.
Can I use different fruits for toppings?
Definitely! While bananas are the star of banana pudding cheesecake cones, experimenting with different fruits can lead to delightful variations. Consider using strawberries, blueberries, or even peaches. Each fruit gives a unique flavor profile to your dessert. You can check out recipes for fruit-based toppings at Epicurious or Food Network for more inspiration.
Incorporating your favorite fruits not only enhances the visual appeal but also adds an exciting twist to each bite of your cones. So go ahead, get creative and personalize your cones to fit your taste!
Conclusion on Banana Pudding Cheesecake Cones
Making banana pudding cheesecake cones is not just about following a recipe; it’s an experience packed with joy and nostalgia. From the moment you whip up the creamy cheesecake filling to the first delightful bite, these cones offer a playful twist on classic flavors.
Imagine gathering with friends, sharing these delicious treats, and basking in their compliments. It’s a dessert that sparks conversation and laughter. If you’re looking for a unique party favorite or a refreshing way to satisfy your sweet tooth, these cones are a must-try. For more creative dessert ideas, check out Serious Eats. Happy baking!
PrintBanana Pudding Cheesecake Cones: The Best Easy Treat You’ll Love

Bite into a delightful twist on traditional banana pudding with these Banana Pudding Cheesecake Cones.
- Prep Time: 20 minutes
- Total Time: 50 minutes
- Yield: 8 servings 1x
- Category: Dessert
- Method: No-Bake
- Cuisine: American
- Diet: Vegetarian
Ingredients
- 1 cup crushed vanilla wafers
- 2 cups cream cheese, softened
- 1 cup powdered sugar
- 1 cup whipped topping
- 2 ripe bananas, sliced
- 1 teaspoon vanilla extract
- 8 ice cream cones
Instructions
- In a mixing bowl, combine crushed vanilla wafers and softened cream cheese.
- Mix in powdered sugar and vanilla extract until smooth.
- Fold in whipped topping gently to maintain the fluffiness.
- Layer the bottom of each cone with sliced bananas.
- Fill the cones with the cheesecake mixture, then top with additional banana slices and a few crushed vanilla wafers.
- Chill in the refrigerator for at least 30 minutes before serving.
Notes
- For a crunchy texture, top with more crushed wafers just before serving.
- Experiment with different flavors of pudding for a unique twist.
Nutrition
- Serving Size: 1 cone
- Calories: 250
- Sugar: 14g
- Sodium: 120mg
- Fat: 10g
- Saturated Fat: 5g
- Unsaturated Fat: 3g
- Trans Fat: 0g
- Carbohydrates: 36g
- Fiber: 1g
- Protein: 3g
- Cholesterol: 30mg
Keywords: Banana Pudding, Cheesecake, Desserts, Treats, Easy Recipes