
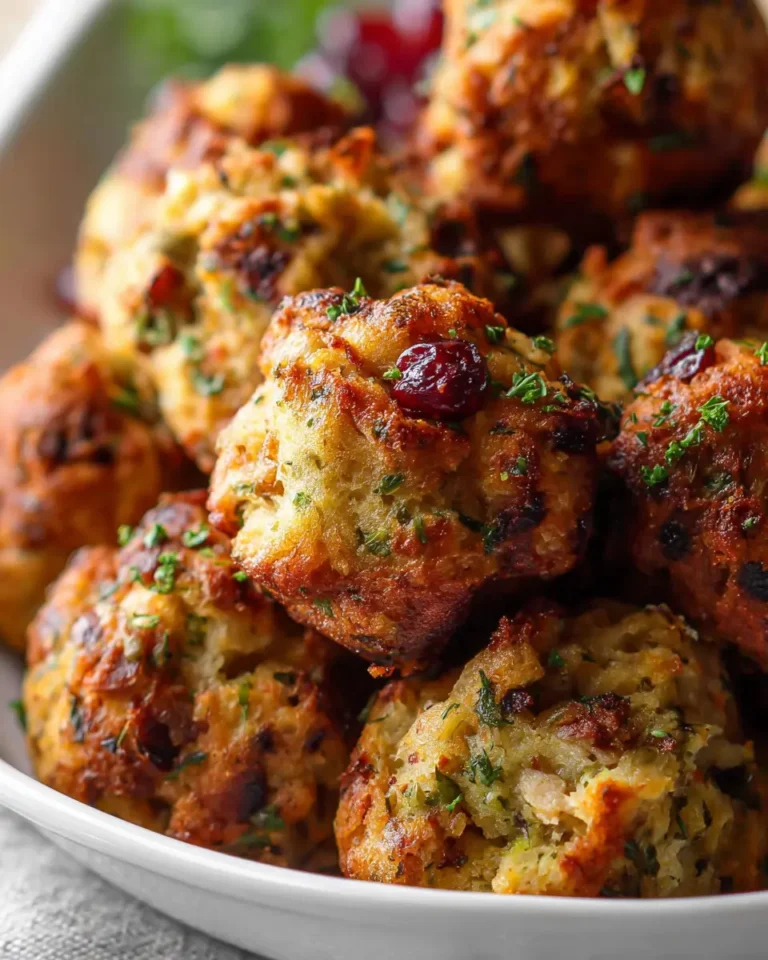
Introduction to Crispy Stuffing Balls
If you’re a young professional navigating the bustling world of work and play, you may find it challenging to balance a busy schedule with the desire for homemade meals. That’s where crispy stuffing balls come into play. These delicious bites are not only effortless to prepare but also a delightful way to enjoy classic flavors in a modern twist. Imagine savory filling held together by a crispy exterior—what’s not to love?
Why Crispy Stuffing Balls Fit Your Fast-Paced Lifestyle
With an always-full calendar, the last thing you want after a long day is to spend hours in the kitchen. Thankfully, crispy stuffing balls are versatile and can be whipped up in no time. Here’s why they’re ideal for busy professionals:
-
Quick Preparation: With just a few ingredients, you can prepare the stuffing and form the balls in less than 30 minutes. Plus, you can make a big batch and refrigerate or freeze them for later.
-
Versatile Options: You can customize your stuffing balls using turkey bacon or chicken ham for a delicious flavor boost. Add some herbs or spices to make them uniquely yours!
-
Meal Prepping Made Easy: Perfect for meal preppers, these bites store well in the fridge and can be quickly reheated when hunger strikes. They make an excellent addition to lunches or quick dinners.
Taste Without Compromise
In an age where dining out is often the go-to solution, making your own food doesn’t have to be a compromise. Studies have shown that cooking at home can lead to healthier eating habits and savings on your budget. Plus, it’s just more rewarding to share a meal you’ve prepared yourself!
Enjoying the Company
Imagine coming home after a hectic day, tossing a few crispy stuffing balls in the oven, and savoring the aroma as they cook. This not only elevates your meal but brings a sense of comfort and homeliness back into your busy life. Next time you’re looking for an easy dinner idea, consider this crowd-pleaser.
Intrigued? If you’re ready to dive deeper into this culinary adventure, check out this guide on easy homemade recipes to get started!
Ingredients for Crispy Stuffing Balls
Creating crispy stuffing balls is all about selecting the right ingredients that blend together to achieve that perfect balance of flavor and texture. Let’s dive into what you’ll need to whip up these tasty bites for your next gathering.
Essential Ingredients for the Stuffing Mixture
To craft a rich, savory filling, gather these key components:
- Stale Bread: About 4 cups, preferably a mix of whole grain and white for texture.
- Turkey Bacon: About 4 slices, chopped finely for a smoky flavor.
- Chicken Ham: A half-cup, diced to add a savory profile.
- Beef Broth: 1 cup, for moisture and depth.
- Onion and Celery: One cup each, diced, for aroma and crunch.
- Herbs: A mix of parsley, sage, and thyme enhances the stuffing’s freshness.
These ingredients create a heartwarming base that everyone will love.
Ingredients for the Coating
For that irresistible crunch, you’ll need:
- Eggs: 2, beaten, to help bind the mixture.
- Breadcrumbs: 1 cup, seasoned or unseasoned, depending on your preference.
Coating your stuffing balls ensures they develop a delectable outer crisp while keeping the inside moist and flavorful. If you’re curious about different breadcrumb options, you can check out this guide on breadcrumbs for more details.
Once you have these ingredients prepped, you’re all set to transform them into crispy stuffing balls that are perfect for any occasion.
Step-by-step preparation of Crispy Stuffing Balls
Creating crispy stuffing balls is a delightful way to elevate your meal, whether it’s during the holidays or just a comforting dinner at home. Follow this step-by-step guide to craft your perfect crispy stuffing balls filled with flavor and crunchy goodness. Let’s dive in!
Moisten the stuffing
Start by choosing a good base for your stuffing. Whether you opt for a store-bought version or create your own from scratch, it’s essential to moisten it properly.
- If you’re using dry stuffing mix, follow the package instructions, adding water or broth (chicken or vegetable broth works wonderfully) to get that right consistency. Aim for a texture that’s moist but not soggy.
- If you’re using leftover stuffing, mix in a bit more broth to ensure it’s easy to mold.
Once moistened, set it aside for a few minutes to let the flavors meld.
Add the flavorings
Now comes the fun part—building flavor! This is where you can get creative. Here are some tasty options to enhance your stuffing:
- Chopped Turkey Bacon or Chicken Ham: Cook these first until crispy, then mix them into your stuffing for those glorious flavors.
- Herbs and Spices: Fresh parsley, thyme, or sage can add a beautiful aromatic layer. Just a sprinkle of garlic powder or onion powder also does wonders!
Enriching the stuffing is key to achieving irresistible crispy stuffing balls.
Mix thoroughly
Once you’ve added your flavorings, it’s time to mix everything together. Using your hands or a wooden spoon, fold the mixture gently until it’s well incorporated.
- The goal here is to ensure that every bite of your stuffing balls will be bursting with flavor.
- Don’t be afraid to take a taste; adjust seasonings if you think it needs a little more kick!
Shape into balls
Now that your mixture is well mixed, it’s time to shape it into your crispy stuffing balls.
- Grab a handful of the mixture and roll it between your palms. Aim for a size similar to a golf ball for even cooking.
- Place them on a baking sheet lined with parchment paper for easy handling.
Make sure they’re all uniform in size, which helps achieve an even crispiness when frying.
Prepare the coating station
To take your crispy stuffing balls to the next level, consider coating them before frying. This creates an extra crunch! Prepare your coating station:
- Ingredients needed:
- 1 cup of flour
- 2 beaten eggs
- 1 cup of breadcrumbs
Set these up in separate shallow dishes, making it easy to dip and coat your balls.
Coat the balls
Take each stuffing ball and roll it in the flour first, ensuring it’s lightly coated. Then, dip it into the beaten egg mixture and finally roll it in the breadcrumbs for that golden, crispy exterior.
- Repeat until all your stuffing balls are nicely coated.
This step adds a lovely crunch that contrasts beautifully with the soft stuffing inside.
Heat the oil
Choose a deep pot or a large frying pan for cooking your crispy stuffing balls. Fill it with vegetable oil, about 2-3 inches deep, and heat it over medium to high heat.
- You can test if the oil is ready by dropping a little piece of bread into it—if it bubbles up, you’re good to go!
Fry until golden
Carefully place a few stuffing balls into the hot oil, ensuring not to overcrowd the pan. Fry them for about 4-5 minutes, or until they are golden brown and crispy.
- Be patient; let them cook to develop that perfect crispiness!
Using a slotted spoon, remove them from the oil and place them on paper towels to drain any excess oil.
Drain and serve
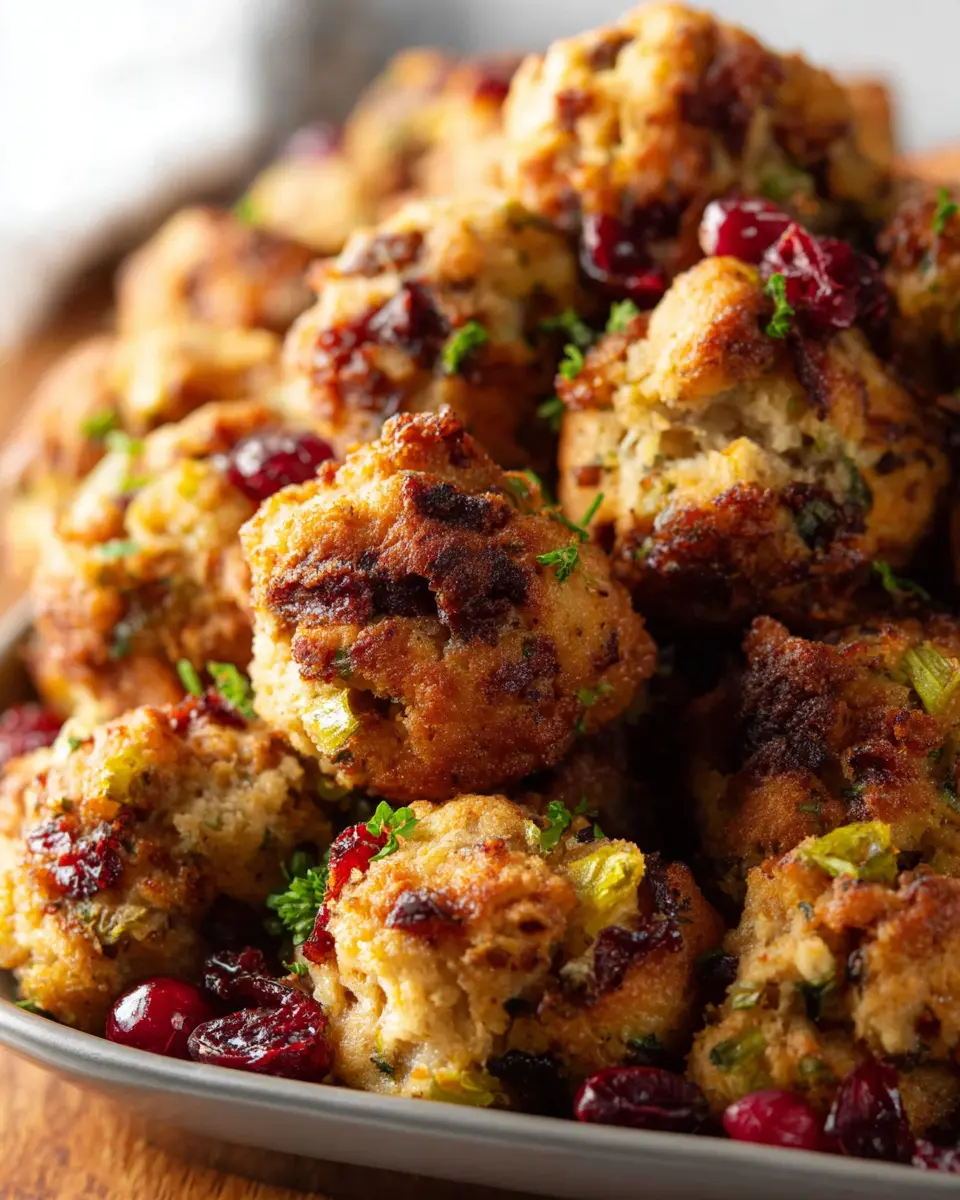
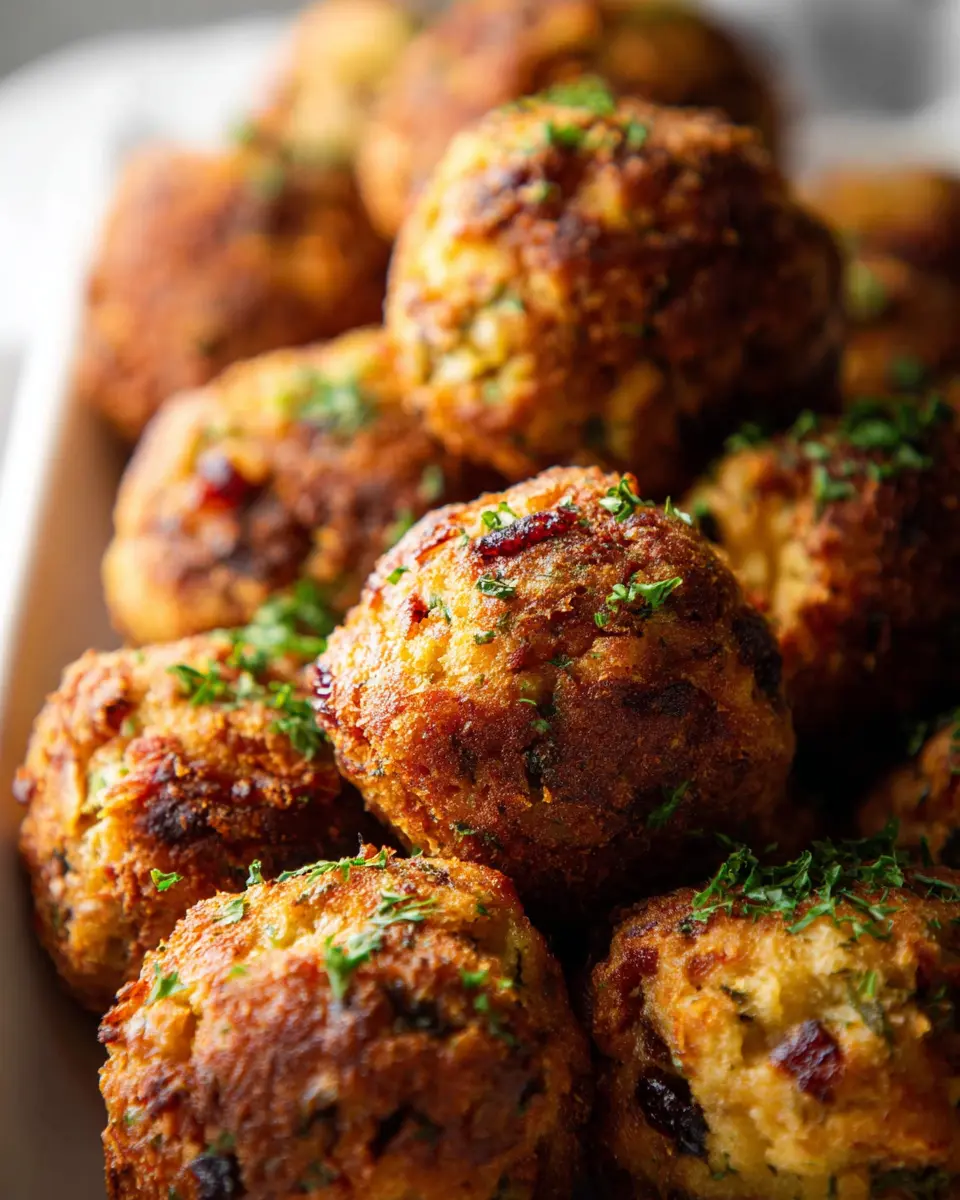
Finally, it’s time to serve your scrumptious crispy stuffing balls! Arrange them on a plate, adding a garnish of fresh herbs for a pop of color.
- Consider serving them with a side of gravy or a tangy dipping sauce for an extra flavor explosion.
With this step-by-step guide, you’ll not only impress your dinner guests but also yourself with your culinary skills. Happy cooking!
Variations on Crispy Stuffing Balls
Exploring different takes on crispy stuffing balls can turn this classic dish into a versatile staple for any occasion. Here are two delightful variations you might want to try!
Crispy Stuffing Balls with Turkey Bacon
If you’re looking to add a smoky twist to your crispy stuffing balls, consider incorporating turkey bacon. Not only does it infuse rich flavor, but it also offers a leaner alternative. Here’s how you can do it:
- Ingredients: Substitute some of the traditional stuffing ingredients with chopped and cooked turkey bacon. You’ll want about 4-6 strips, diced.
- Instructions: After mixing your stuffing base, fold in the crispy turkey bacon before shaping the mixture into balls. Bake until golden.
For simple steps on how to cook turkey bacon perfectly, check out this guide from Healthline.
Crispy Stuffing Balls with Herbs and Cheese
Another fantastic way to elevate your crispy stuffing balls is by adding fresh herbs and cheese. This variation brings out an aromatic taste that can brighten up your holiday table.
- Ingredients: Use a blend of your favorite herbs, like thyme, rosemary, and parsley. For cheese, consider sharp cheddar or creamy mozzarella.
- Instructions: Mix the chopped herbs and cheese into your stuffing mixture. This not only adds flavor but also helps keep the stuffing moist during baking.
For more ideas on herb pairings, you might find this article from Epicurious helpful.
Experimenting with these variations on crispy stuffing balls will surely impress your guests and allow you to tailor this dish to your taste preferences!
Cooking tips and notes for Crispy Stuffing Balls
Tips for achieving the perfect crunch
When making crispy stuffing balls, achieving that ideal crunch is crucial. Here are some tried-and-true tips to help:
- Dry Ingredients: Start with stale bread or toast it lightly to absorb moisture better, resulting in a firmer texture.
- Egg Binder: Use just the right amount of egg; too much can lead to soggy stuffing. One egg per 4 cups of stuffing usually works well.
- Space Them Out: When cooking, give your stuffing balls room to breathe. This allows hot air to circulate, promoting crispiness.
- Oil Spray: Consider lightly spraying the balls with cooking oil before baking or frying to boost crispiness without adding excess fat.
For more expert tips on achieving crunch, check out Serious Eats.
Notes on alternative cooking methods
When it comes to cooking your crispy stuffing balls, you have options!
-
Baking: Baking them at 375°F (190°C) for about 25-30 minutes is a healthier choice. Ensure you turn them halfway for even browning.
-
Frying: If you’re after that golden, crunchy outer layer, pan-frying in a little oil could be your ultimate method. Just make sure the oil is hot enough (around 350°F) to seal them quickly.
Whichever method you choose, both can produce delicious results. So, how do you prefer your crispy stuffing balls?

Serving suggestions for Crispy Stuffing Balls
When it comes to serving crispy stuffing balls, creativity can elevate your dish from ordinary to extraordinary. Here are some ideas to enhance your dining experience.
Ideal dips for serving
Pair your crispy stuffing balls with an array of dips to tantalize the taste buds. Consider:
- Creamy garlic aioli: This classic dip adds a rich, garlicky flavor that complements the stuffing perfectly.
- Sweet and tangy cranberry sauce: A classic pairing that adds a burst of brightness to the savory flavor of the stuffing.
- Spicy mustard: Perfect for those who enjoy a little kick, it contrasts nicely with the crispy texture.
Complementary side dishes
To round out your meal, serve with complementary side dishes that harmonize with the flavors of your crispy stuffing balls. Think about preparing:
- Roasted vegetables: Seasonal veggies, drizzled with olive oil and herbs, balance the richness of the stuffing.
- A fresh salad: A vibrant salad with a zesty vinaigrette can cleanse the palate, providing a refreshing contrast.
- Turkey bacon-wrapped asparagus: Combining savory and healthy, this side adds an elegant touch to your platter.
With these ideas, your crispy stuffing balls will be the highlight of any gathering! Ready to impress your guests? Check out Epicurious for more entertaining tips and side dish inspiration.
Time Breakdown for Making Crispy Stuffing Balls
Preparation Time
Getting ready to make your crispy stuffing balls is a breeze, taking about 15 to 20 minutes. You’ll chop some vegetables, crumble your stuffing, and mix in your favorite ingredients, such as turkey bacon and chicken ham. Make it fun! Put on your favorite playlist, and enjoy the process of creating deliciousness.
Cooking Time
Once your mixture is prepped, it’s time to cook. You’ll need around 25 to 30 minutes for the crispy stuffing balls to achieve that perfect golden brown in the oven. Keep an eye on them, as oven times can vary.
Total Time
In total, you’re looking at approximately 40 to 50 minutes from start to finish. Imagine the satisfaction of biting into these crispy delights after a short while in the kitchen. Perfect for gatherings or a cozy dinner, don’t you think?
For more insights on the benefits of cooking with fresh ingredients, check out this article from the Harvard School of Public Health on nutrition. Happy cooking!
Nutritional Facts for Crispy Stuffing Balls
When it comes to enjoying flavorful snacks like crispy stuffing balls, knowing their nutritional content can help you balance taste with health. Here’s a quick breakdown of what you’re getting per serving.
Calories Per Serving
Each serving of these delicious crispy stuffing balls comes in at around 150-200 calories. Perfect for a light snack or as a part of your festive feast!
Protein Content
With the addition of turkey bacon and hearty vegetables, you get about 6 grams of protein per serving. This makes them a satisfying option for those looking to increase their protein intake while enjoying something indulgent.
Key Vitamins and Minerals
These crispy stuffing balls are not just tasty; they also pack a punch in terms of nutrition! You’ll find:
- Vitamin A: Important for eye health
- Vitamin C: Supports your immune system
- Iron: Crucial for transporting oxygen in the blood
When planning your meals, knowing your food is nutritious makes every bite that much better! For more detailed nutrition info, you can check Nutrition.gov to explore how these components can fit into your overall diet.
By integrating these flavorful bites into your culinary lineup, you’re not just indulging; you’re nourishing your body too!
FAQs about Crispy Stuffing Balls
How can I adjust the recipe for dietary restrictions?
Making crispy stuffing balls adaptable for various diets is easier than you might think! Here are some simple swaps:
- Gluten-Free: Substitute traditional bread with a gluten-free variety. Look for gluten-free stuffing mixes available at stores or make your own using gluten-free bread.
- Vegetarian/Vegan: For a vegetarian option, skip the turkey bacon and use plant-based crumbles or mushrooms for texture. To veganize it, replace eggs with flax eggs and use vegetable broth instead of chicken broth.
- Low-Carb: Opt for high-fiber bread or consider using cauliflower rice mixed with your favorite seasonings to keep those carbs in check.
Can I freeze crispy stuffing balls for later?
Absolutely! Crispy stuffing balls freeze wonderfully, making them an excellent choice for meal prep. Here’s how:
- Allow them to cool completely after cooking.
- Place them in a single-layer freezer-safe container, or layer them between parchment paper in a zip-top freezer bag to prevent sticking.
- They can be frozen for up to 3 months. Just pop them into the oven at 350°F (175°C) for about 20 minutes when you’re ready to enjoy.
What’s the best way to store leftovers?
To keep your crispy stuffing balls fresh:
- Refrigerate: Store leftovers in an airtight container in the fridge. They’ll be good for about 3-4 days.
- When ready to eat, reheat in the oven or air fryer for that perfect crispiness.
For detailed tips on proper food storage, check out resources from the USDA – they’ve got some solid guidelines!
So, whether you’re hosting a gathering or simply indulging on a cozy night in, you’ll be well-prepared with your deliciously crispy stuffing balls!
Conclusion on Crispy Stuffing Balls
In conclusion, the benefits of making crispy stuffing balls extend far beyond their delightful crunch. These savory morsels are incredibly versatile, accommodating various ingredients like turkey bacon and chicken ham, and can even cater to vegetarian preferences by using a mix of colorful vegetables or plant-based sausage. The ease of preparation makes them perfect for any gathering and a fantastic option for meal prep.
I encourage you to give these crispy delights a try! Pair them with your favorite dipping sauce or serve them alongside a seasonal salad. For more recipe inspiration, check out Food Network or BBC Good Food. Transform your meals today with these irresistible crispy stuffing balls!
PrintCrispy Stuffing Balls: An Easy Delight with Turkey Bacon and Herbs

Enjoy these delicious crispy stuffing balls made with turkey bacon and herbs, perfect for any gathering.
- Prep Time: 15 minutes
- Cook Time: 25 minutes
- Total Time: 40 minutes
- Yield: 24 servings 1x
- Category: Appetizer
- Method: Baking
- Cuisine: American
- Diet: Gluten-free
Ingredients
- 2 cups stuffing mix
- 1 cup turkey bacon, cooked and chopped
- 1/2 cup celery, finely chopped
- 1/2 cup onion, finely chopped
- 1/4 cup parsley, chopped
- 1 teaspoon dried thyme
- 1/2 teaspoon pepper
- 1 egg
- 1/4 cup chicken broth
Instructions
- Preheat the oven to 375°F (190°C).
- In a large bowl, combine stuffing mix, turkey bacon, celery, onion, parsley, thyme, and pepper.
- Add the egg and chicken broth, mixing until well combined.
- Shape the mixture into balls and place them on a baking sheet.
- Bake for 20-25 minutes or until golden brown and crispy.
Notes
- For extra flavor, you can add other herbs.
- You can use leftover stuffing instead of stuffing mix.
Nutrition
- Serving Size: 2 balls
- Calories: 150
- Sugar: 1 g
- Sodium: 350 mg
- Fat: 7 g
- Saturated Fat: 2 g
- Unsaturated Fat: 4 g
- Trans Fat: 0 g
- Carbohydrates: 18 g
- Fiber: 1 g
- Protein: 5 g
- Cholesterol: 20 mg
Keywords: Crispy Stuffing Balls, Turkey Bacon, Easy Recipe, Appetizers